

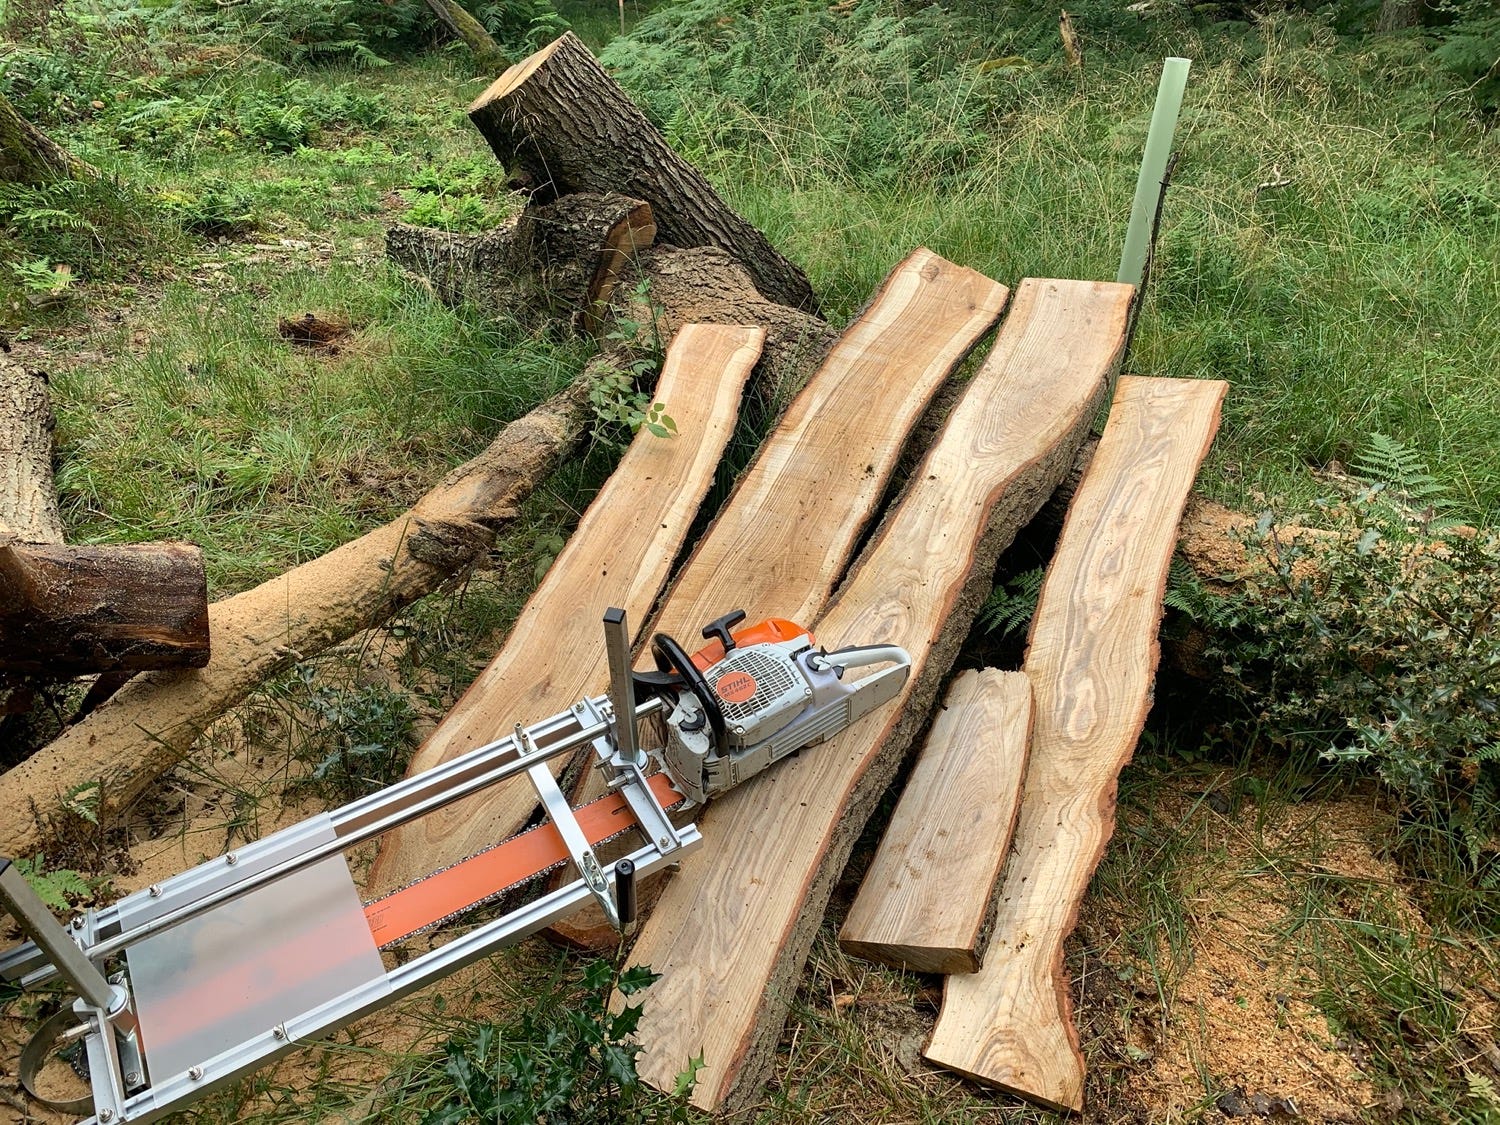
Turning a large oak limb into boards.
Turning a large oak limb into boards.
I took the lightning tree down way back in April. It was about time I got the mill out and planked up the large limbs for various woodland projects. The only issue – this was my first time.

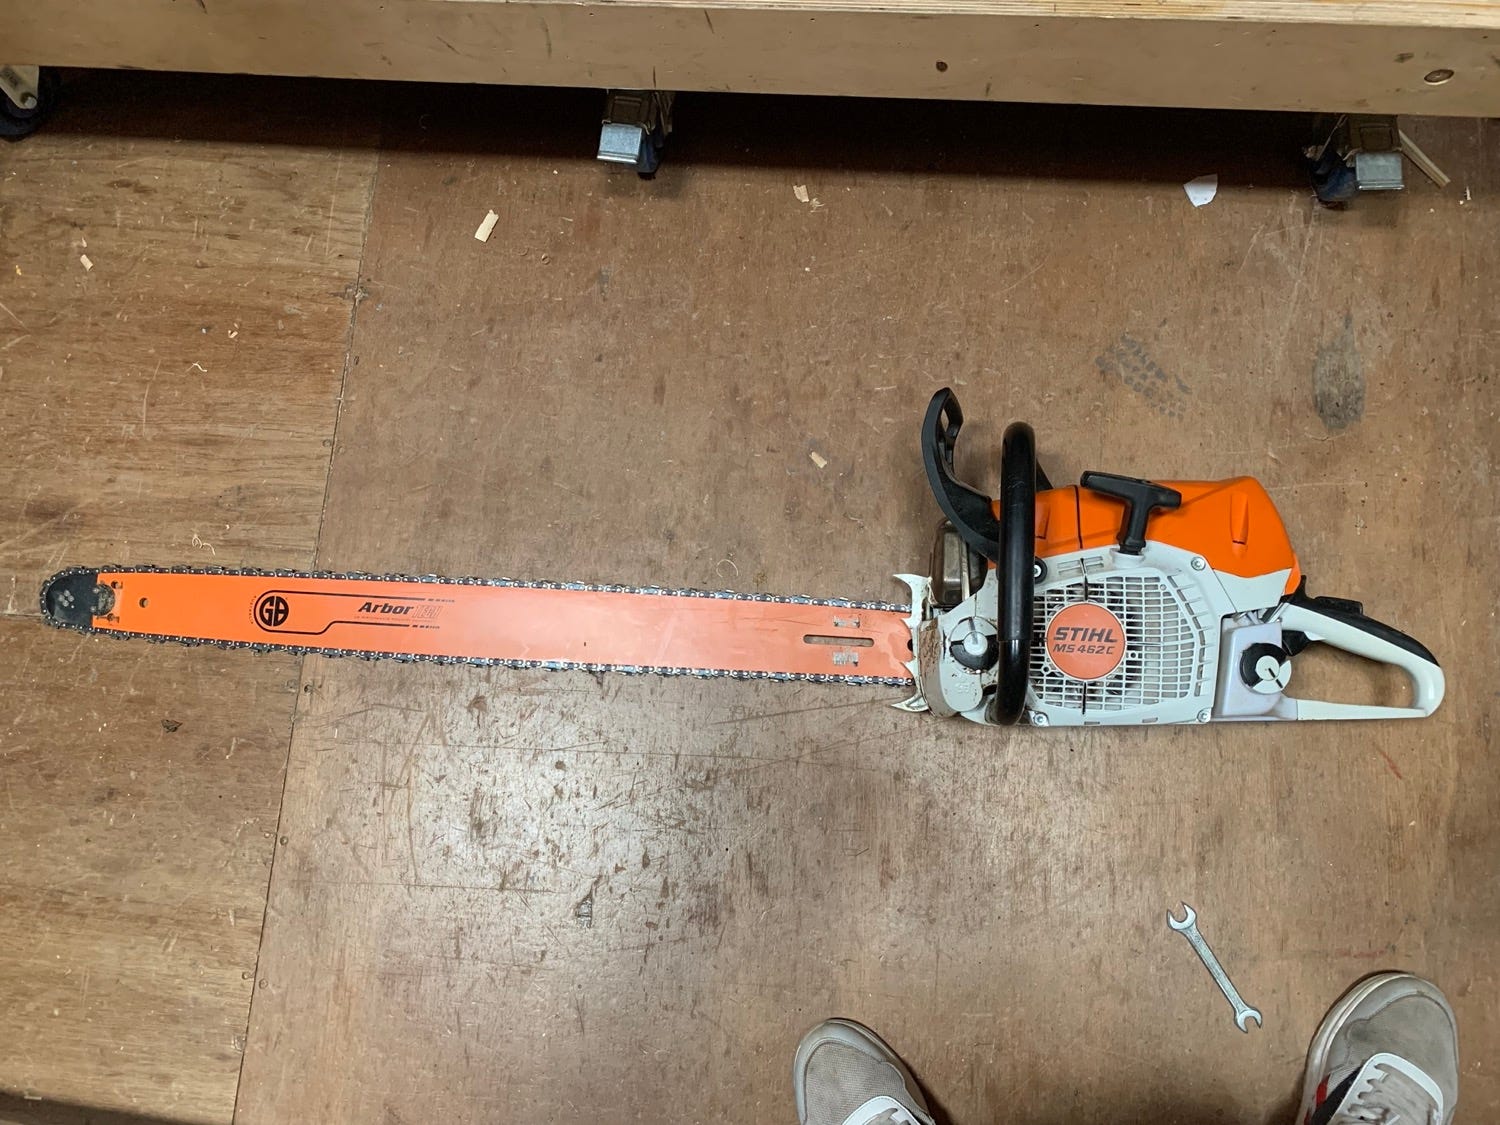
This is a chainsaw, a Stihl 462c to be precise. I’ve fitted it with 36” bar and put on a ripping chain which is designed to cut along the grain of the wood fibre (rip cut), rather than a normal chain which is designed to cut through the grain (cross cut).
This is the same saw with an “alaskan milling” attachment on it. Most people just call this setup a mill or a planking saw. If you’ve ever done any chainsaw milling yourself, then I know what you’re about to scream at me - that saw is not powerful enough. You’re right and it forms part of the story.
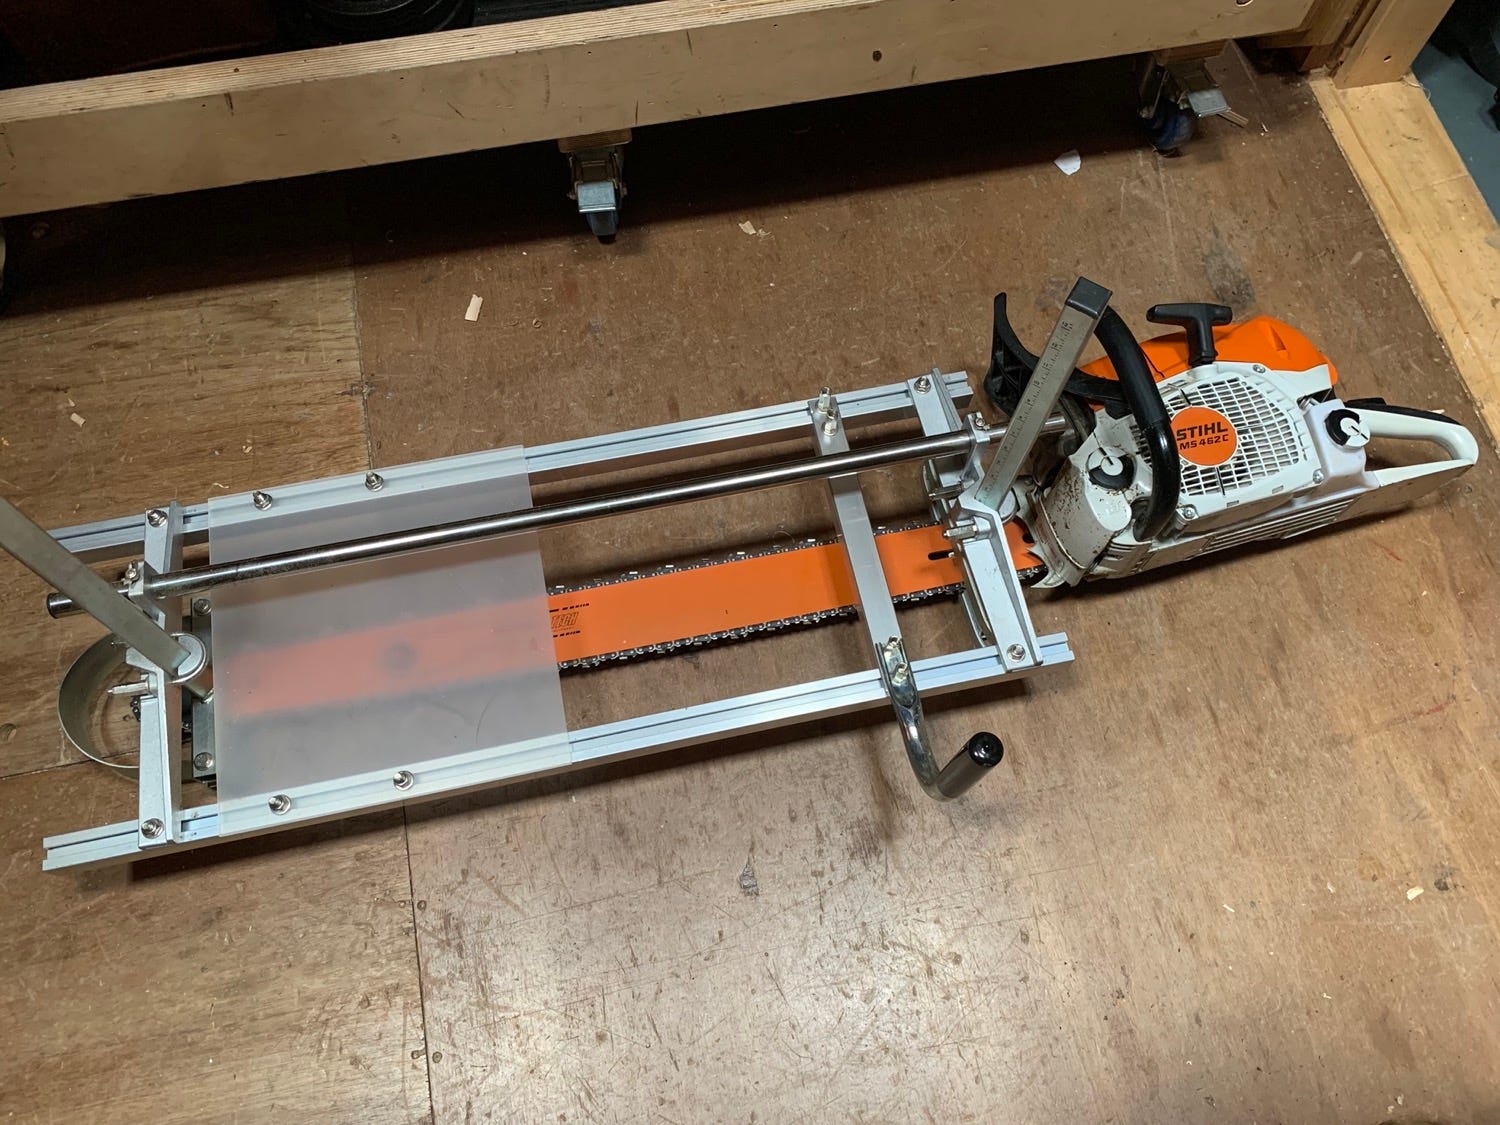
The general idea is that the milling attachment allows the chainsaw to be pushed along a flat surface to create planks with a uniform thickness. However, logs are not flat, they are round and in order to create the first flat surface, you need to make one. For this you can either use a ladder, a custom made thing or just spend the cash and get a “first cut system”. I opted for the latter as I don’t have a spare ladder and if I built a custom thing I’d never complete it - so Life of Treedom invested in a first cut system. Essentially, it is a set of joinable rails that have various fixing points to attach to the top of the log.
A few things should be noted at this point. First, this project was my first ever attempt at planking up logs and I was working alone and without an internet connection. This meant that I had to “figure stuff out” as I went along. Secondly, whilst this is my most powerful chainsaw, it is underpowered for what I intended to use it for. Oak is a very hard wood and ripping is very hard work. If I pushed my luck too much and worked the saw too hard, I’d kill my saw by causing it to overheat and blow the engine up.
In essence though, it all seems easy and quick. You fit the attachment to the chainsaw, plonk the first cut system on the log, fire up the chainsaw and get planking. In practice, it is far from easy, or quick. At least when you’re doing it for the first time.
Setting Up the First Cut
The first cut is arguably the most important cut. The entire point of the first cut is to lop off all of the non-uniformly shaped part of the log to leave a flat surface on which the mill travels on each successive cut. Any defects in this surface will be copied into every other board. If your first cut isn’t good and you mindlessly saw the log, you could very well end up making expensive firewood. I didn’t want to make firewood so I took my time.
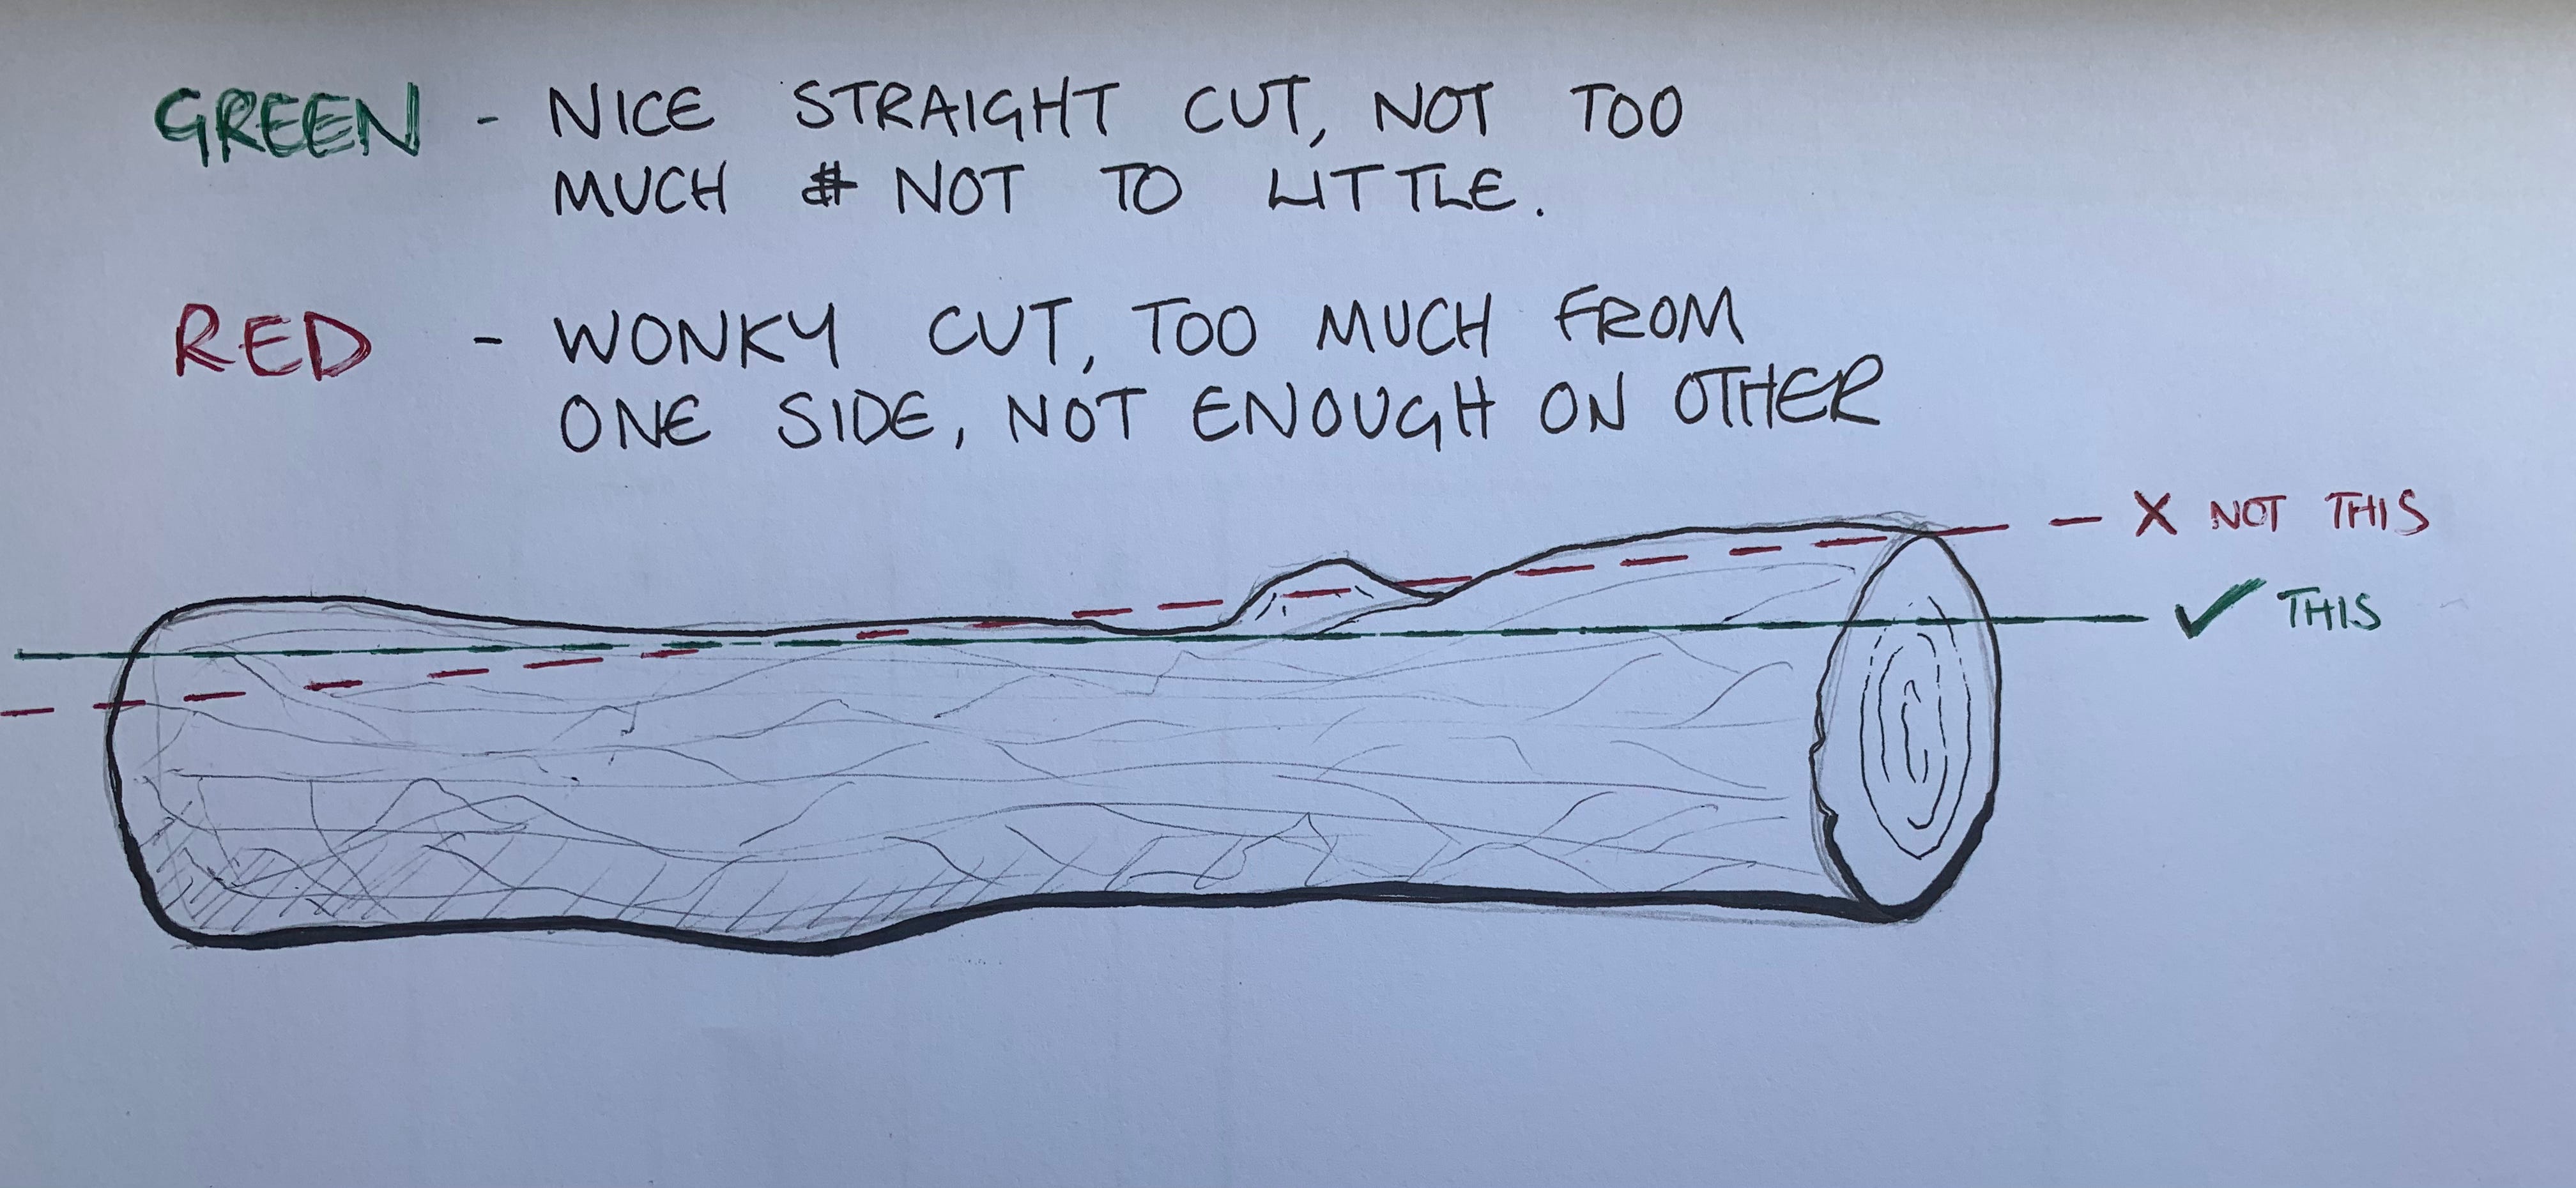
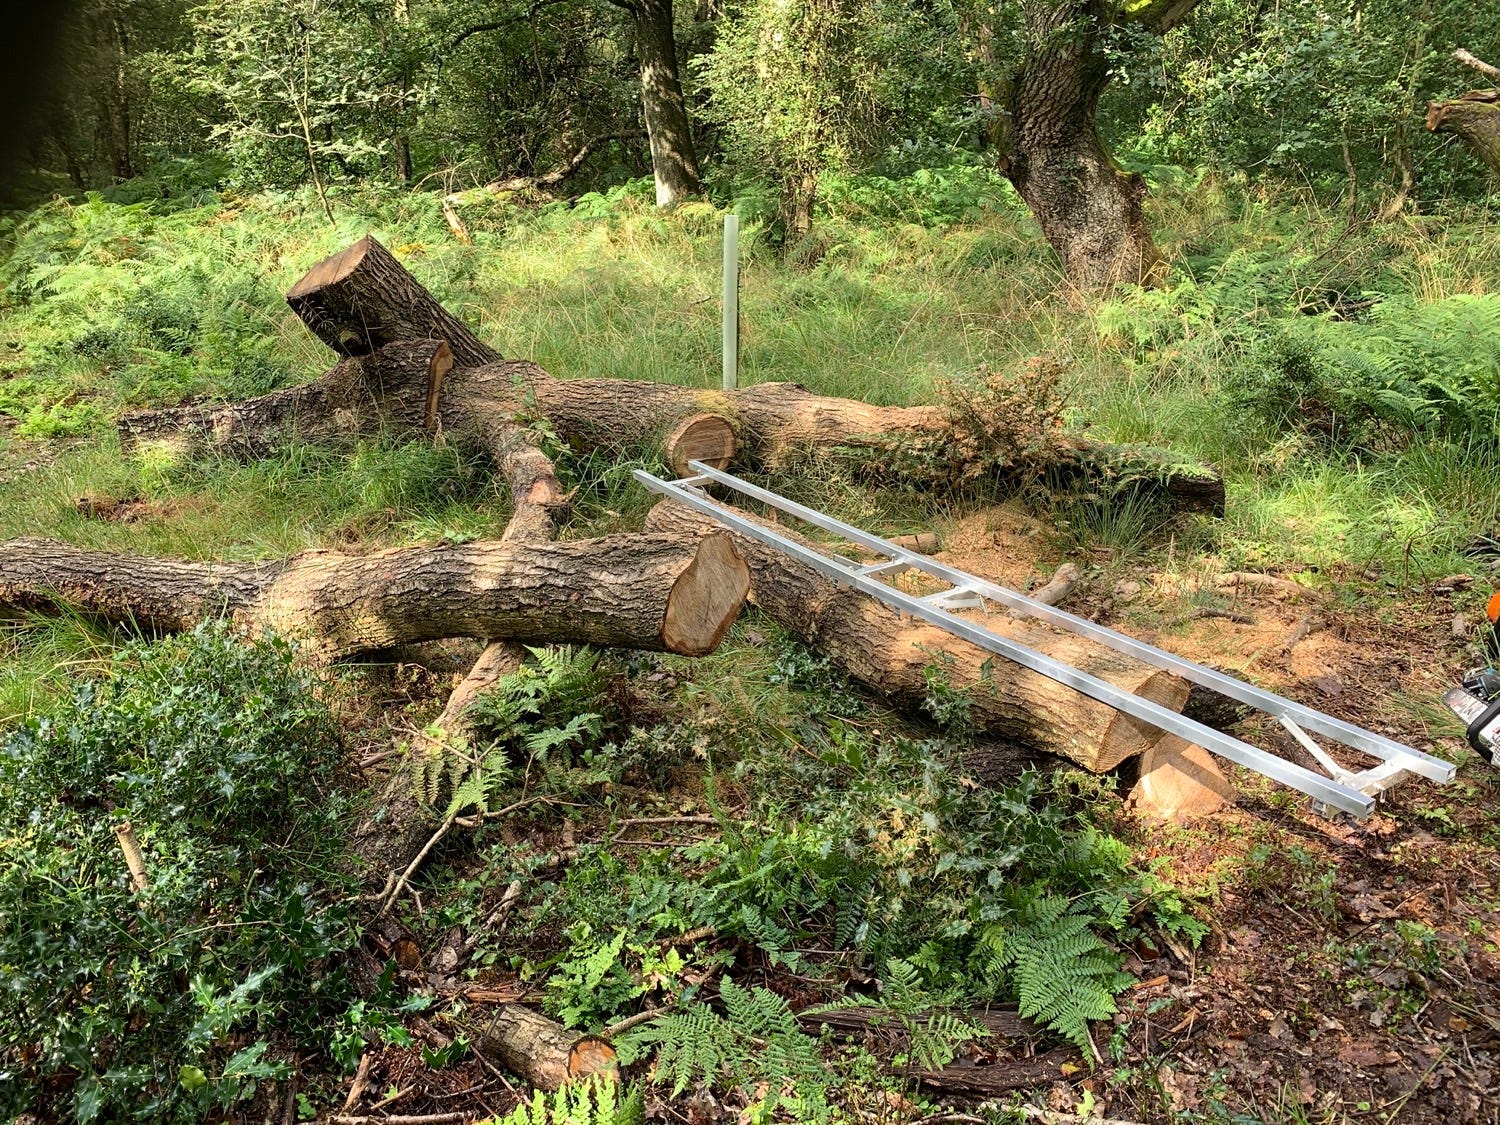
About ten seconds after plonking the first cut attachment down, I realised that plonking down the first cut system and firing up the saw was not going to work. So I spent a good ten minutes analysing the log for the best section. The aim is to find the most efficient line that touches the low spots (green line), whilst both minimising the amount of wood that is removed in order to get that first flat surface and avoiding a wonky plane (red line).
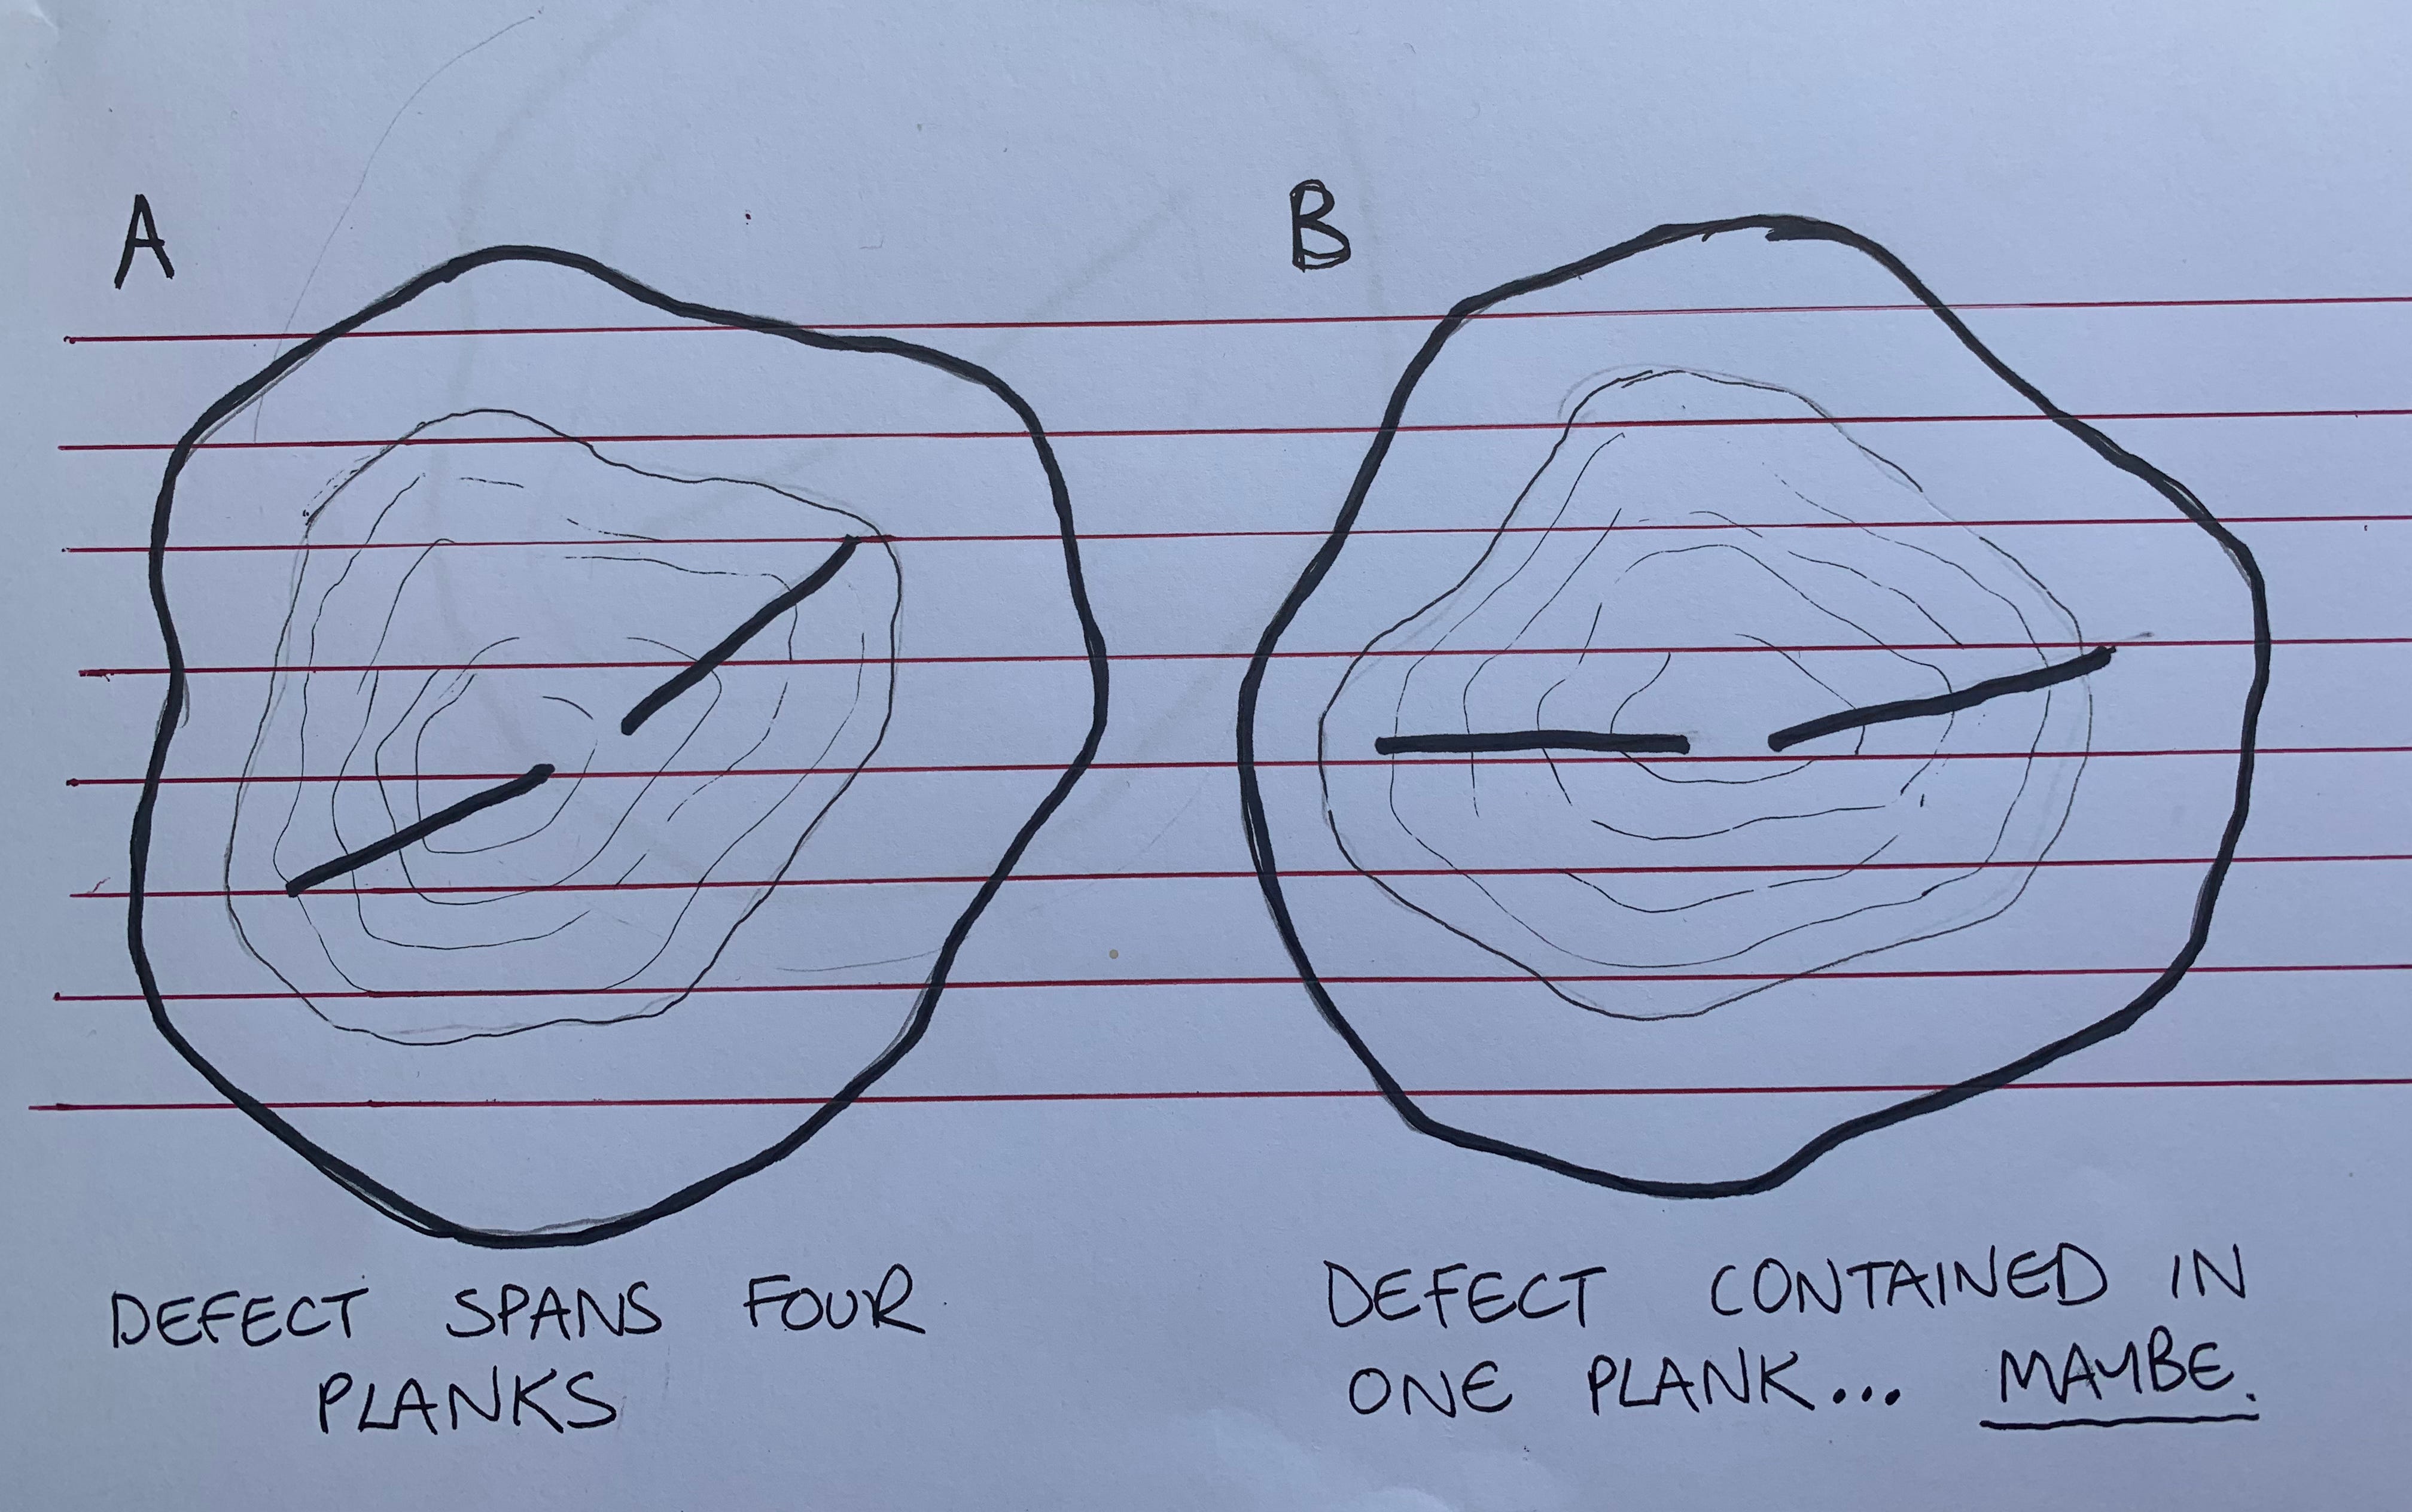
Another thing to bear in mind is the orientation of the log in relationship to any internal stress fractures (remember that this wood came from wind damage). You want to work with any cracks (technically called “shake”) and position them so that they won’t affect your final product. Below I’ve diagrammed the same log in two orientations (A & B). If the log is orientated in position A, then the shake would span three planks (red lines). However, in orientated B the defective shake cracks are contained in one plank. However, there’s no guarantee of this as the shake may internally move around. Either way, if you’re going for wide planks, the B is the best option. There’s also other optimal positions (if you were cutting beams rather than planks) but I don’t want to get overly technical.
Enough technicalities, back to the real world. So there I was faffing on with the placement of the first cut system.
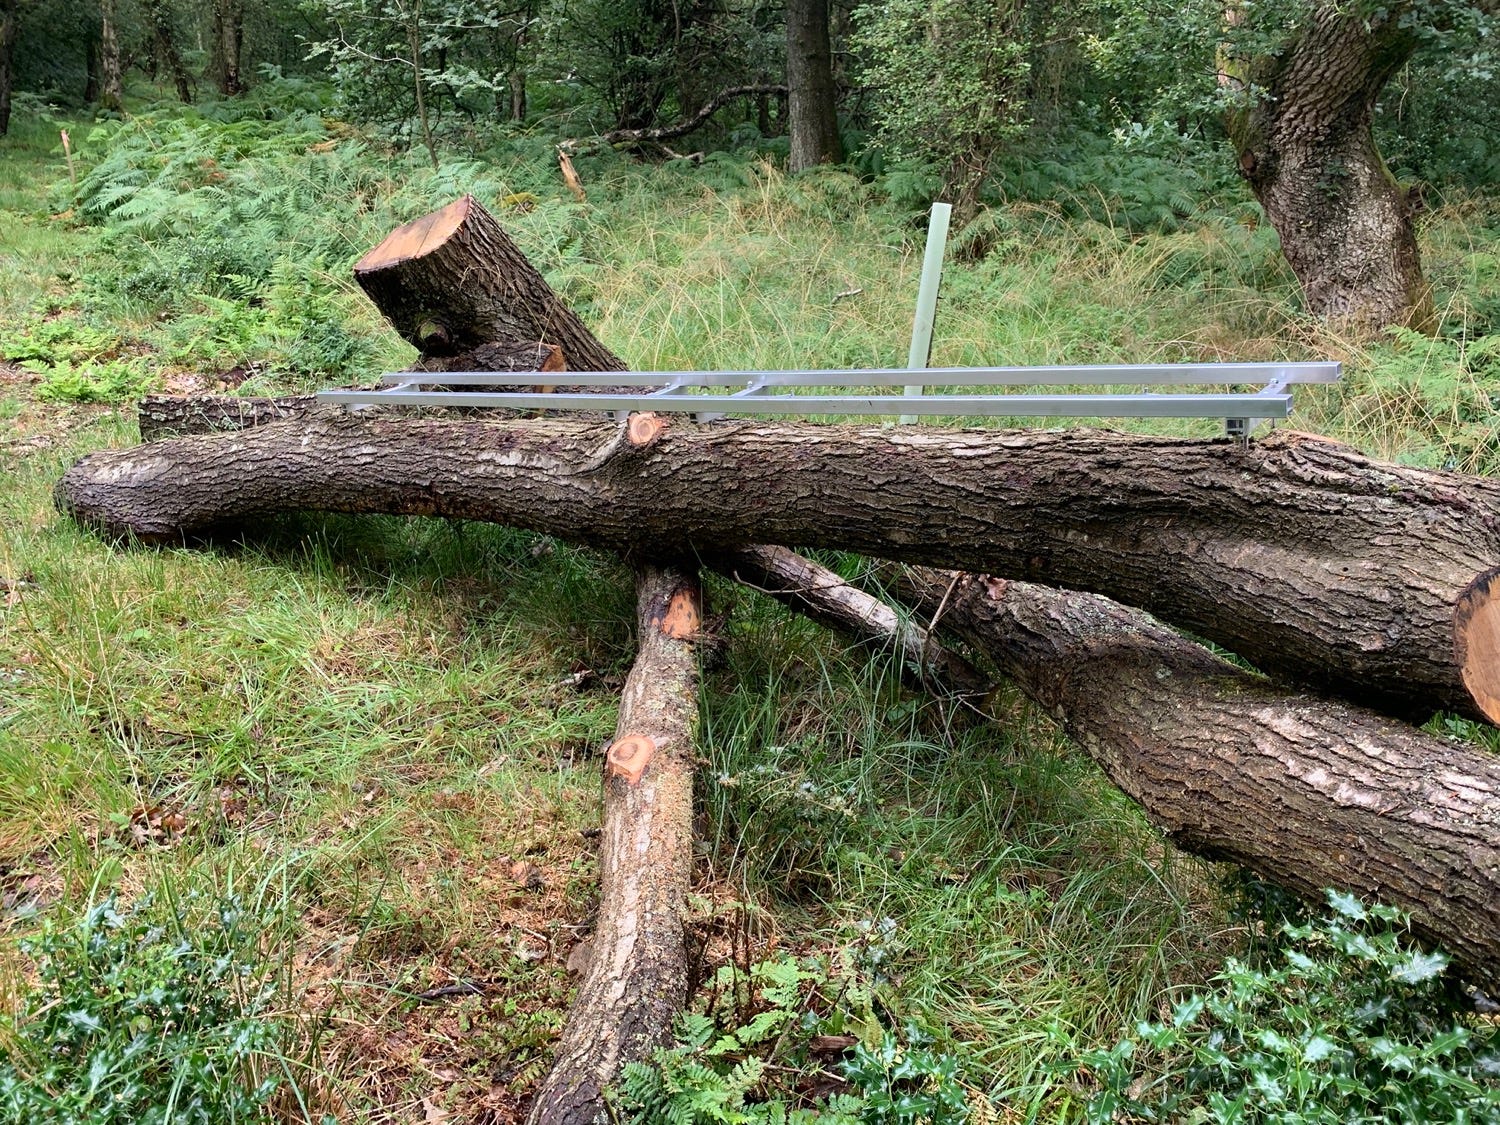
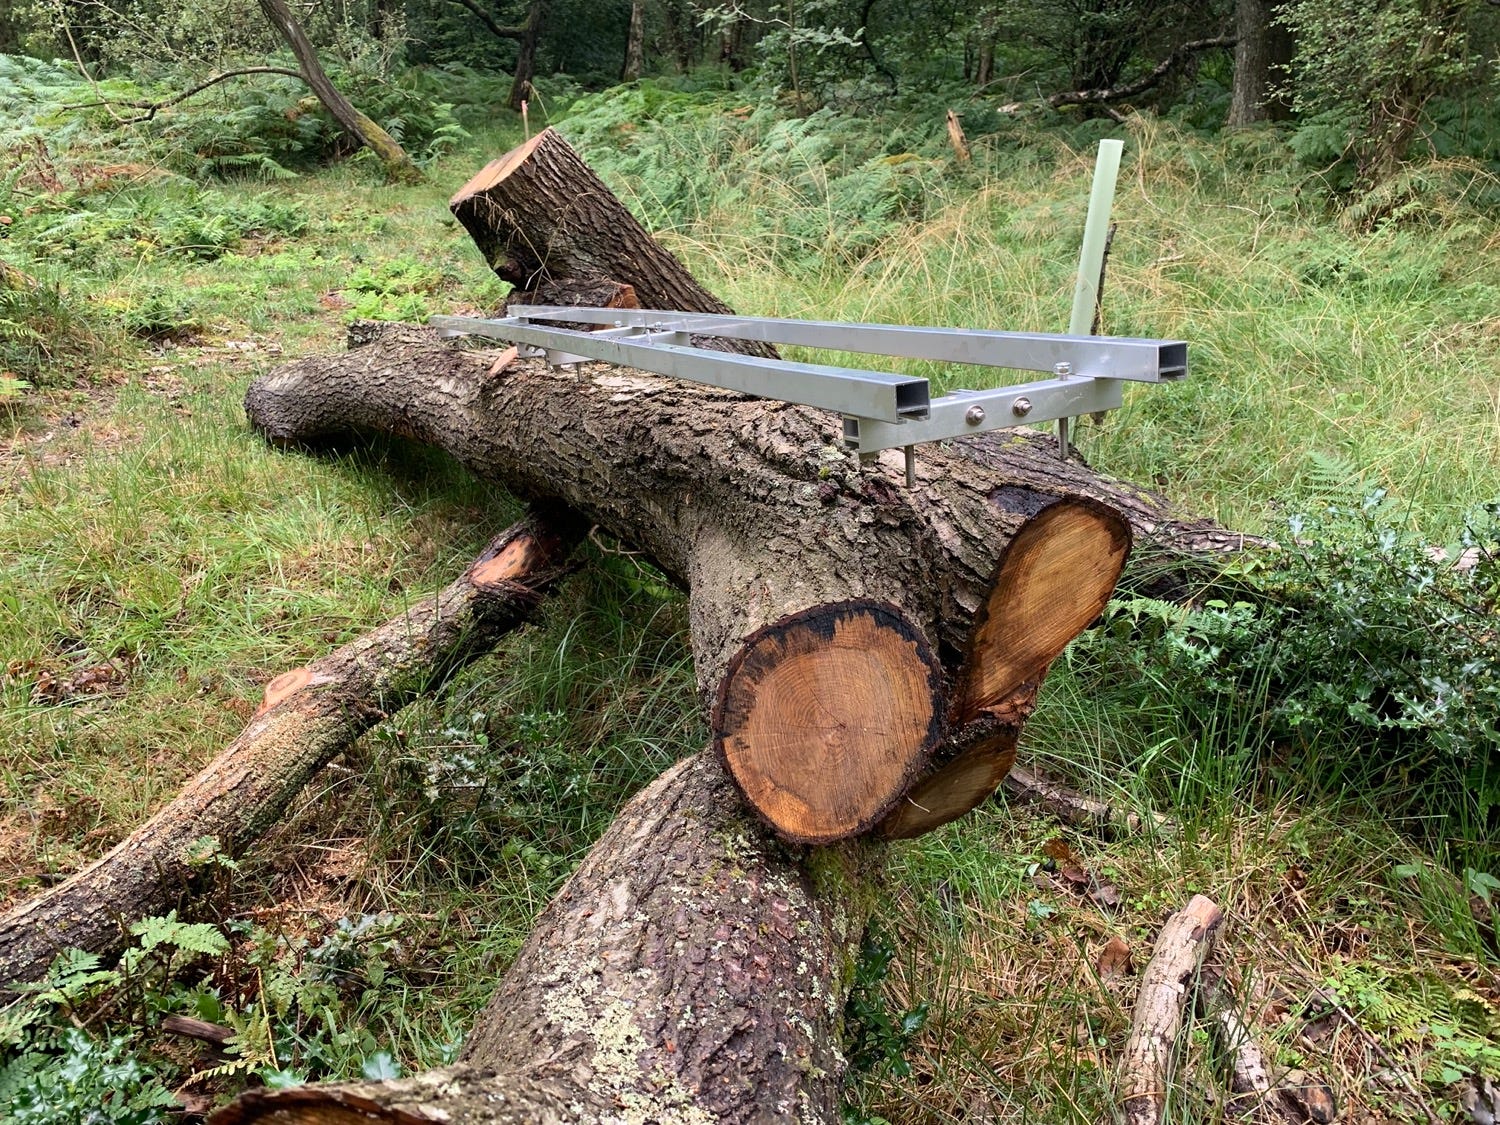
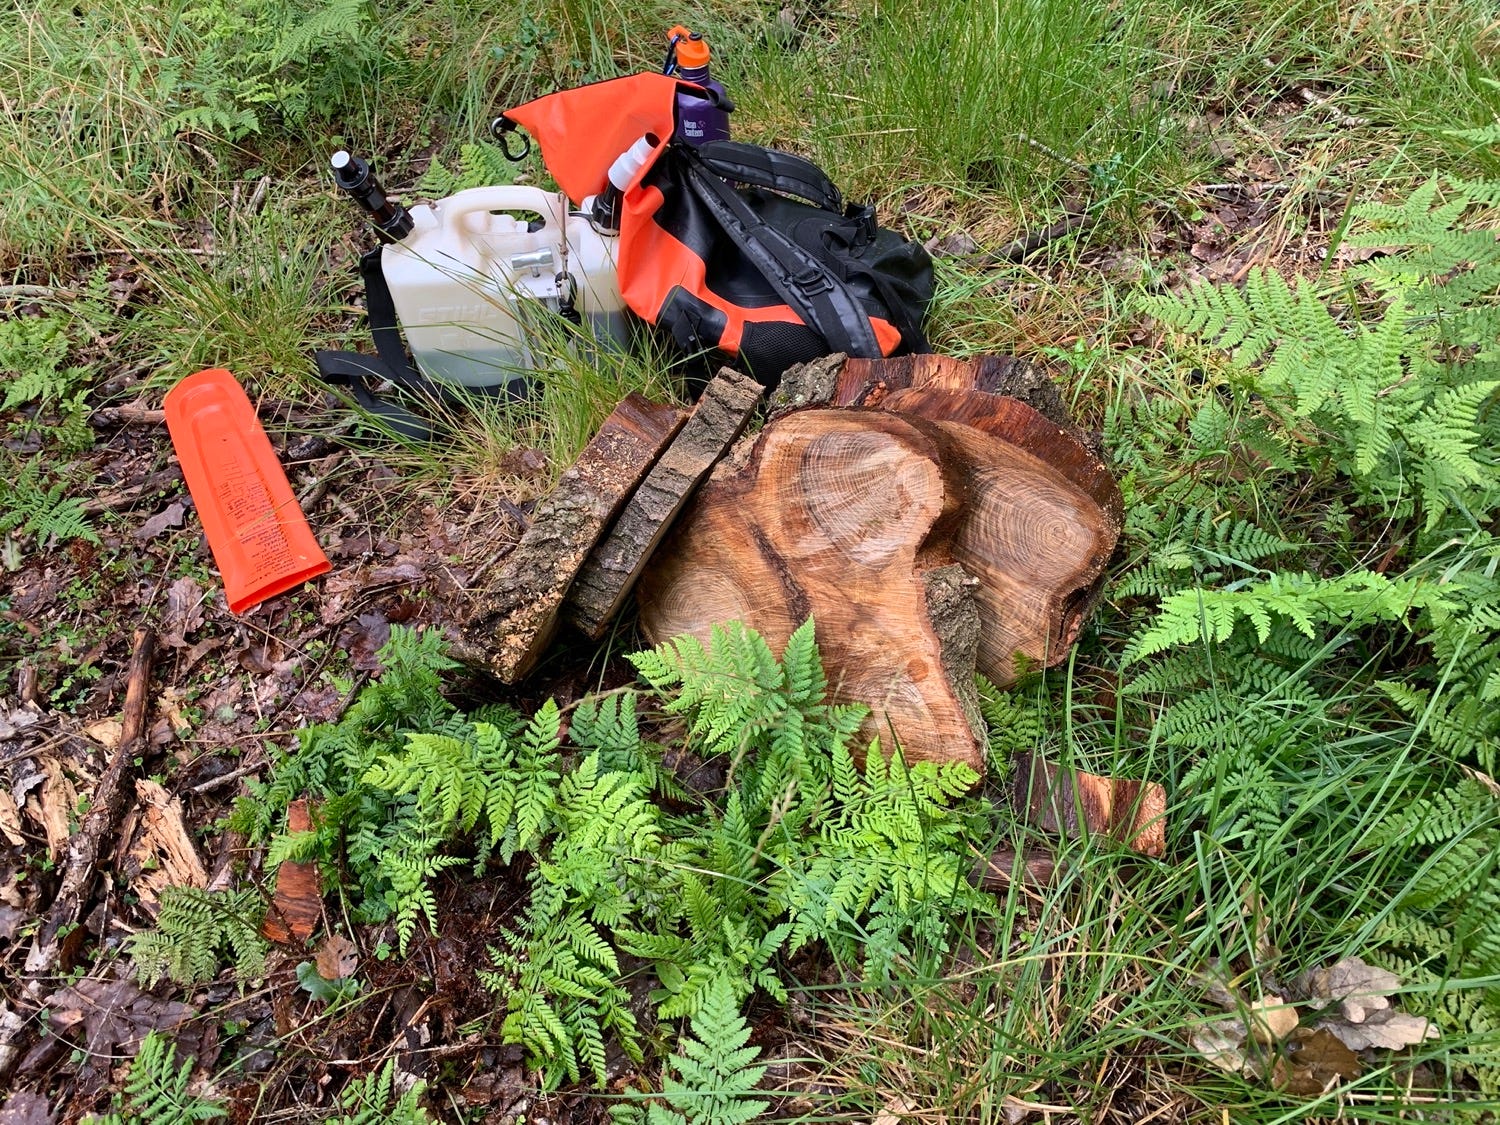
After a good ten to twenty minutes of placing the first cut system in various positions, I settled for the placement in the above photo. The problem, however, was that it was 18” inches or so from the end. Thankfully, I brought a second chainsaw with me to do the crosscutting. I didn’t want to waste an inch of this log, so I chopped off a number of cookies.
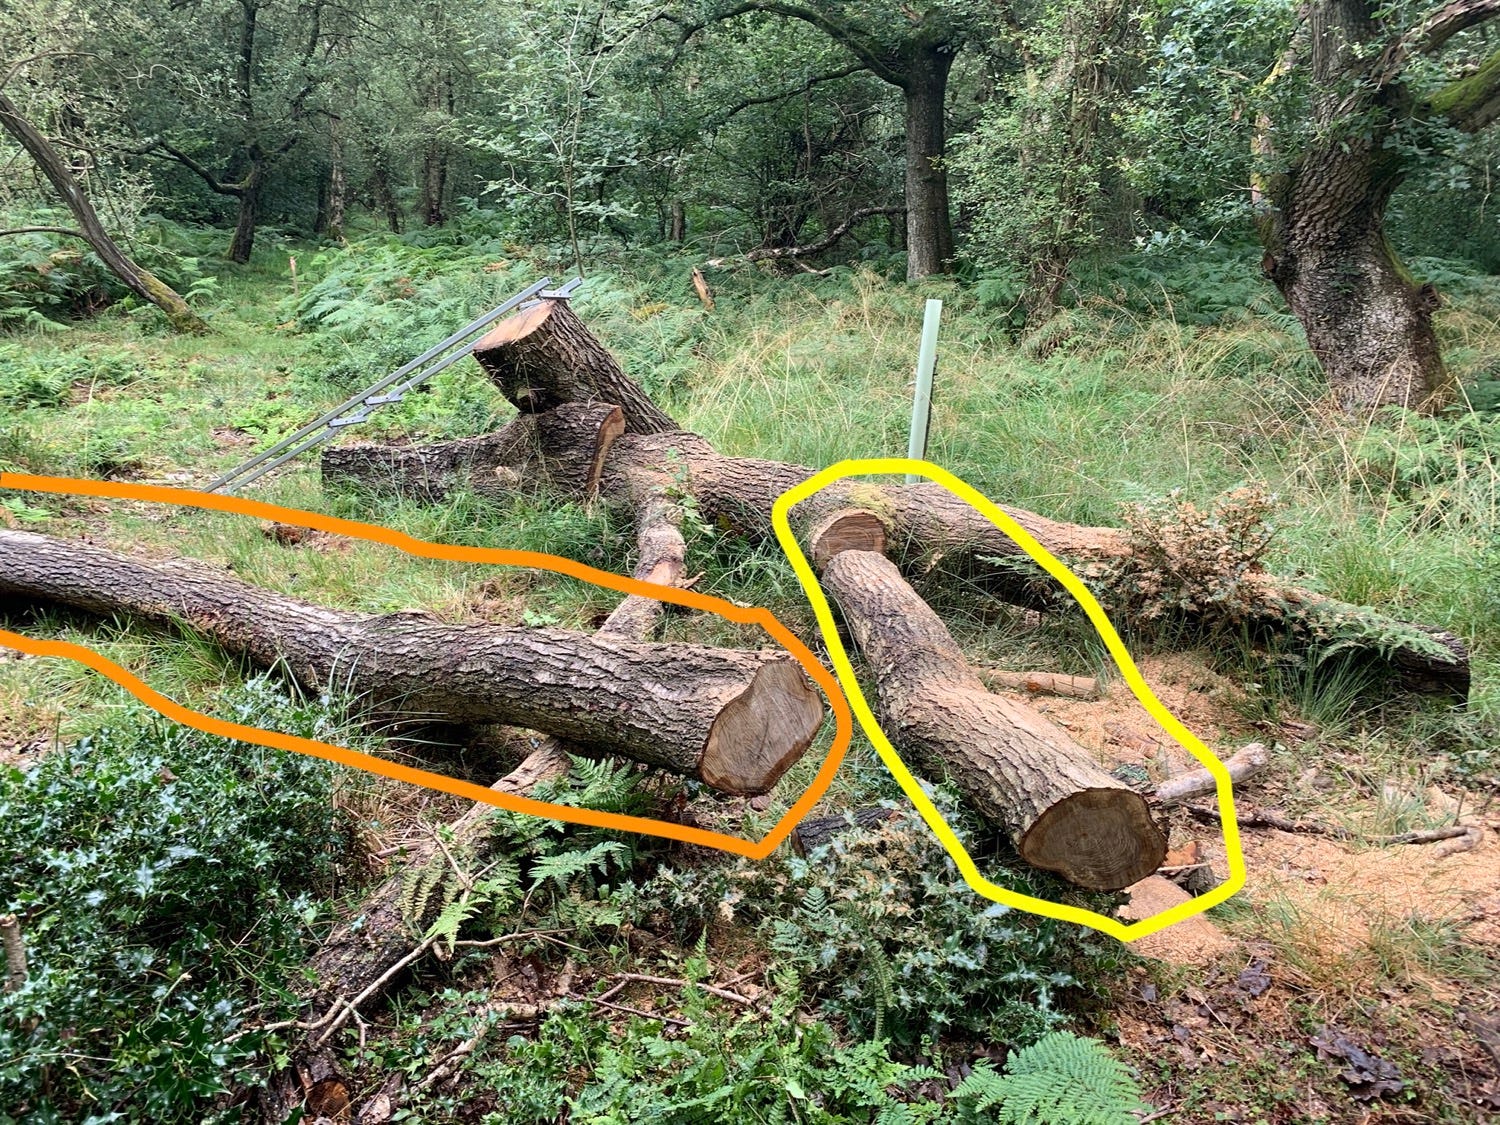
At this point, I changed my mind on which log I was going to plank. As this was my first time planking I elected to cut a smaller piece. The logic being that I was very likely to make an error and ruin a log.

Also the smaller piece was in my way. I also had to lop a few more cookies off it, to account for the flared section you can see. So, using the felling lever I rolled the limb I was going to plank out of the way (outlined in orange) and then cut off the smaller new limb from its parent limb. You can see the new log in the below photo, It’s the yellow outline.
The log wasn’t optimally orientated. You can see in the below photo I rotated the log so that the flat profile of the bottom of the log was in a parallel plane to the first cut system. I thought I was nearly ready to go.
I was not ready to go. I had to make a little “freehand” rip cut into the log in order to get an optimal first cut. Or at least I thought I did. Remember I was on my own here and there was no internet and no one to ask for help. Here’s the log after I ripped off a highpoint.
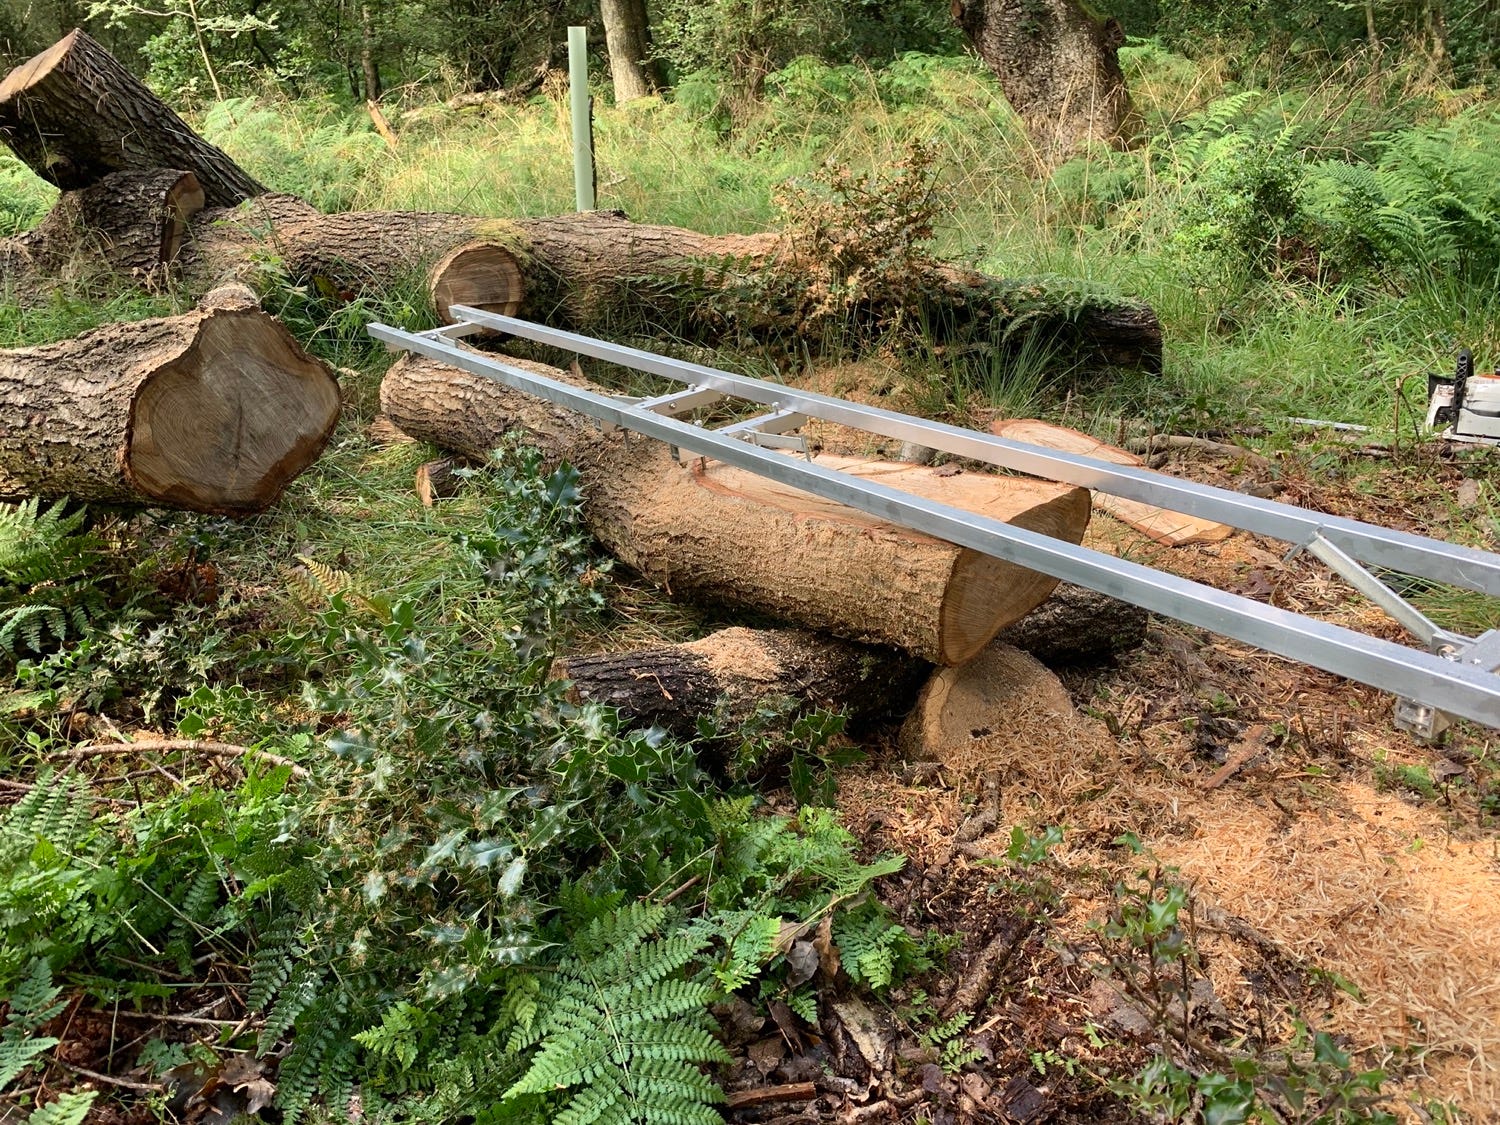
I was honestly quite excited at this point. Heart–beaty excited.
The first cut
My excitement was short lived. After a good ten minutes of setting up height on the mill I hit a few problems. The kind of problems you don’t encounter until you actually start to do something or switch something on for the first time.
First, I realised I didn’t bring an 11mm spanner so that meant I couldn’t adjust or properly tighten the mill handles. This one was solved easily enough as I had a spare 10mm spanner and a file, so I simply filed the 10mm spanner into an 11mm spanner.
The second problem was that the way I’d put the mill together was preventing the chain brake from being engaged on the chainsaw. Given that I’d be working very close to 36” bar going flat out, I was not happy that I didn’t have a functioning chain brake. This was solved by taking the mill apart just a bit and moving the components around.
Finally, after another twenty minutes of faffery, thirty minutes after I was certain I was heading for glory, I was at this stage. The first cut system was in place, it was fastened down with screws and it was solid. All I had to do was start the chainsaw and claim my glory. I was excited.
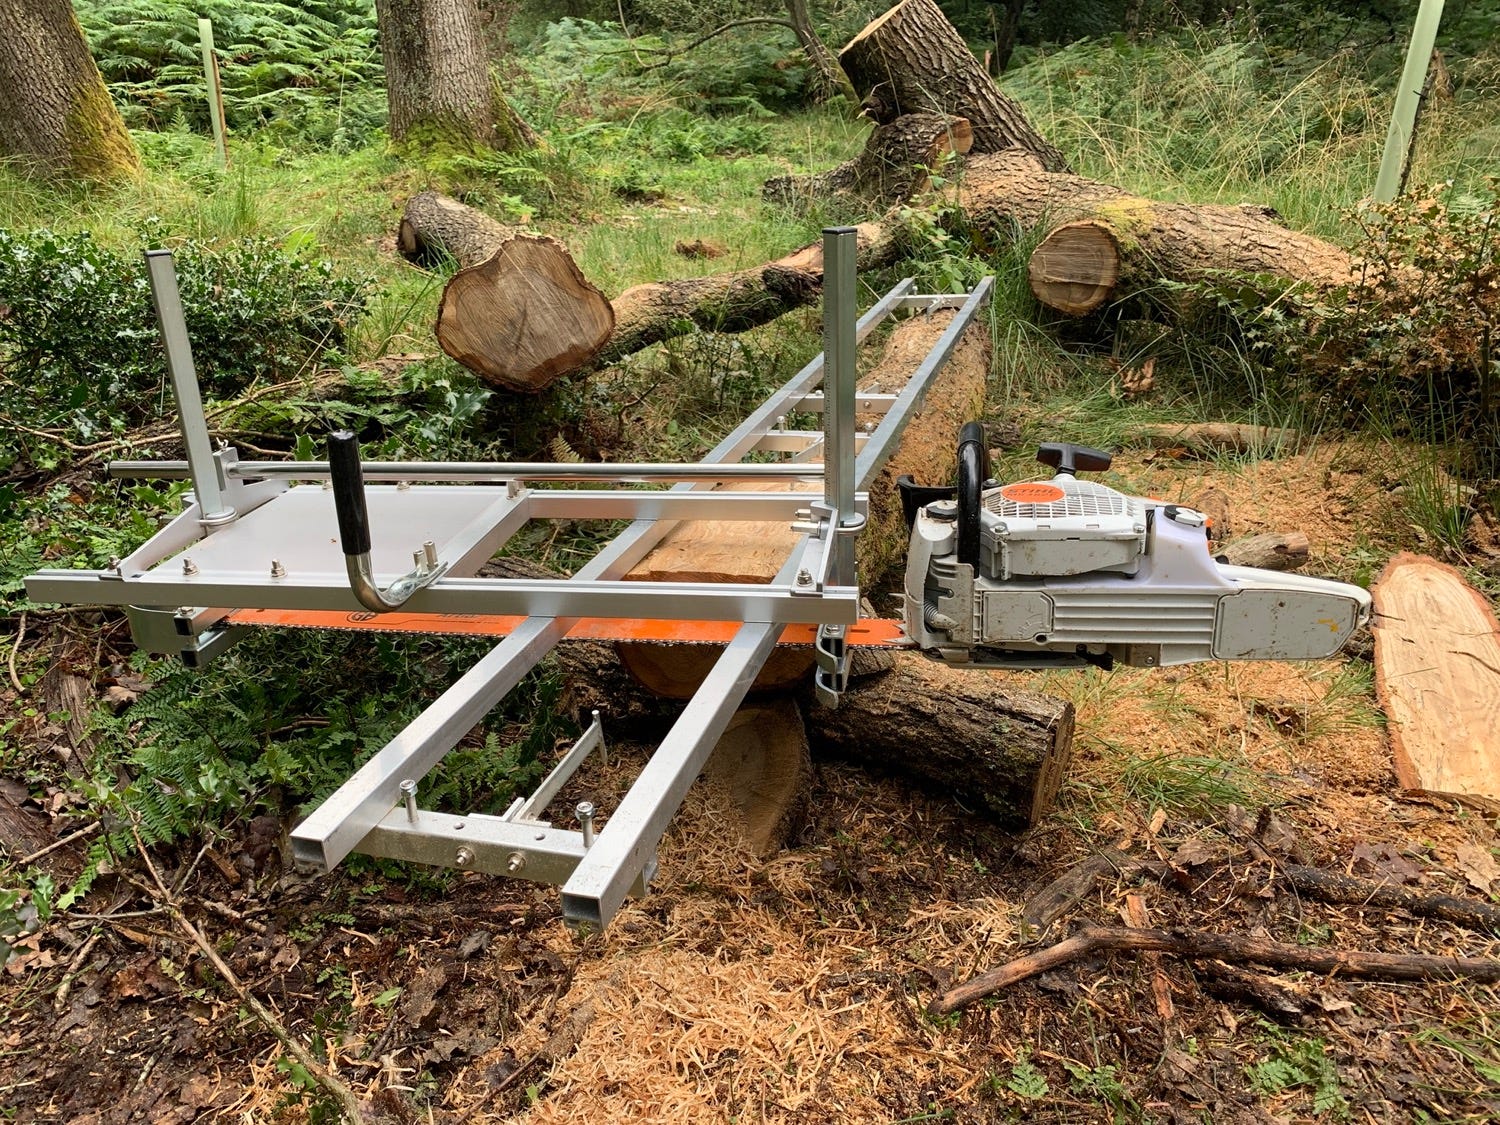
I was wrong again. In a few seconds I’d begin making my first mistake. However before I get into that I should state that I was aware that I was pushing my luck with using this saw (medium power), with this bar (36” is a long bar for this saw), with this chain (fully comp rather than “skip tooth”) on this species (English oak). The only thing going for me was the fact the log was pretty small in diameter and length and I was aware that I had to take my time and not let the saw get too hot.
I started the saw up and began the cutting. I was pretty surprised at how well the system cut. I wasn’t sure which way up the saw should be mounted in the mill, so I went with pointing the cooling system up (the cooling system is the bit with the orange logo in a circle). This meant I’d be cutting with the top of the bar. When you cut like this, the chain is travelling towards you so it pushes the saw back towards you rather than pulling you into the work. I’ve used this saw a lot in general woodland, arb and forestry contexts but in this context it felt like a different beast - much more powerful.
This meant I was stopping and starting a fair bit to get myself properly secured against the saw. Fortunately, the starting and stopping help me spot my first error. I had not set the right depth on the mill and I was about to saw directly through the screws that held the first cut system in place. Fortunately I spotted this error before I mashed my chain up and stopped.
However, now I’d removed 5mm of material which meant the first cut system was no longer perfectly flat. But there was nothing I could do about that now, it was just a case of spending more time faffing around with the adjusting the height of the mill to be three inches lower. When I’d got it three inches lower, I set it back down only to notice I’d not taken into account the height of the mill and that it should have been four and half inches. So I spent more time setting it to four and half inches. Finally, I set back down and was ready to saw and I noticed whilst I was now clear of the screws, at the height I’d set it to, I’d have boards that were too thick. So once again, I set the height. This time I set it to four inches. You’ll be delighted to note that this time, I was able to start cutting again.
It was all going well, until I noticed the saw was having a hard time cutting and was working hard. It was also hot. I could smell it and it was smoking. So I battled through giving the saw good five minute breaks. For twenty minutes it was stop and starting. This was when I started to realise something was not right. However, I was full of adrenaline and clearly not thinking straight. Anyone who has milled will see what I was doing wrong, and I’ll go into that in while.
Finally, after about thirty minutes and one seriously hot saw I was through my first cut.
At the point I took the above photo I had not removed the material to see what was underneath. This moment felt like that moment where you’ve been looking forward to meal for months and then suddenly it’s in front of you. So I took a moment to take this photo and to savour the moment.
After a good few seconds, I removed the section to reveal the first surface of the first plank I ever made. Only it wasn’t the first surface of the first plank. It was the first surface of the second plank. Remember that I’d screwed up my first attempt? Well one crosscut later, it had turned into a perfectly usable short board.
At this point I had one more pass to get my first full length plank out of the log. Knowing the saw was hot, and not wanting to destroy it I did consider stopping until I could get my hands on a more powerful saw. However, I am too much of a risk taker for that kind of “play it safe” nonsense and so I cracked on. Mindfully, but I did crack on.
Carry on or destroy your saw?
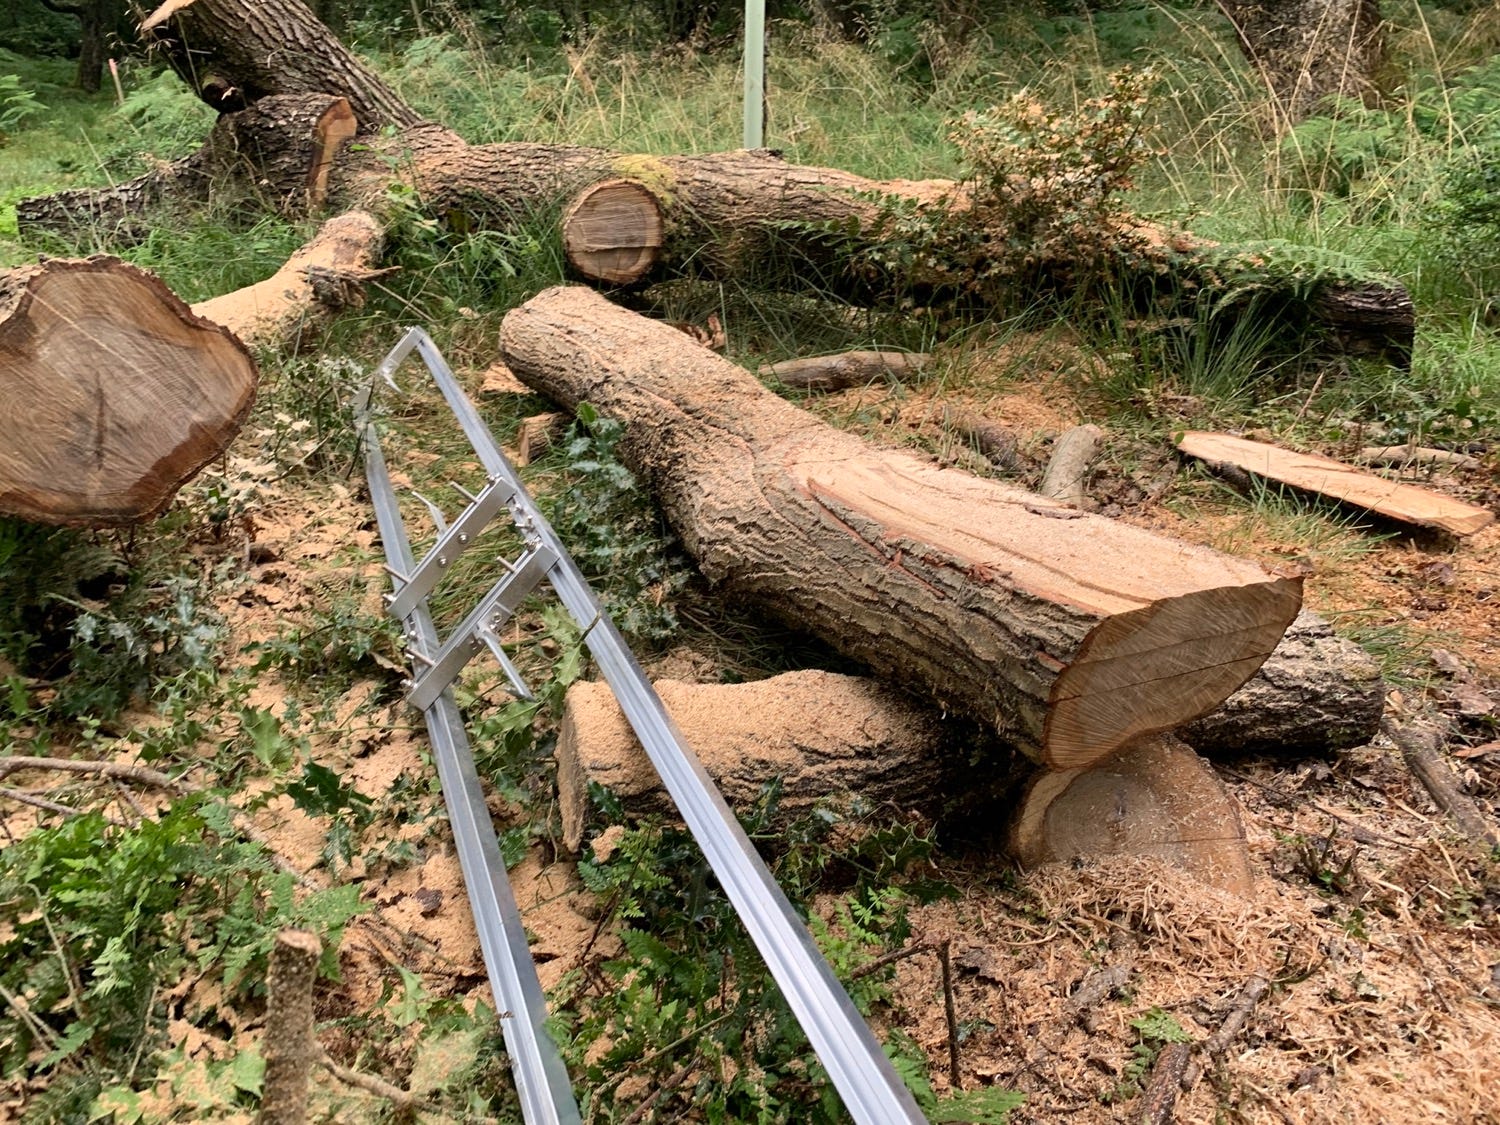
This time I was getting a lot more grief from the saw. It wasn’t cutting nearly as well and I was having to stop more often. It was getting to the point where I thought I was about to kill my saw but I was so close to getting my first plank. The risk of killing my saw had gone from “It’s an option” to “death is coming”. Anyone who has done any kind of milling will immediately spot the mistake in the below set up. It’s such a newbie error.

Wedges. You need wedges to hold the saw kerf open whilst you saw, otherwise the kerf closes around the chain forcing the saw to work harder and harder. I actually knew this as you can see some wooden wedges that I brought with me. I just wasn’t thinking straight due to the “OH MY GOD I’M DOING IT LOOK AT ME DOING IT” mindset. Here’s the role that wedges play.
<sketch of a little help please from the saw, and thanking you kindly from the saw with and without wedges>
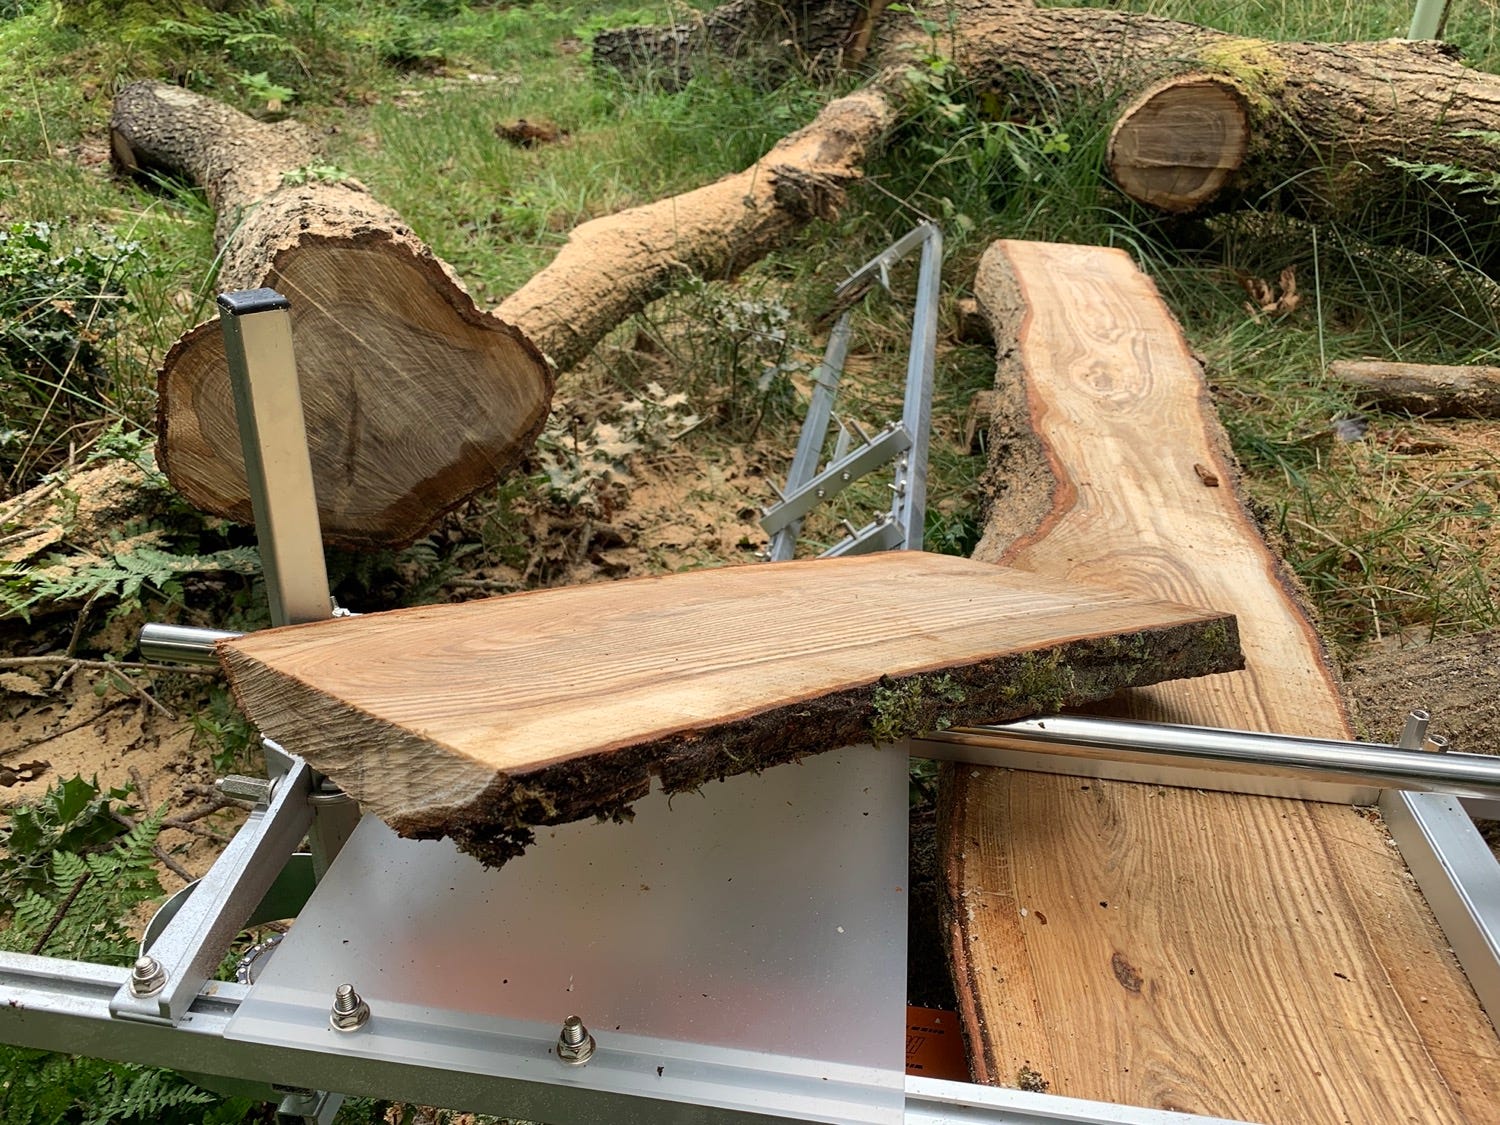
Once I’d figured that wedges are essential in being kind to your saw and the cutting process, I popped in some oversized felling wedges. You don’t want the wedges rammed in there super tight, but they need to be snug. The saw cut nicely after that. It wasn’t a hot knife through butter kind of cut, but it was a lot better. The saw handled it fine going nice and slow. You can see the wedges in action below.
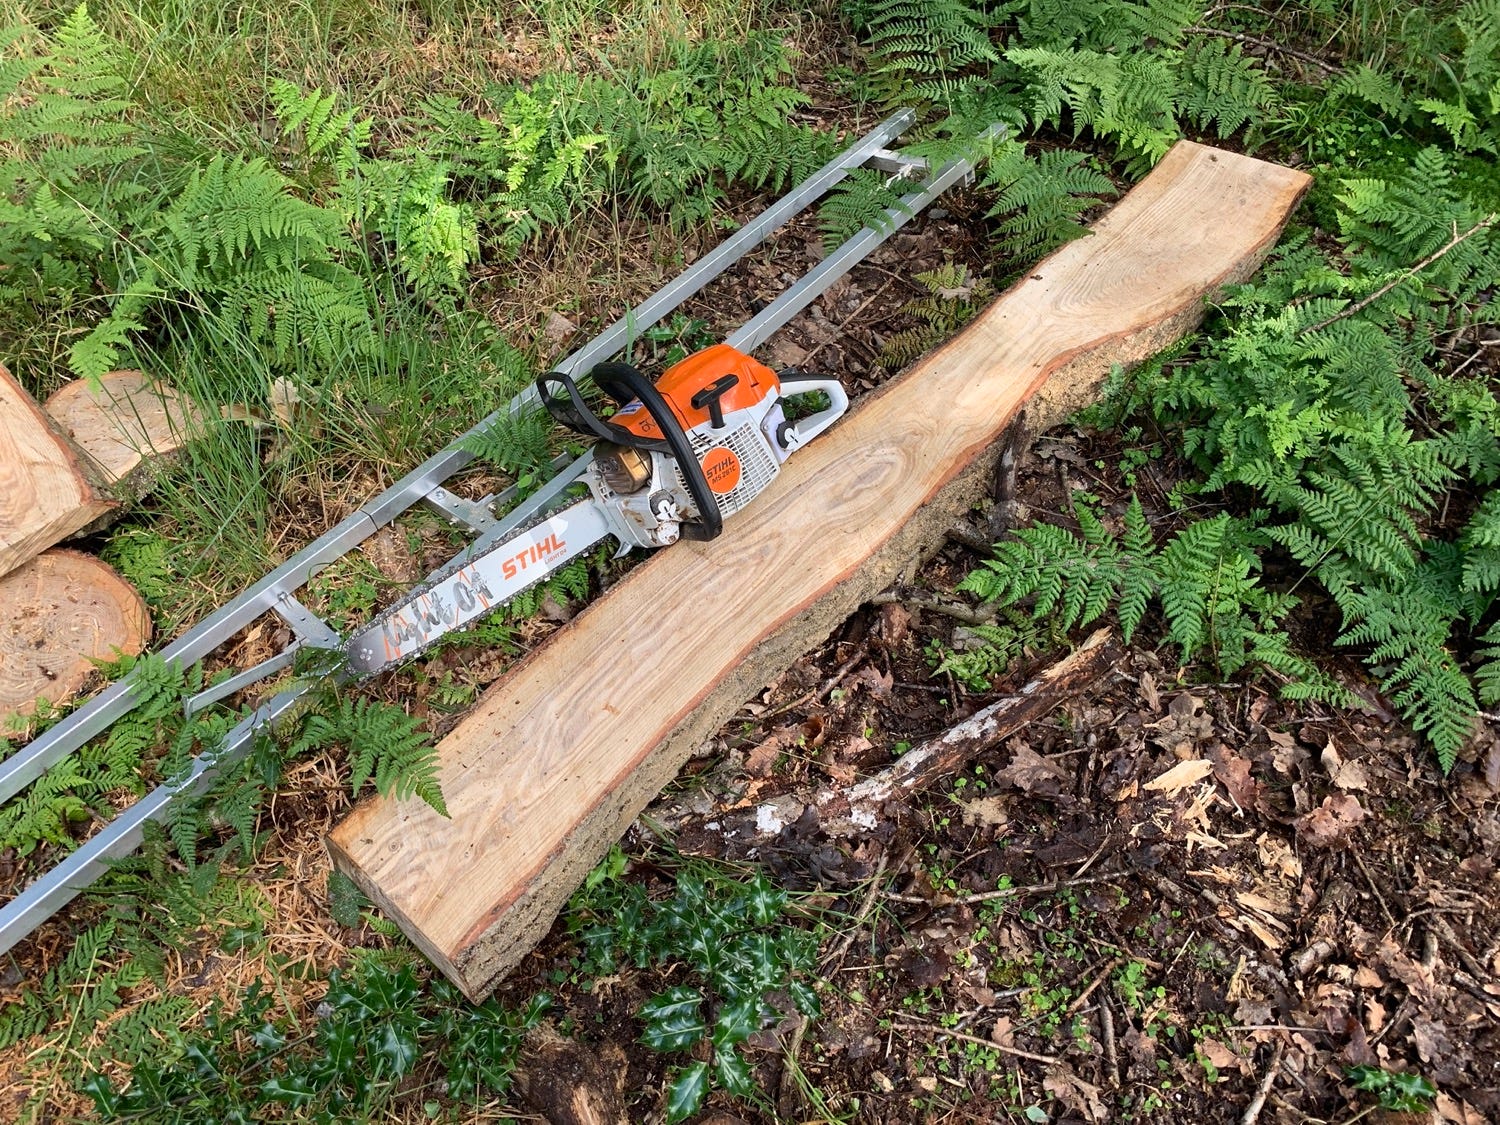
This is also the second teaser shot. In a few moments I would remove my first plank. I’ve put the chainsaw in for scale. It’s a weighty thing – at about two metres long and two inches thick I’d say it weighed about 20-25kg. It’s also about 30% moisture. I know this because I’ve measured the cookies with my moisture meter.
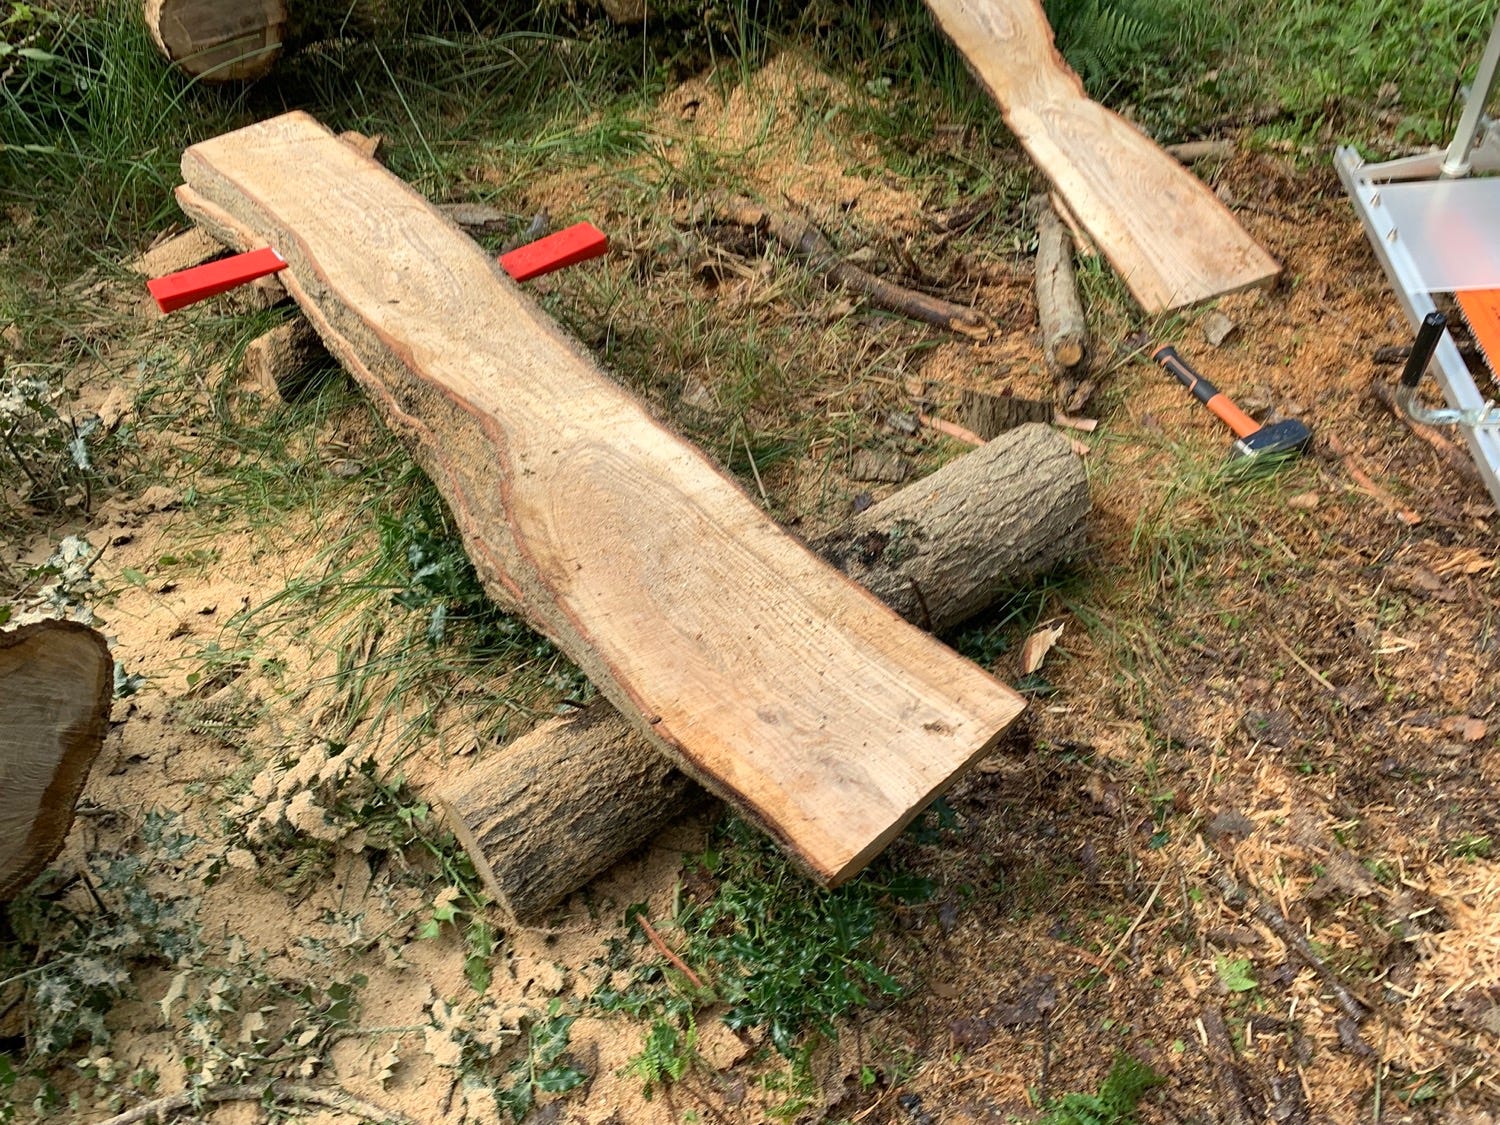
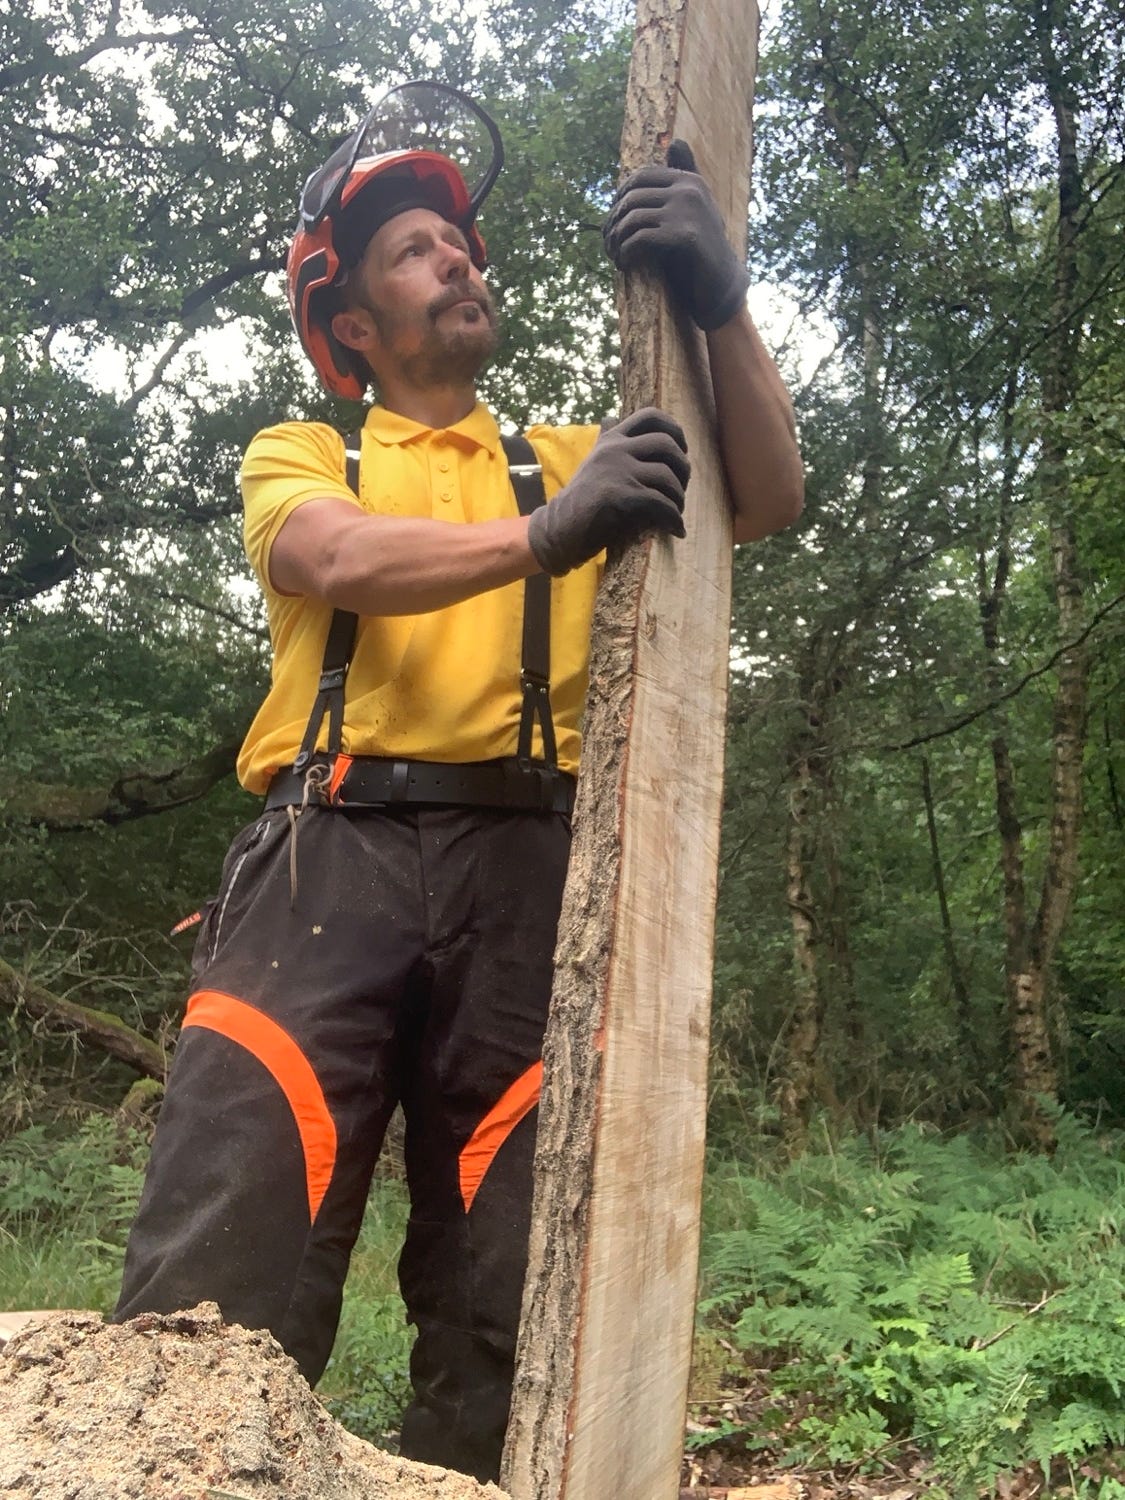
I’ll not lie, there was something quite special about this moment. Yes, it’s just a lump of wood, but it’s a lump of wood that I milled, from a hazard tree that I unpicked and dropped to the ground. Many things had to happen to make this plank and they’re not lost on me.
I finished off the rest of the log. Taking it slowly and making sure everything was wedged was the ticket. At this point in the day it was getting on and I needed to get home to make a thai curry (friday is thaiday) so I stopped photographing everything and cracked on.
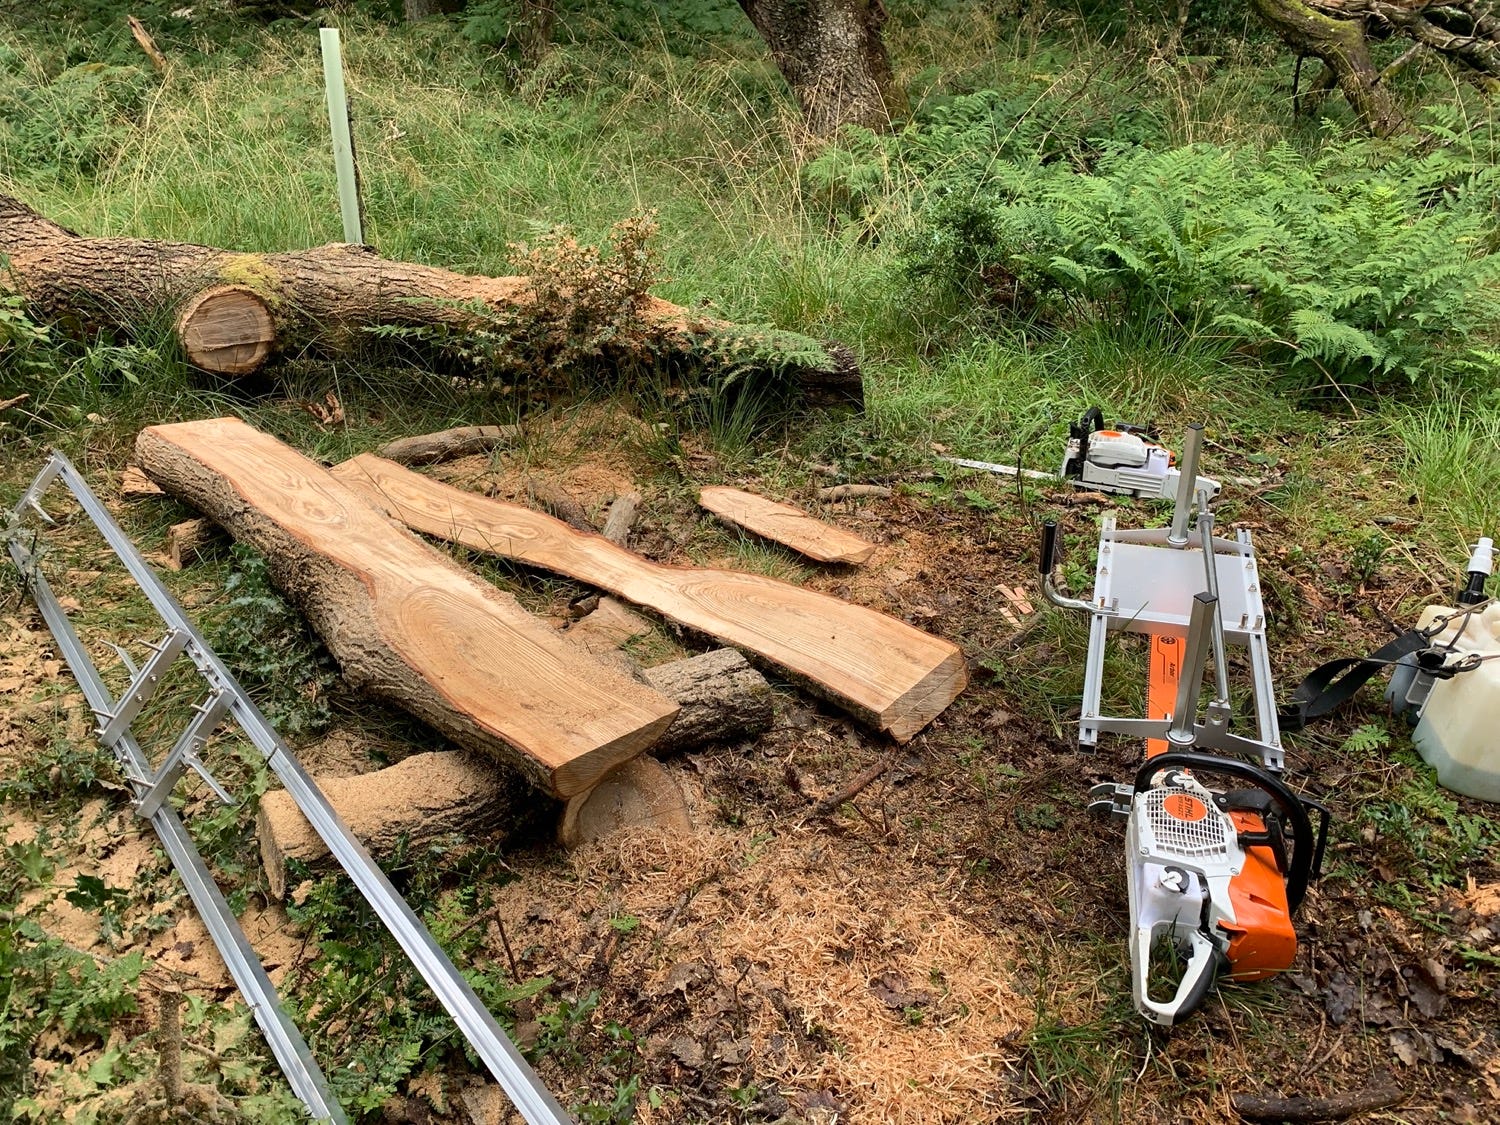
The Yield
I managed to get two usable planks which you can see in the middle. There’s also the stuff from the top and the bottom of the log which whilst it won’t make any furniture I can still put to use in and around the woodland.
English oak is very durable thanks to its high tannin content. However, as these planks were made from limbs and not the main stem, much of the planks are sapwood rather than more durable heartwood. Without going all plant science, sapwood is how the tree transports water and nutrients around itself. As a result, insects, bacteria and fungi like it and so tend to munch on it because it contains nutrients. Heartwood however is essentially sapwood that has ceased being used for transportation of nutrients and in a sense is dead.1
What did I learn?
As with all first time experiences, a few things pop out at me that I need to bear in mind.
Tools
Make sure I bring all of the right spanners with me. Ideally, socket sets for nuts as this will make life much faster when adjusting the height of the mill. In fact, it may be an idea to go over the mill and ensure that things are uniformly sized. Having 10mm, 11mm and 13mm sized bolts seems excessive. Ideally, everything being 13mm would be better and if that’s not possible then two sizes would be better. Ideally sizes that work with the chainsaw combi-spanner which I always have on hand.
Upgrade the mill
I made a big compromise when I bought this mill. I went with a chinese knock-off milling attachment (cutely referred to as a “chilaskan mill”) rather the dropping the dollars on a professional grade mill. If I end up doing more milling, especially when I open the tree surgery business, I’ll invest in a nice panther mill. To be fair, there’s a £600 difference in the price point, so I made the right decision for starting kit.
Marking on the mill
It would be prudent for me to mark on the mill where absolute zero is when using the first cut system. The mill has inch marks, but there’s nothing to reference the first cut system. Having reference marks on the mill for the first cut system would make easier to determine the correct thickness for the planks I’m making.
Tighten everything up!
The vibrations on the mill shake everything loose. I spent a lot of time tightening stuff between and during cuts. So basically, if it can vibrate loose and doesn’t need to be adjusted, I’m going to go HAM on making sure it only moves if I want it to move.
Fumes
Being over the chainsaw when milling is different to normal usage in terms of the fumes you breathe in. Normally the exhaust points the fumes away from the operator (this is actually a safety feature) but when milling they’re being blown beneath you or directly into your face if you’re cutting with the underside of the bar. This may be one place I choose to wear a respirator. Future me thanks me. Current me stamps his feet and declares he looks like a pussy in respirator. Future me doesn’t care. Future me wins. Even risky me sides with future me as being alive for longer means risky me gets to take more risks.
Work holding
Working on the ground on a log balanced on some other logs is fine until the work you are milling starts to get lighter and lighter as you remove material. Eventually it moves more than mill and this is a bit of a faff on. Chainsaw moves, work stays still - “thems the rools”. So next time, if I am milling something of this size I’ll spend more time getting it onto a surface where I can be certain the work isn’t going to move.
Machines
Doing 18” wide logs is probably the limit for the machine I have when doing oak. Anything bigger is going to require a larger machine with a higher power output. So anything larger for now is going to require me to bring in someone with the gear. Fortunately I know just the person - Henry Lee - and he’s kindly agreed to come down to the woods and help me get it all milled up.
For now, however, I can get planking some of the abundant birch I have around the woodland. It may not be as durable as oak, but it is a hardwood and is plenty usable for furniture and workshop stuff.
Maybe one day though, I’ll be able to skip the chainsaw milling altogether and get a mobile sawmill2.
Wedges
More, smaller wedges would be useful.
Practice
It does make perfect.
Conclusion
Happy. Much to learn, but happy none the less.
It’s in the business plan as a long term goal. I bet Henry beats me to it.
Excellent post, very informative and it seems like you’ve highlighted most of the issues that come up frequently.
I’d highly recommend taking as many tools as you can, literally anything you might need (full set of spanner’s, screwdrivers, drills, augers, chisels, bolster chisels, many hammers, drill driver, impact driver, many Allen keys, adjustable spanner’s, ratchet straps, spare brackets for the mill etc etc etc)
Basically you can never have too much, because if something goes wrong you’ve got to deal with it then and there.
But a great first effort, will be good to get the rest of it milled up