
Climbing & Cutting.
Climbing & Cutting.
Treeschool is taking up all my time, the sawmill is nearly ready to deliver a massive order to the woodland and I'm making an axe handle. Much is happening but the week of May 8th was a milestone..

Climbing & Cutting
Last week was a monumental week at tree school. It was my first aerial use of a chainsaw. I got a fellow treeschooler (thanks Henry, cheque is in the post) to record my first cut and abundant errors for posterity’s sake. When you do stuff for the first time it’s almost impossible to mindful amongst the back drop of your mind screaming “I’M DOING IT, LOOK AT ME DOING IT”.
Watch this video - thirty seconds long.
Obviously, there’s a lot of pre-skilling before we got to this point and of course the obligatory risk assessment.
In the above thirty second video, it may not look like much, but consider the four skills and eight months required to get to this point.
Skill 1: Climbing
Climbing was the first practical thing we did at treeschool and during the autumn until the half term we climbed every week. The goal was to simply (lol) get a top anchor point. We climb using the techniques and approach that align with the NPTC criteria for tree climbing & aerial rescue which uses a minimal climbing system that in modern climbing speak I think translates to “moving rope technique” (MRT) / “double rope technique” (DRT). There are no fancy pants mechanical parts ($$) and we use old school ropes, using an old school prussic loop and we ascend using an old school hip thrusting technique.
Here’s a very short clip of my first climb. You can see the techique, thrust hips up, get some slack on the rope and advance the prussic (left hand) up to secure your now slightly higher position. It is hard work.
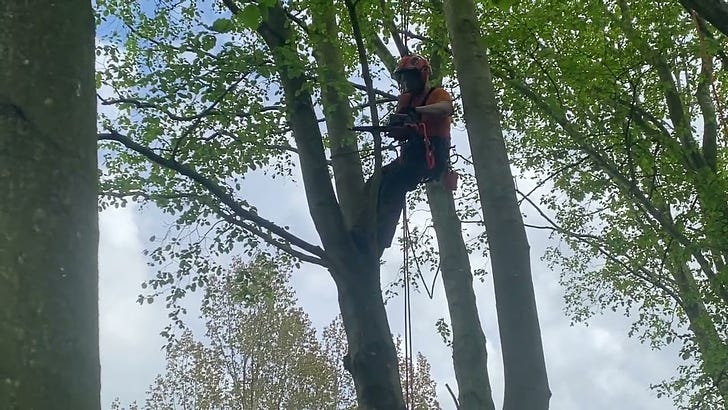
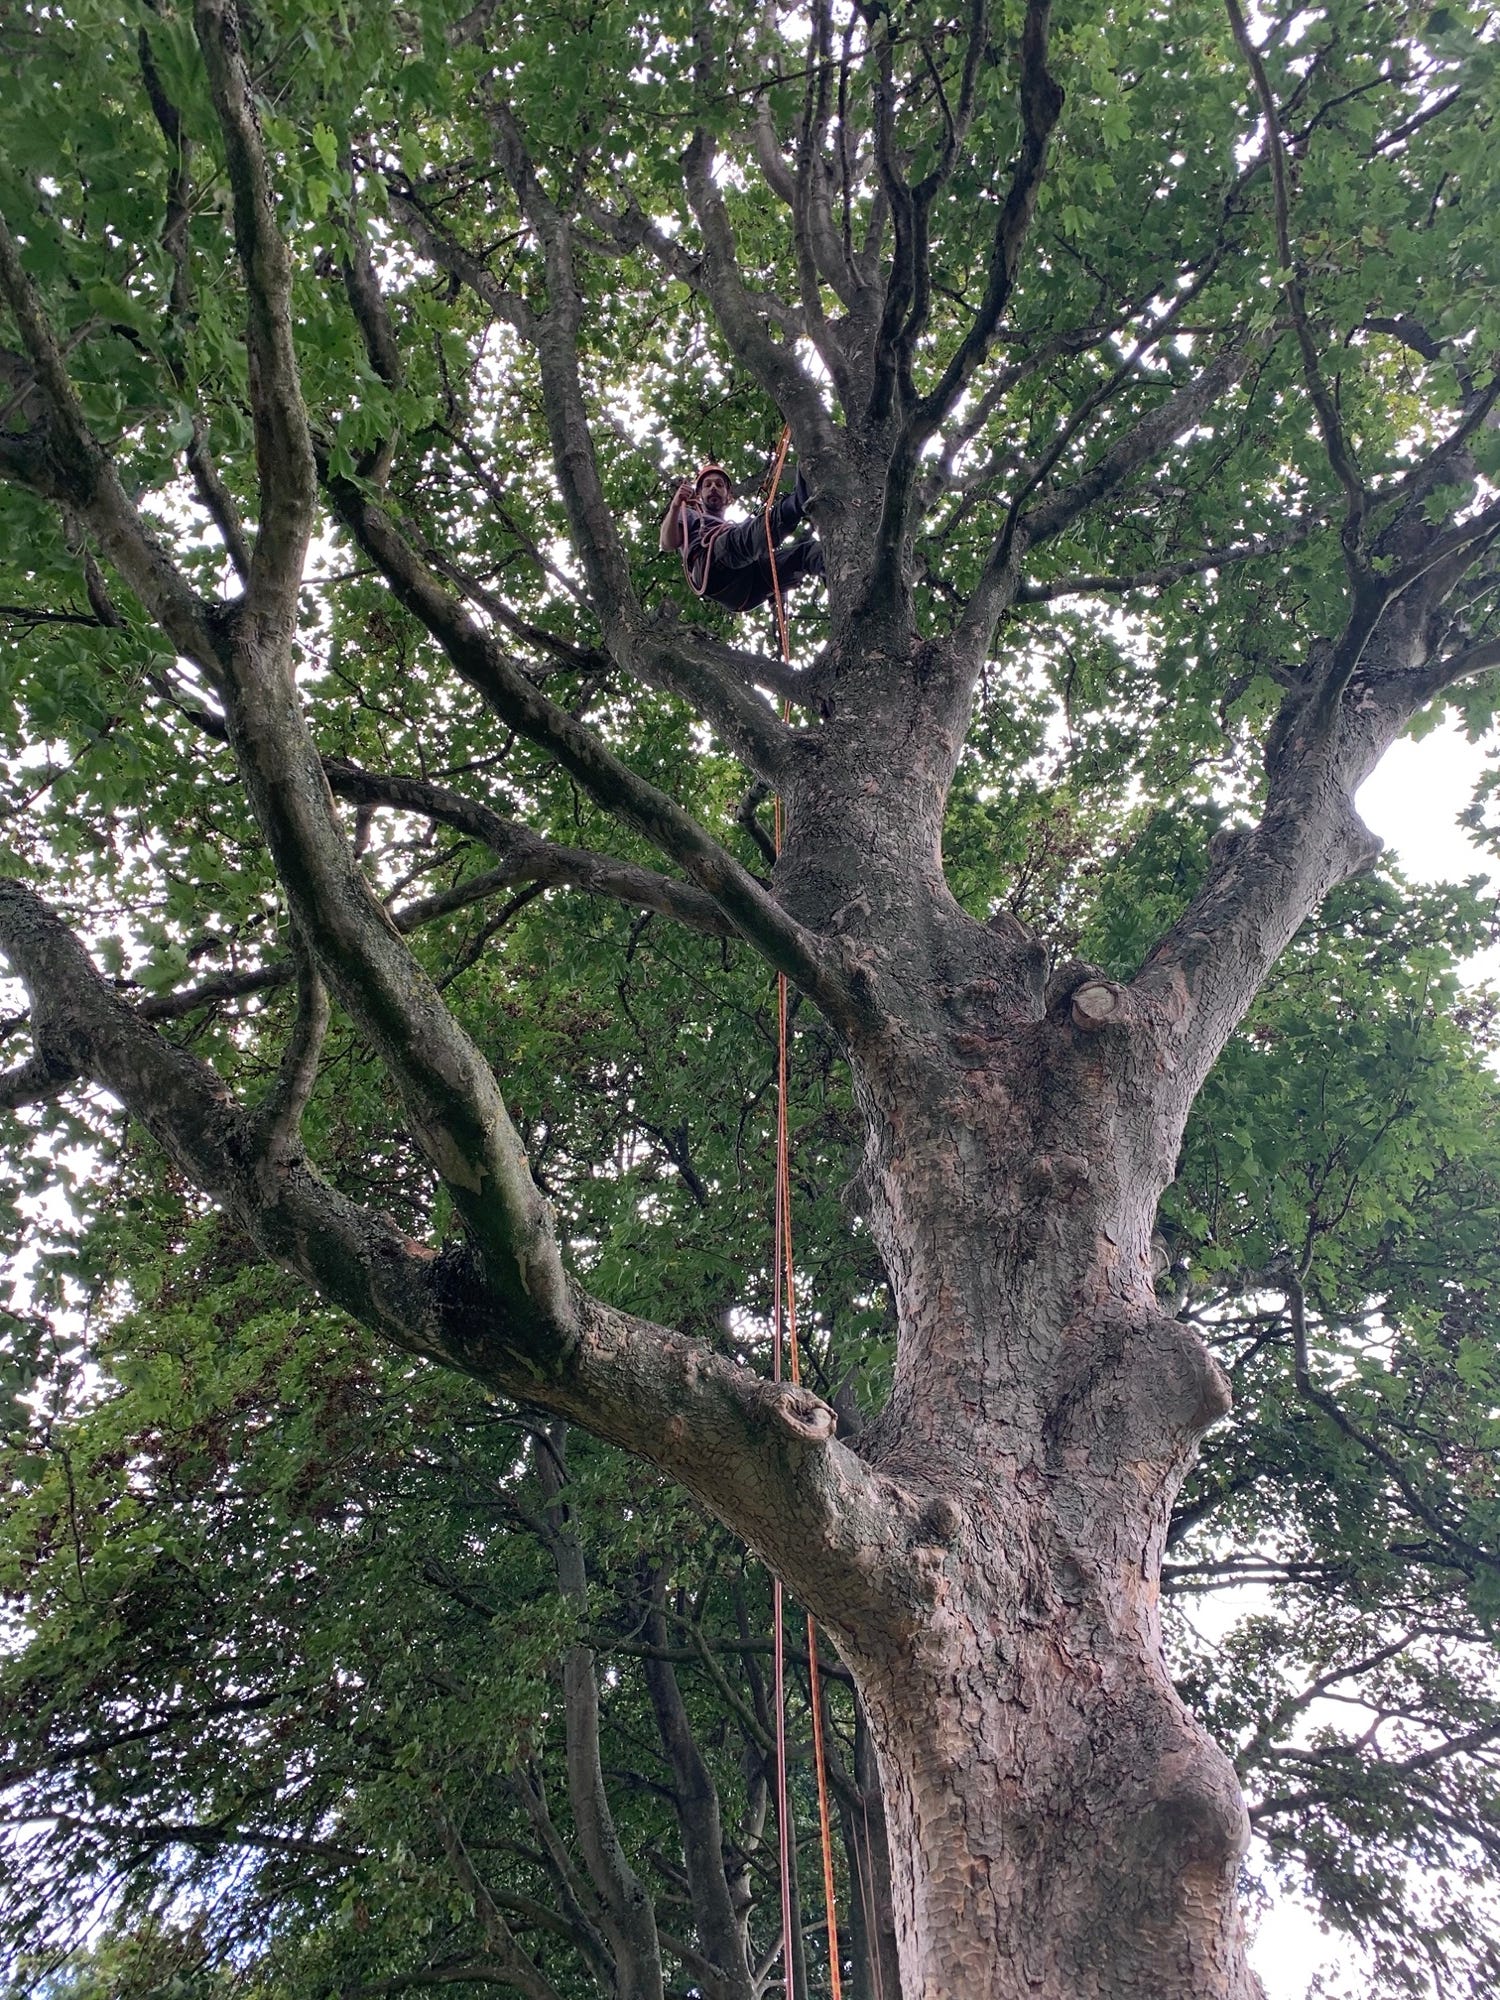
It is not the most efficient technique, but it is taught that in an emergency situation you must be able to quickly ascend someone elses rope system to perform an aerial rescue on them. Note; on the above day we climbed using a single rope as this session was simply about learning the technique. At treeschool we always climb using a primary and backup system. See below, which was taken about fifteen feet before I set my first ever top anchor point.
Skill 2: Chainsaw Maintenance and Crosscutting
Below is a video of my first chainsaw use. I wasn’t entirely comfortable with the machine as you can tell by my initial posture. I’m not using the chain brake, the work is moving around and I’m generally sheepish. There is much wrong here and some right. I’m letting you see it to demonstrate that initially, I was incorrect in my chainsaw usage.
At this point I’d just bought a chainsaw, watched some videos (example) and kitted myself out in the relevant PPE. Many people learn how to use tools like this and probably an equal amount hurt themselves, but I believe in personal freedom and that’s on them.
We didn’t start using chainsaws at treeschool until November in 2022 and when we did we followed the NPTC guidelines for “Chainsaw maintenance and crosscutting”. We spent a good three weeks learning how chainsaws work, what the safety features1 are and how to use them. We also took many chainsaws apart, cleaned and maintained them and put them back together. We did this before we cut anything.
In December of 2022 I took my NPTC chainsaw maintenance and crosscutting exam and passed it. A few months later in Feb 2022 after much work in the woodland, you can see how much more comfortable and safety orientated I am. Also, my hi-vis game is now much more on point.
Skill 3: Tree Felling
Of all the things we’ve learned, felling was the most fun. We were felling at a site in Frosterly, Durham and the job was thinning a conifer plantation.
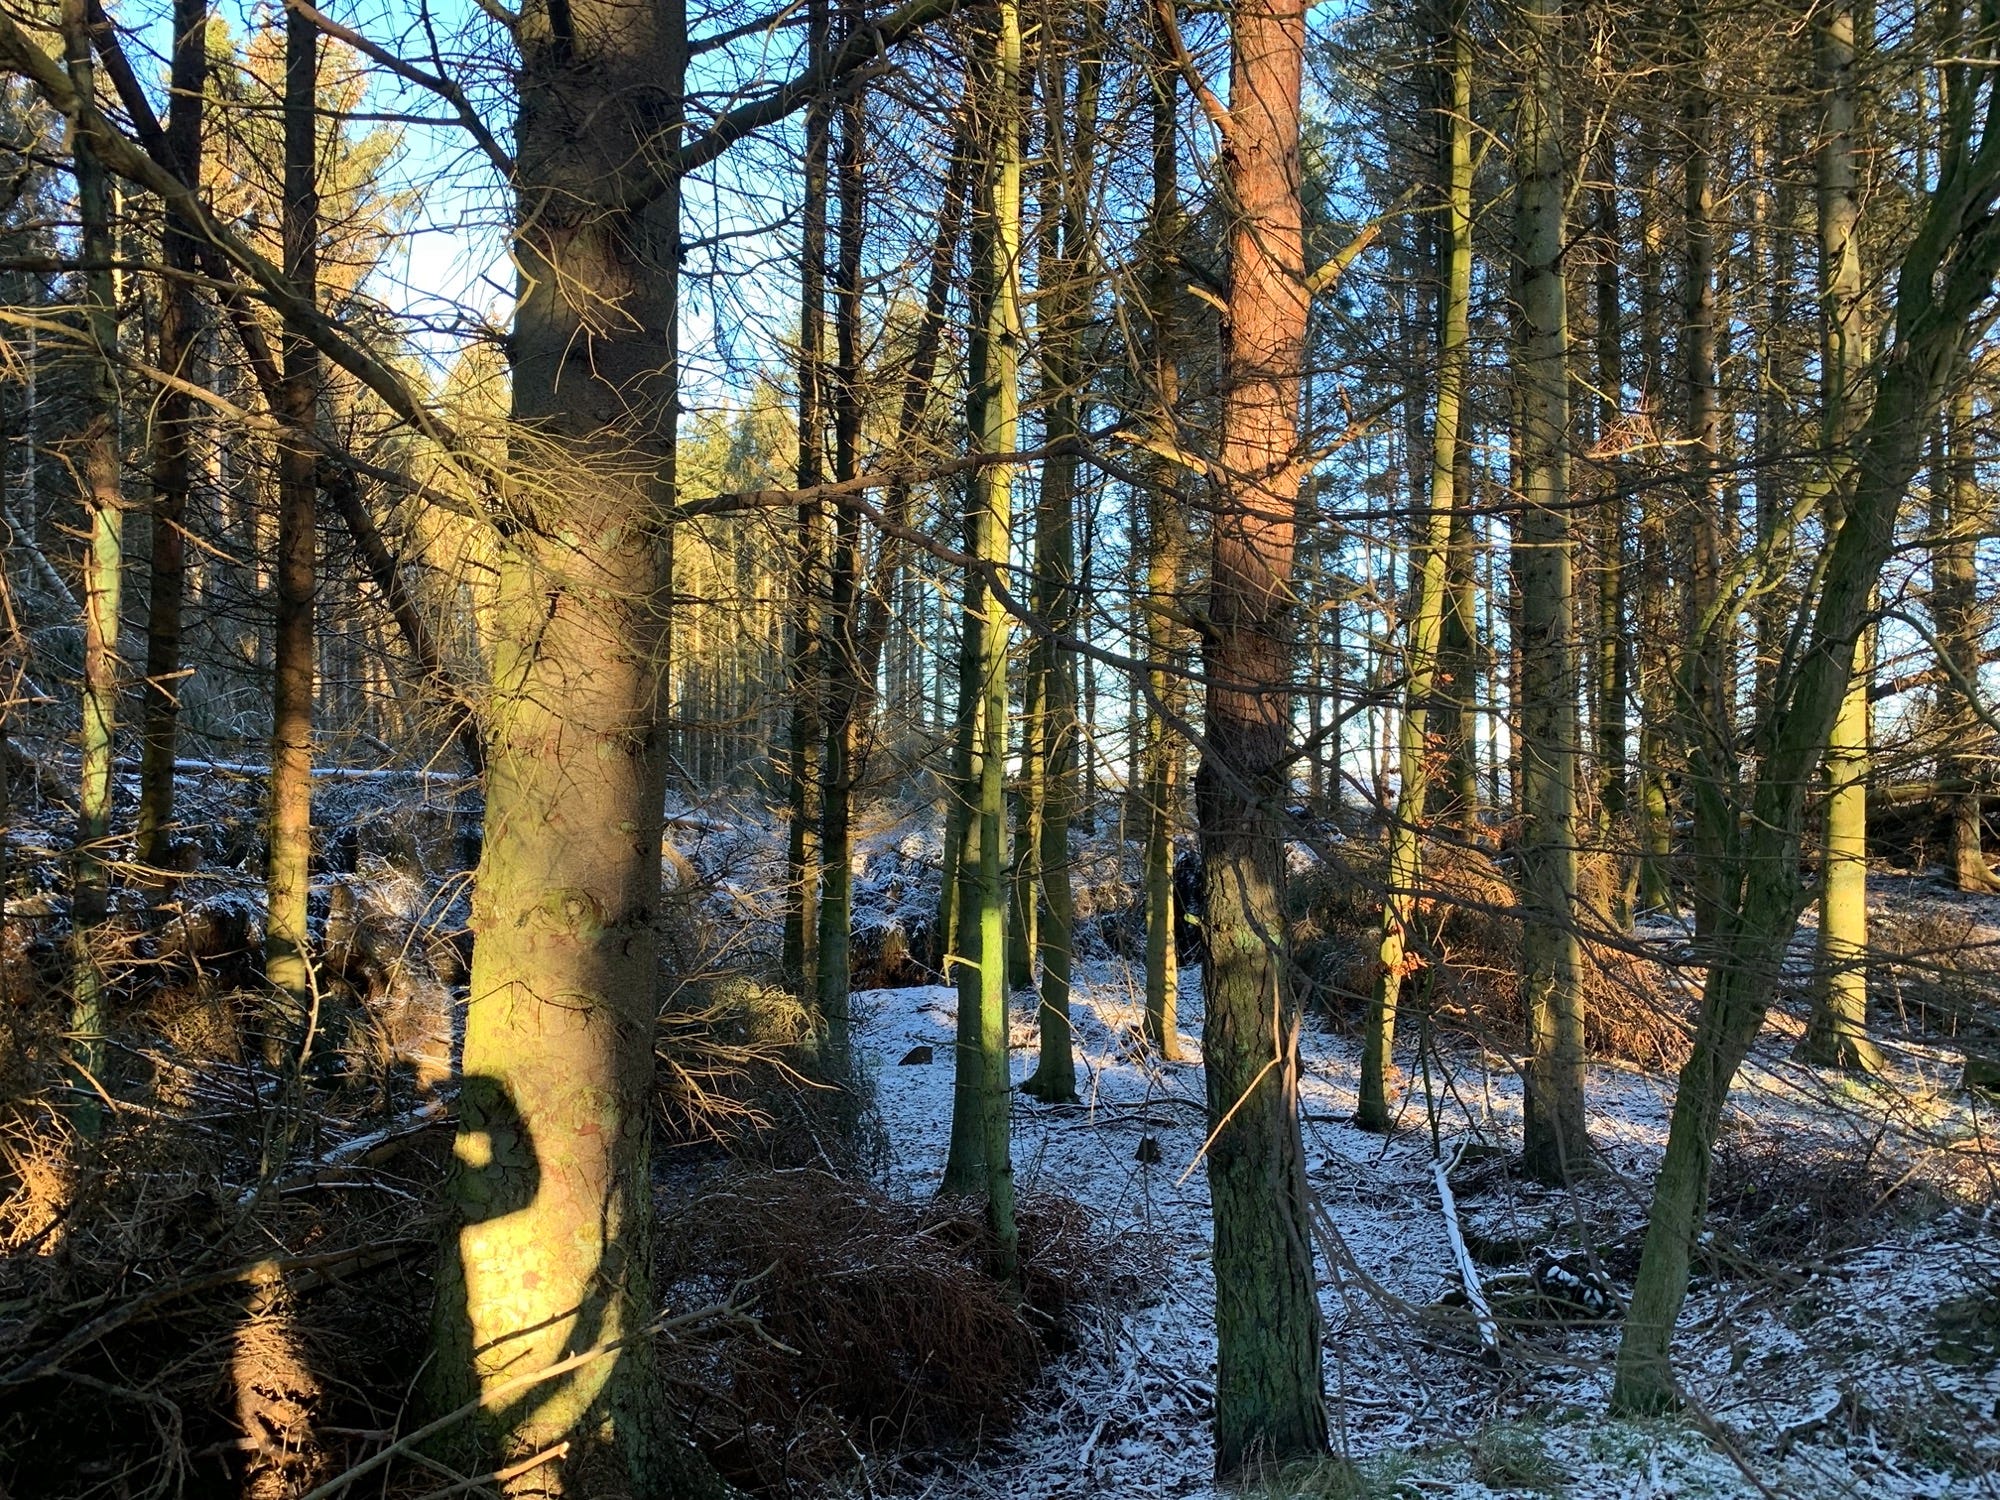
Thinning is the process of removing the worst condition trees in any given group. Design and planting of plantations is a whole topic in and of itself, but the short version is this. Trees are planted in rows at a given spacing which can be anywhere from 1.5 - 3 metres. The trees are then left for 15 years and during that time they all grow at the same speed (in theory) and so they grow straight up towards the light because their crowns take up all available space. Here’s an example I took from one of the woodlands in Northumberland which is in need of a thinning.
Thinning gives you an initial harvest of timber which is typically sold for processing into wood products like paper, MDF and chipboard, but is also used for biomass.
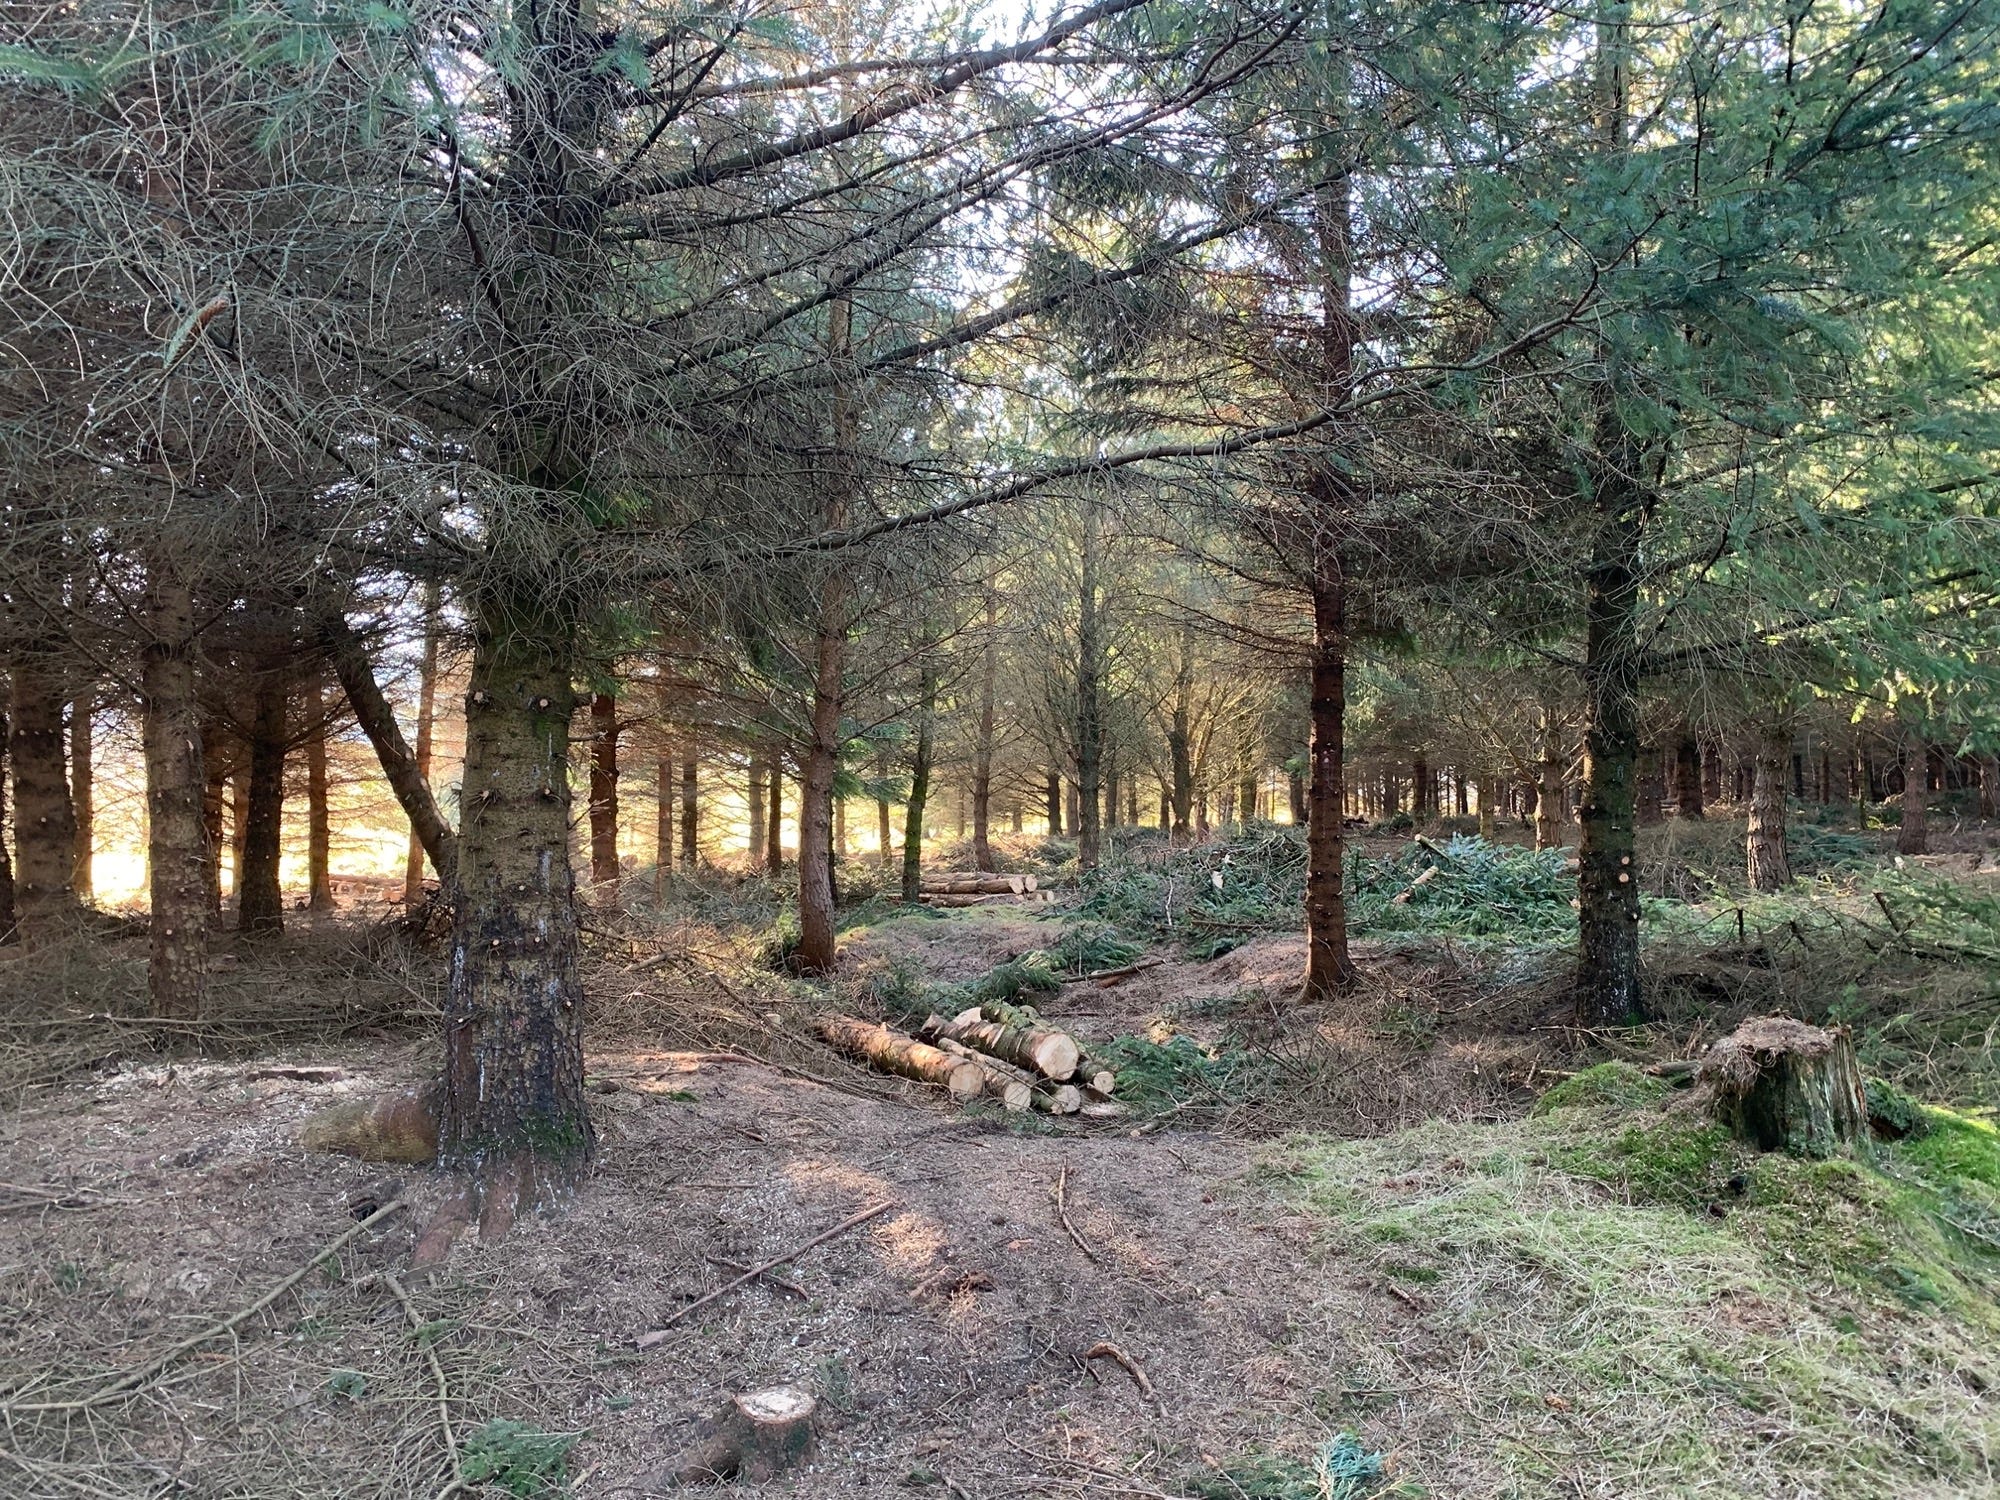
Once thinned a plantation looks like the below photo. The remaining trees have space to catch more light which allows them to put on girth, which is where the money is. The thinned trees are processed into specification (this site had a two metre length spec) and placed in stacks ready for extraction and transport to their final destination.
I can almost hear you asking what tree felling has to do with tree surgery (climbing and cutting) the short answer is that the theory is mostly the same for felling as it is for pruning. When felling, the first main cuts are to create a face cut of some kind (called a “gob” in North East England) and then finish off with a back cut. The idea being that the when the back cut is done, the weight of the tree shifts into the face cut and hinges forward resulting in the tree being felled. It’s the same theory up in the tree when doing branches and limbs are only a bit easier because gravity makes compression and tension in the wood much more predictable. Compression is downward facing in 95% of cases and tension is upward facing in 95% of cases.
Compression and tension is always hard to gauge and inevitably I’ll get it wrong when felling something. To give you an example from a recent video, in February 2023 I began the long process of removing hazard trees from the woodland. In this example the tree falls but gets hung up. I attempt to cross cut the stem, but I end up getting tension and compression mixed up and my saw gets stuck.
Trusty axe to the rescue.
Skill 4: Pruning
The most recent skill we’ve learned about and sat an exam on, is tree pruning. I wrote about this below, so if you’ve not read that – please do so and remember to like it because doing so reminds me there is an audience :)

One major difference with pruning versus felling is that felling kills the tree, whereas pruning is concerned with allow the tree to survive. The short version of pruning is that the final cut is correctly positioned in the branch bark ridge and branch collar so that the trees natural defense system activates and the pruning site (in reality a gaping wound) heals quickly and effectively.
Finally, when pruning a tree whilst using a rope and harness, there are a selection of cuts to choose from. I’ll cover those in depth later in a separate post but there’s hand-held and free-fall version of step cuts and sink cuts. The choice of cut depends on how the branch or limb wants to fall. It’s my job as a climber to ensure that the limb doesn’t hit anything other than the drop zone. The final cut is the same as pruning on the ground - the branch bark ridge to branch collar cut.
Bringing the four skills together.
Fast forward to May 2023 and I’m now climbing and cutting.
I understand the basics of tree climbing safely. Visual Tree Assessment, backup system, using a strop, rope management, limb walking, setting anchor points, selecting anchor points and avoiding damage to the tree are all things I can now process. I have much to learn in these areas, but I have a solid mental map of them.
I understand the basics of chainsaws, how they work, how to debug starting them and more importantly how to perform safety checks before and after starting them. Everything is harder in a tree when on a rope so don’t discount just how important chainsaw maintenance is. Get the saws started on the ground and warmed up. If you’re a "groundsman” then this is your job. Never supply a climber with a cold saw and always ensure that pre-start checks and post-start checks have been performed.
I understand the basics of crosscutting timber and I understand (even if I do get mixed up in more complex situations) tension and compression. You absolutely don’t want to get your saw completely pinched when you’re up a tree because you’ll have to pull another saw up from the ground and then handle two chainsaws in the tree.
I also understand how to correctly prune a tree. How to select the right cut for the branch to ensure two things; one, that I don’t damage the tree by splitting wood fibres into sections of tree I am retaining and two; that the branch makes it to the ground without hitting anything other than the drop zone.
So here’s the video again, thirty seconds of time, but eight months of learning.
I did a fail in this video, I put my fingers into the sink cut as it was hinging closed. Thankfully, I felt it close and I got my fingers out of there quick sharp - lesson learned. Removing the tips of my fingers would make climbing back down harder and more painful.
Wrapping Up
This week (WK20 - 2023) we start on the journey of learning rigging and dismantling. Fingers crossed that by the time the end of first year rolls around I’ll be ready to go and get a summer of work experience with all the necessary tickets under my belt.
I could have learned all of this stuff on a short course over the period of a few weeks rather than a few months. However, one of the things that tree school teaches alongside all the practical skills is the theory side of tree science, identification, trees and the law, pests and diseases, tree surveying and tree inspection and it does all of this by weaving it together into one cohesive slow burning learning experience over two years.
It’s amazing to think that I am now nearly halfway through those two years.
p.s. If you’ve not seen the feature, substack has a feed type product called “notes”. It’s a basically a social feed clone and I post more “ad-hoc” stuff on there. You can find all my "notes” here.
ten safety features of a chainsaw: rear hand guard, interlocking throttle, on/off switch, safety stickers, chain catcher, anti-vibration mounts, front hand guard, chain break, correct guidebar and chain, exhaust and sheath for saw chain when in transport.