

A birch on a birch on an oak in an oak.
A birch on a birch on an oak in an oak.
We first came across this job a few months after we purchased the woodland. Then we lost it again in summer of 2022. Then we found it again in early 2023 and then promptly lost it again. Oh dear.

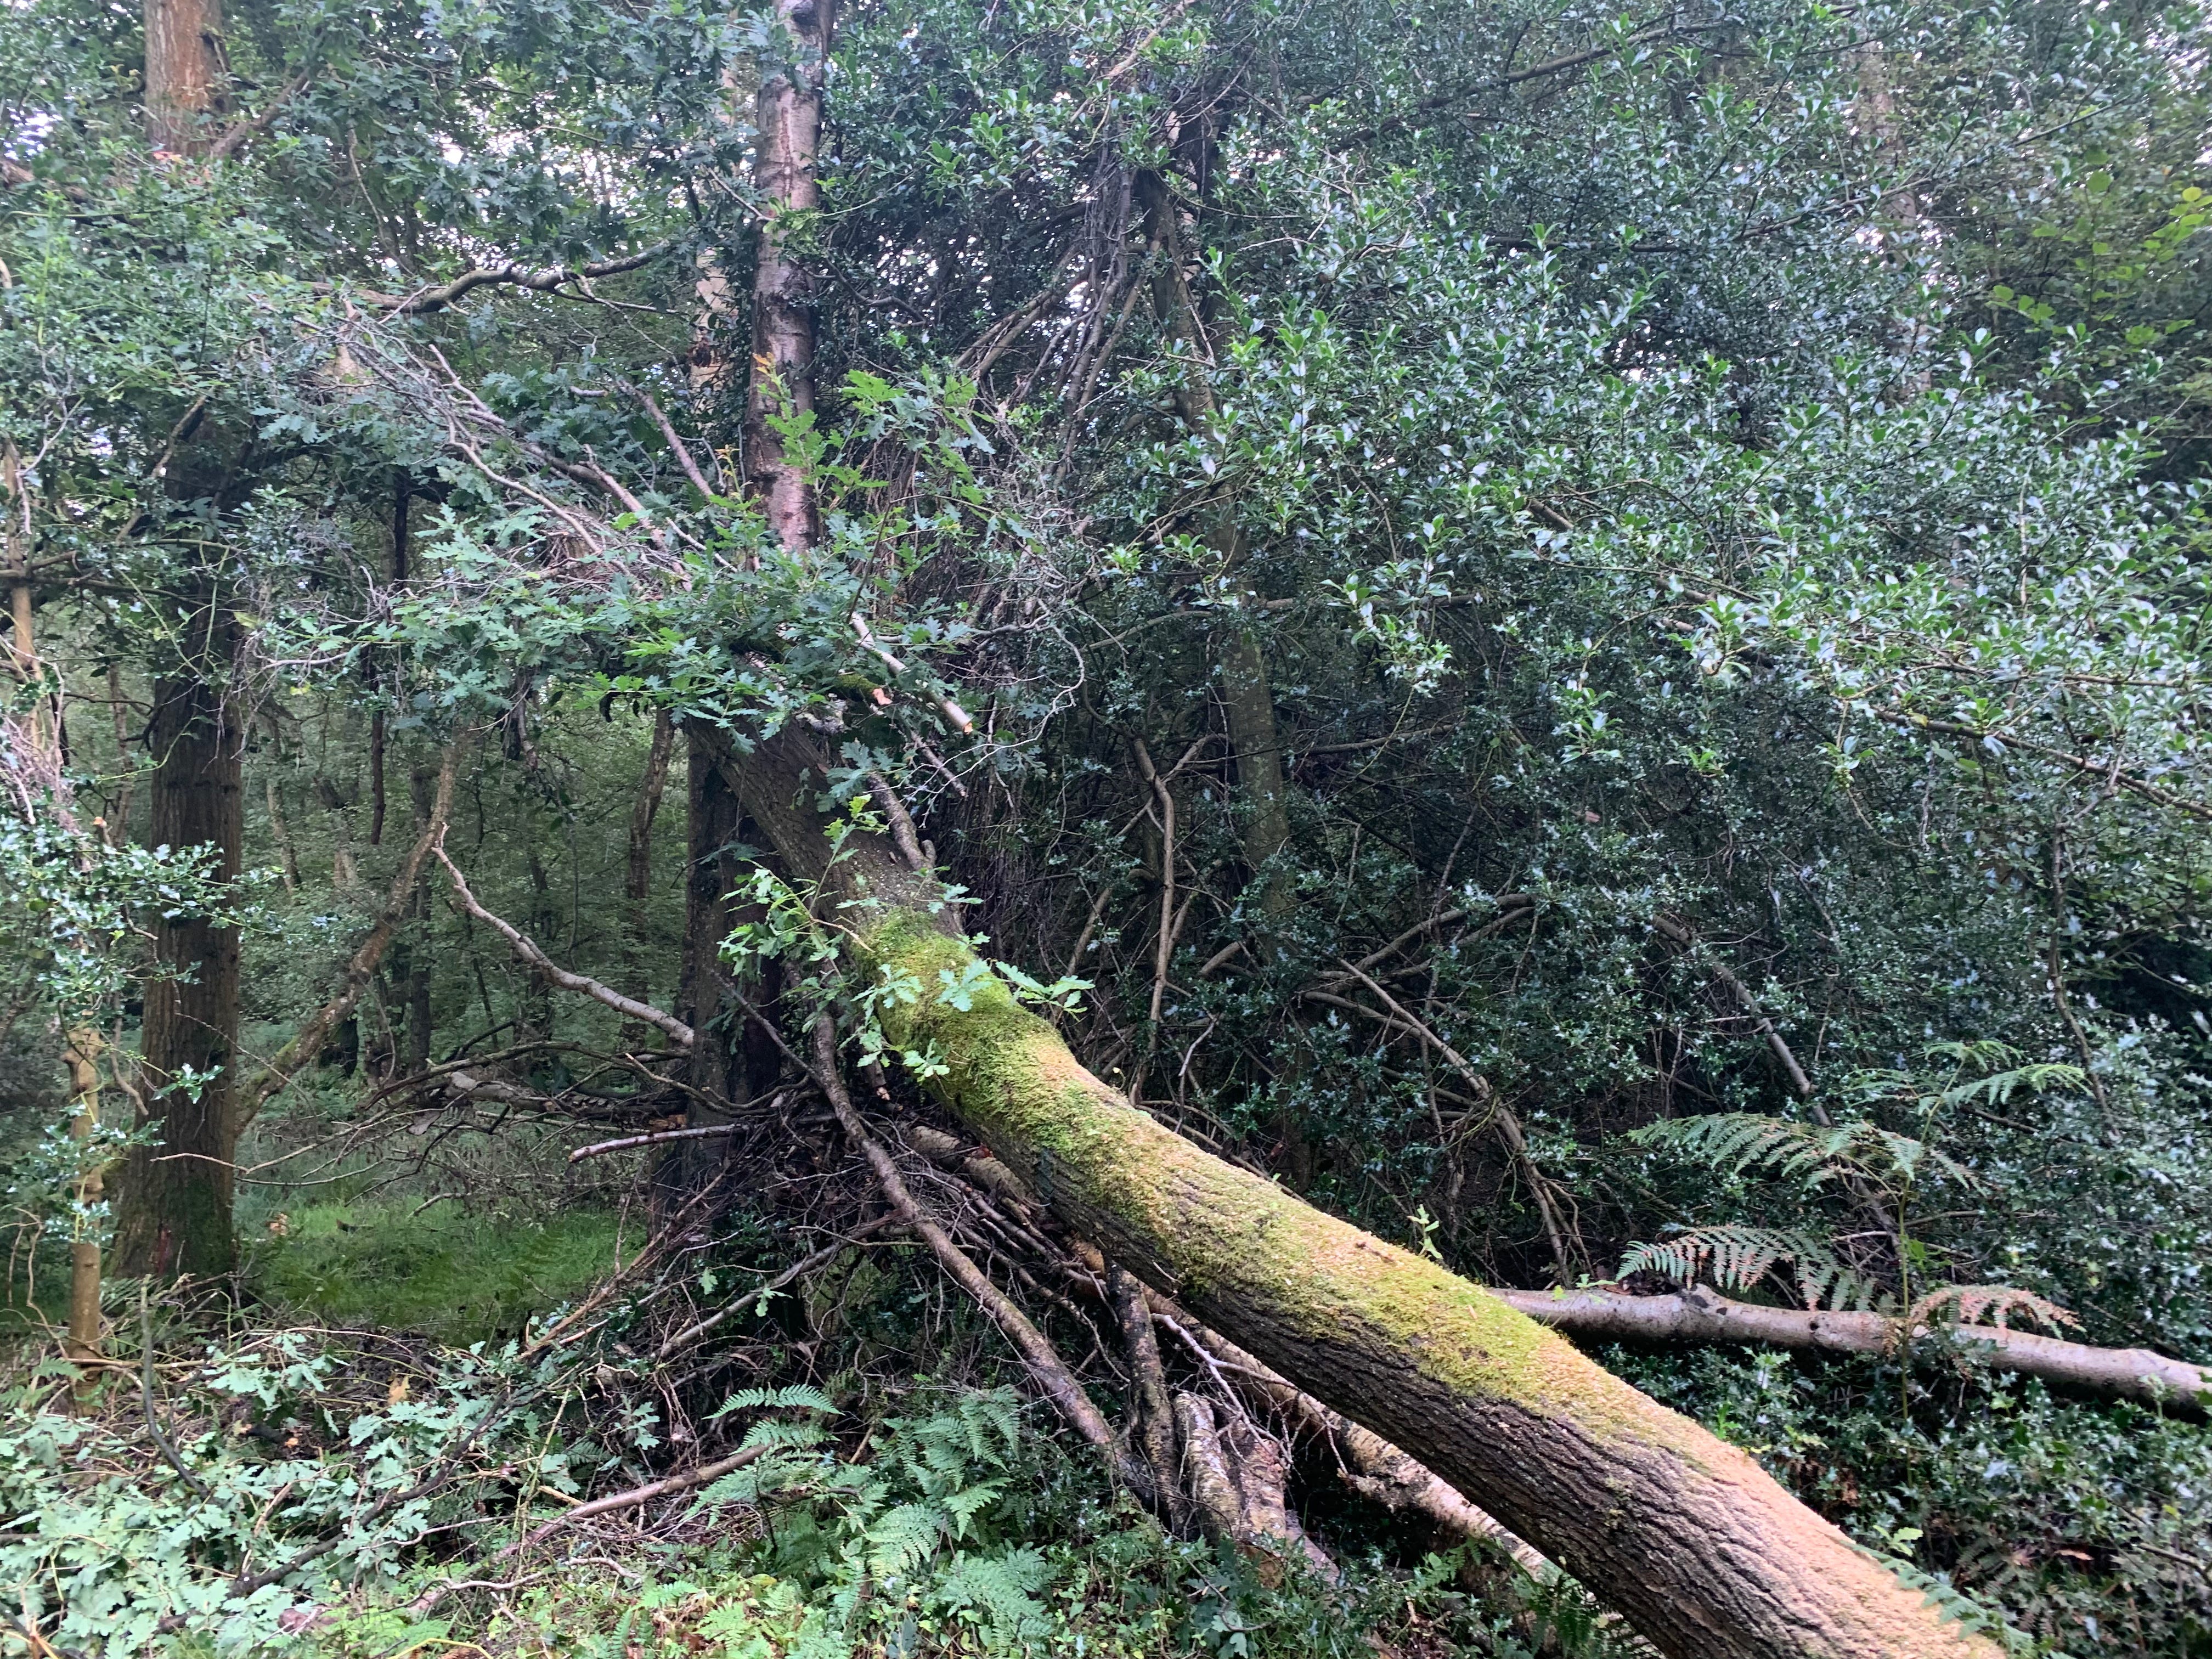
On the west boundary of our woodland, there was a situation. Despite it being a pretty tricky situation to unpick, and quite obviously something that you’d not manage to lose, we managed to lose it for a few months. Losing trees in a woodland can happen –especially when you find them in one season (winter) and then their location is disguised by the following next season (spring, summer). See the below video. It is more or less unedited raw footage from when I rediscovered this mess for the second time in July of 2023. It is nearly impossible to make out the fact that there are three fallen trees on top of each other in this mess. Most of the video has been dramatically sped up.
When I started cutting into the above I knew there was windfallen stuff in there, that’s why I spend so much time standing around looking at what to cut. Eventually I managed get through everything and at that point I stopped and moved on. If you do watch the above video, the exact moment I make that decision is where I state
“This is definitely multiple (windthrow), but I am still doing it. We learn by doing. We survive by not being crazy”.
So I moved onto clearing stuff upstream of this and saved a mental note of the location of this mess. I knew that later on in the week I’d be doing my “Individual Windfallen Tree” qualification (which I passed btw) and the plan was to come back once I had the qualification and sort it out. Yes, this was multiple windthrow and my qualification was individual but if I am being totally honest with you, the qualifications are 30% about knowing how to do something without harm to you, others, or the local ecology and 70% a requirement for insurance. However, in an attempt to not be crazy, I decided that this mess, which I decided to call “birch on a birch on an oak in an oak”, was a two person job. Anyway, long story short, on the qualification day I met someone called John who lives close by who was interested in helping me sort this mess out. Which, on the 15th August 2023 he most certainly did.
The Job
Here are the photos of the mess taken in 2022 facing south - hence the lens flare. It wasn’t possible to photograph this facing north in 2022 as the area behind this was a totally inaccessible holly thicket which I didn’t cut a path through until July of this year (another upcoming post).


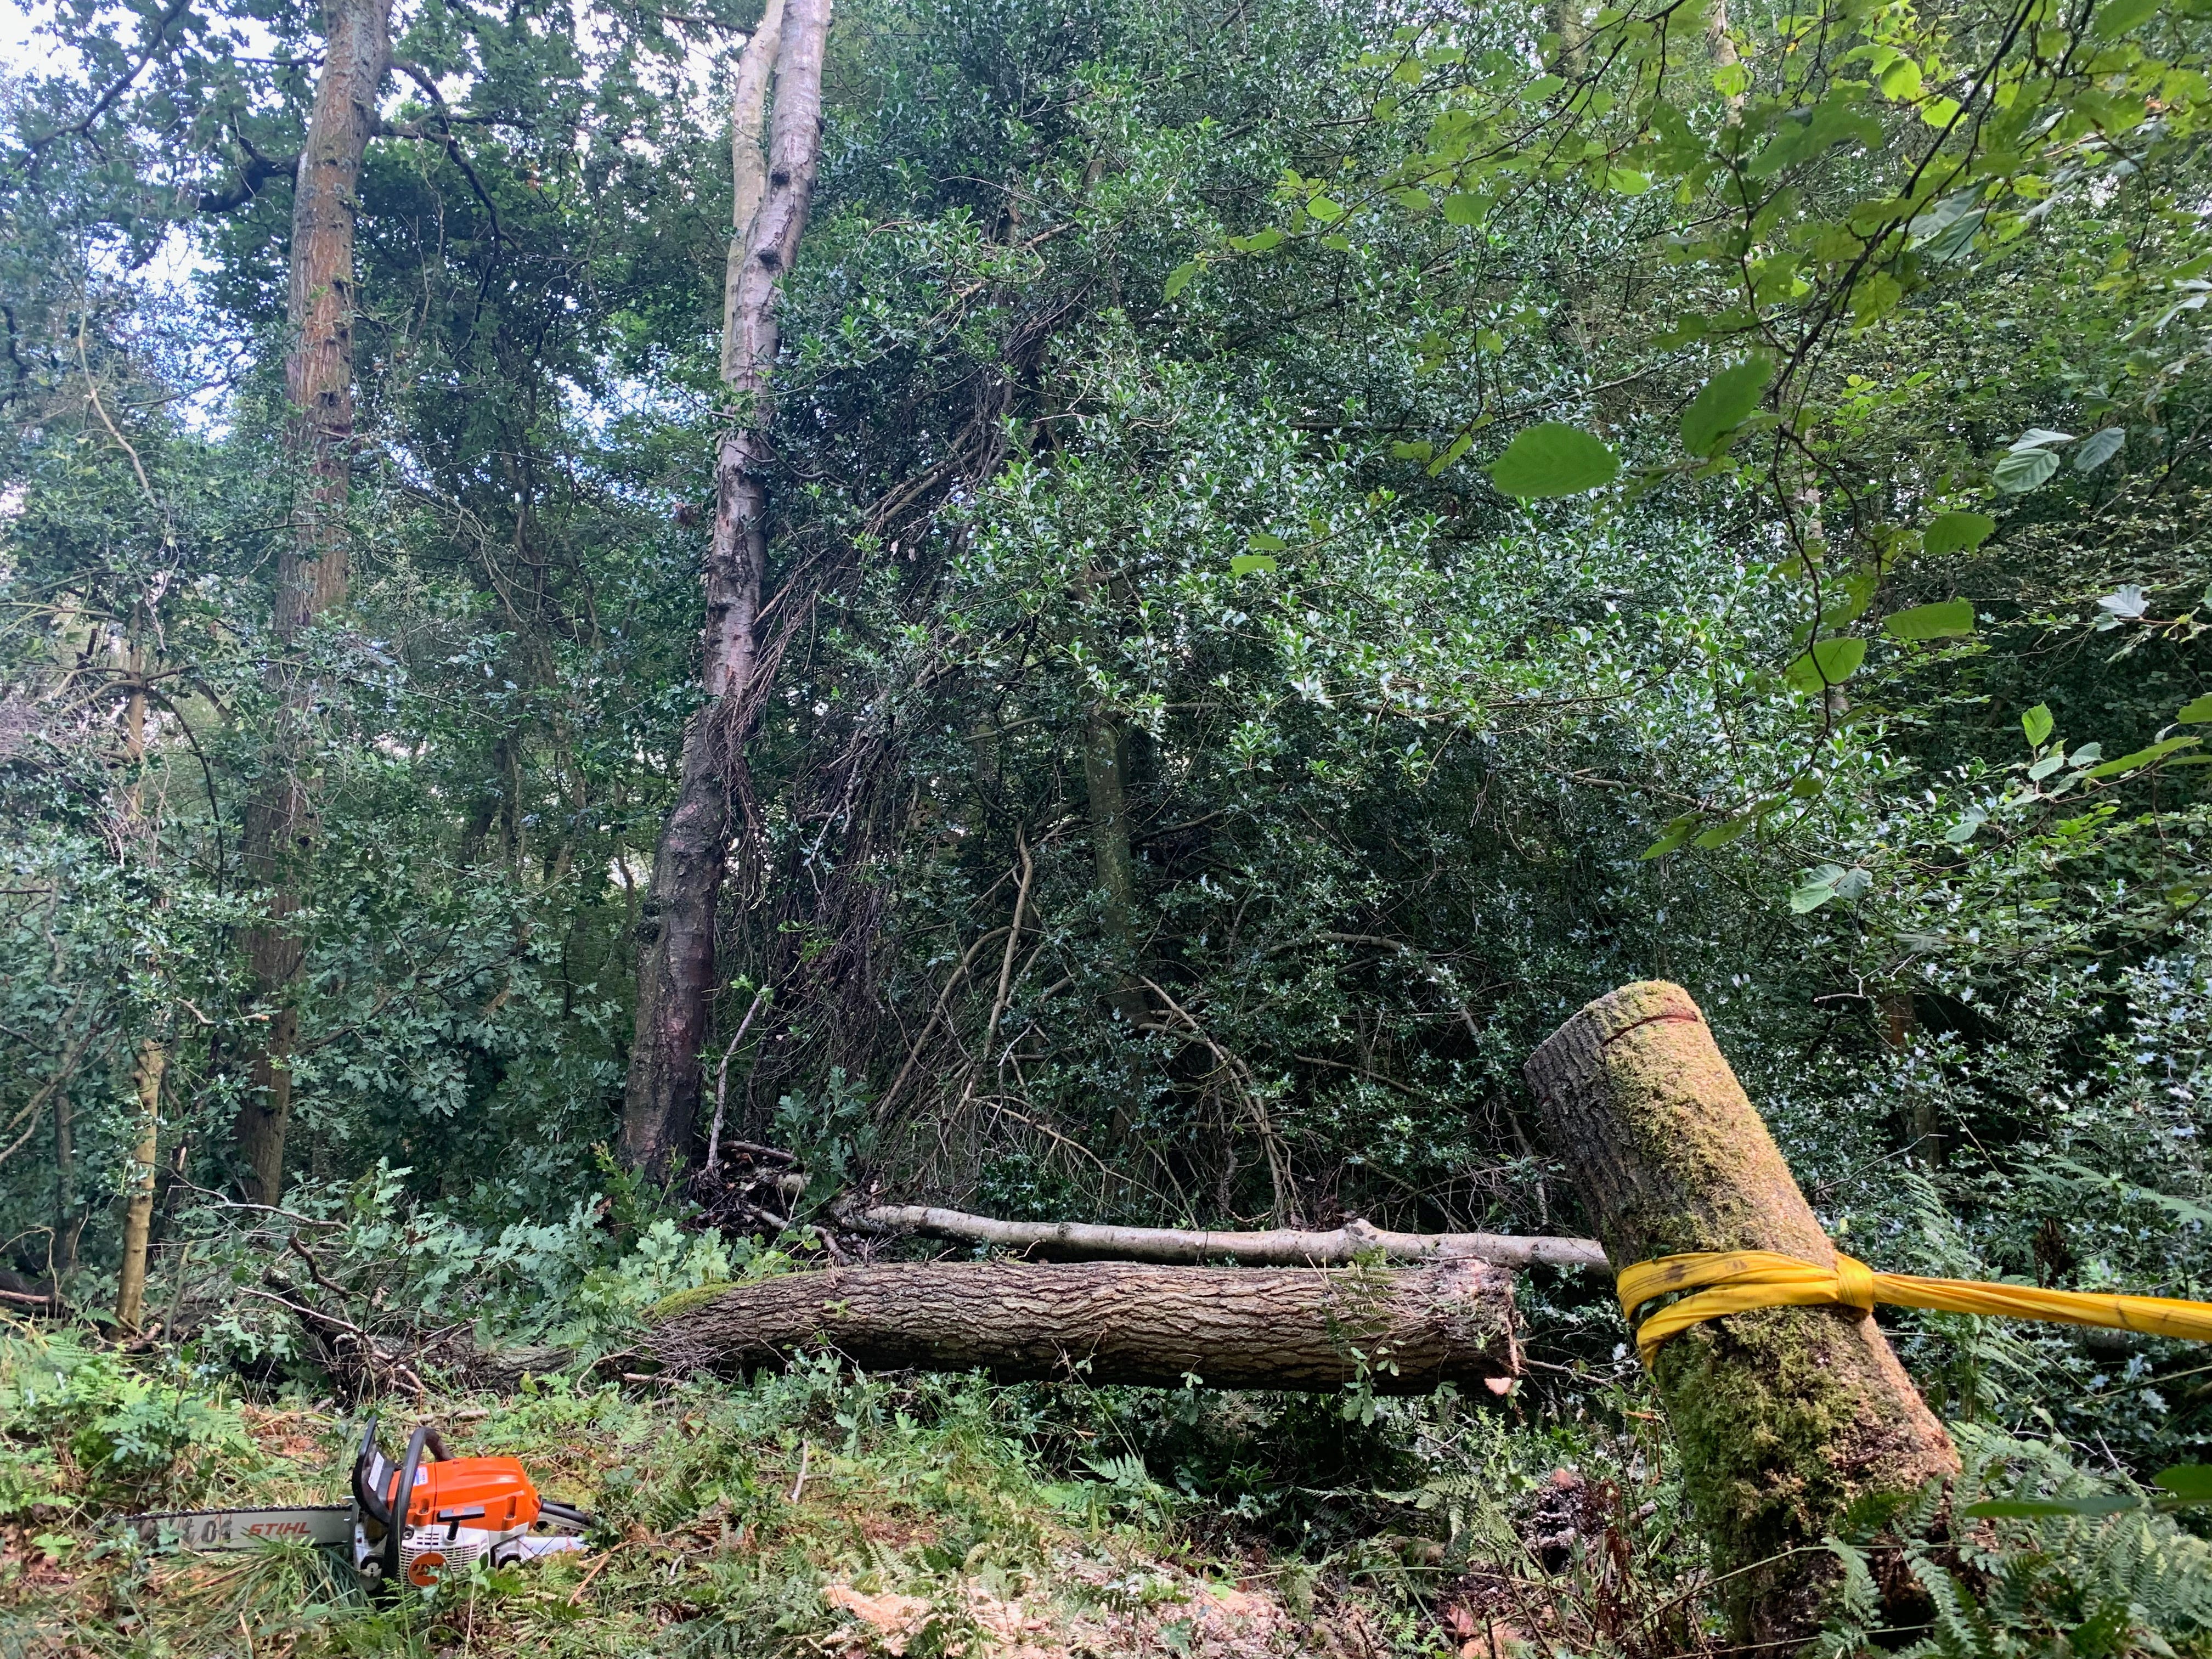
The bracken in this woodland is high. In places it can reach 6ft and our working space was one such area. Photographing bracken is pointless as it is basically a sea of green which makes for great screensavers and backgrounds but poor narrative. By time I’d got the brush cutter out and cleared the working space so I could take some before photos, John had already cleared the first fallen birch without a winch.
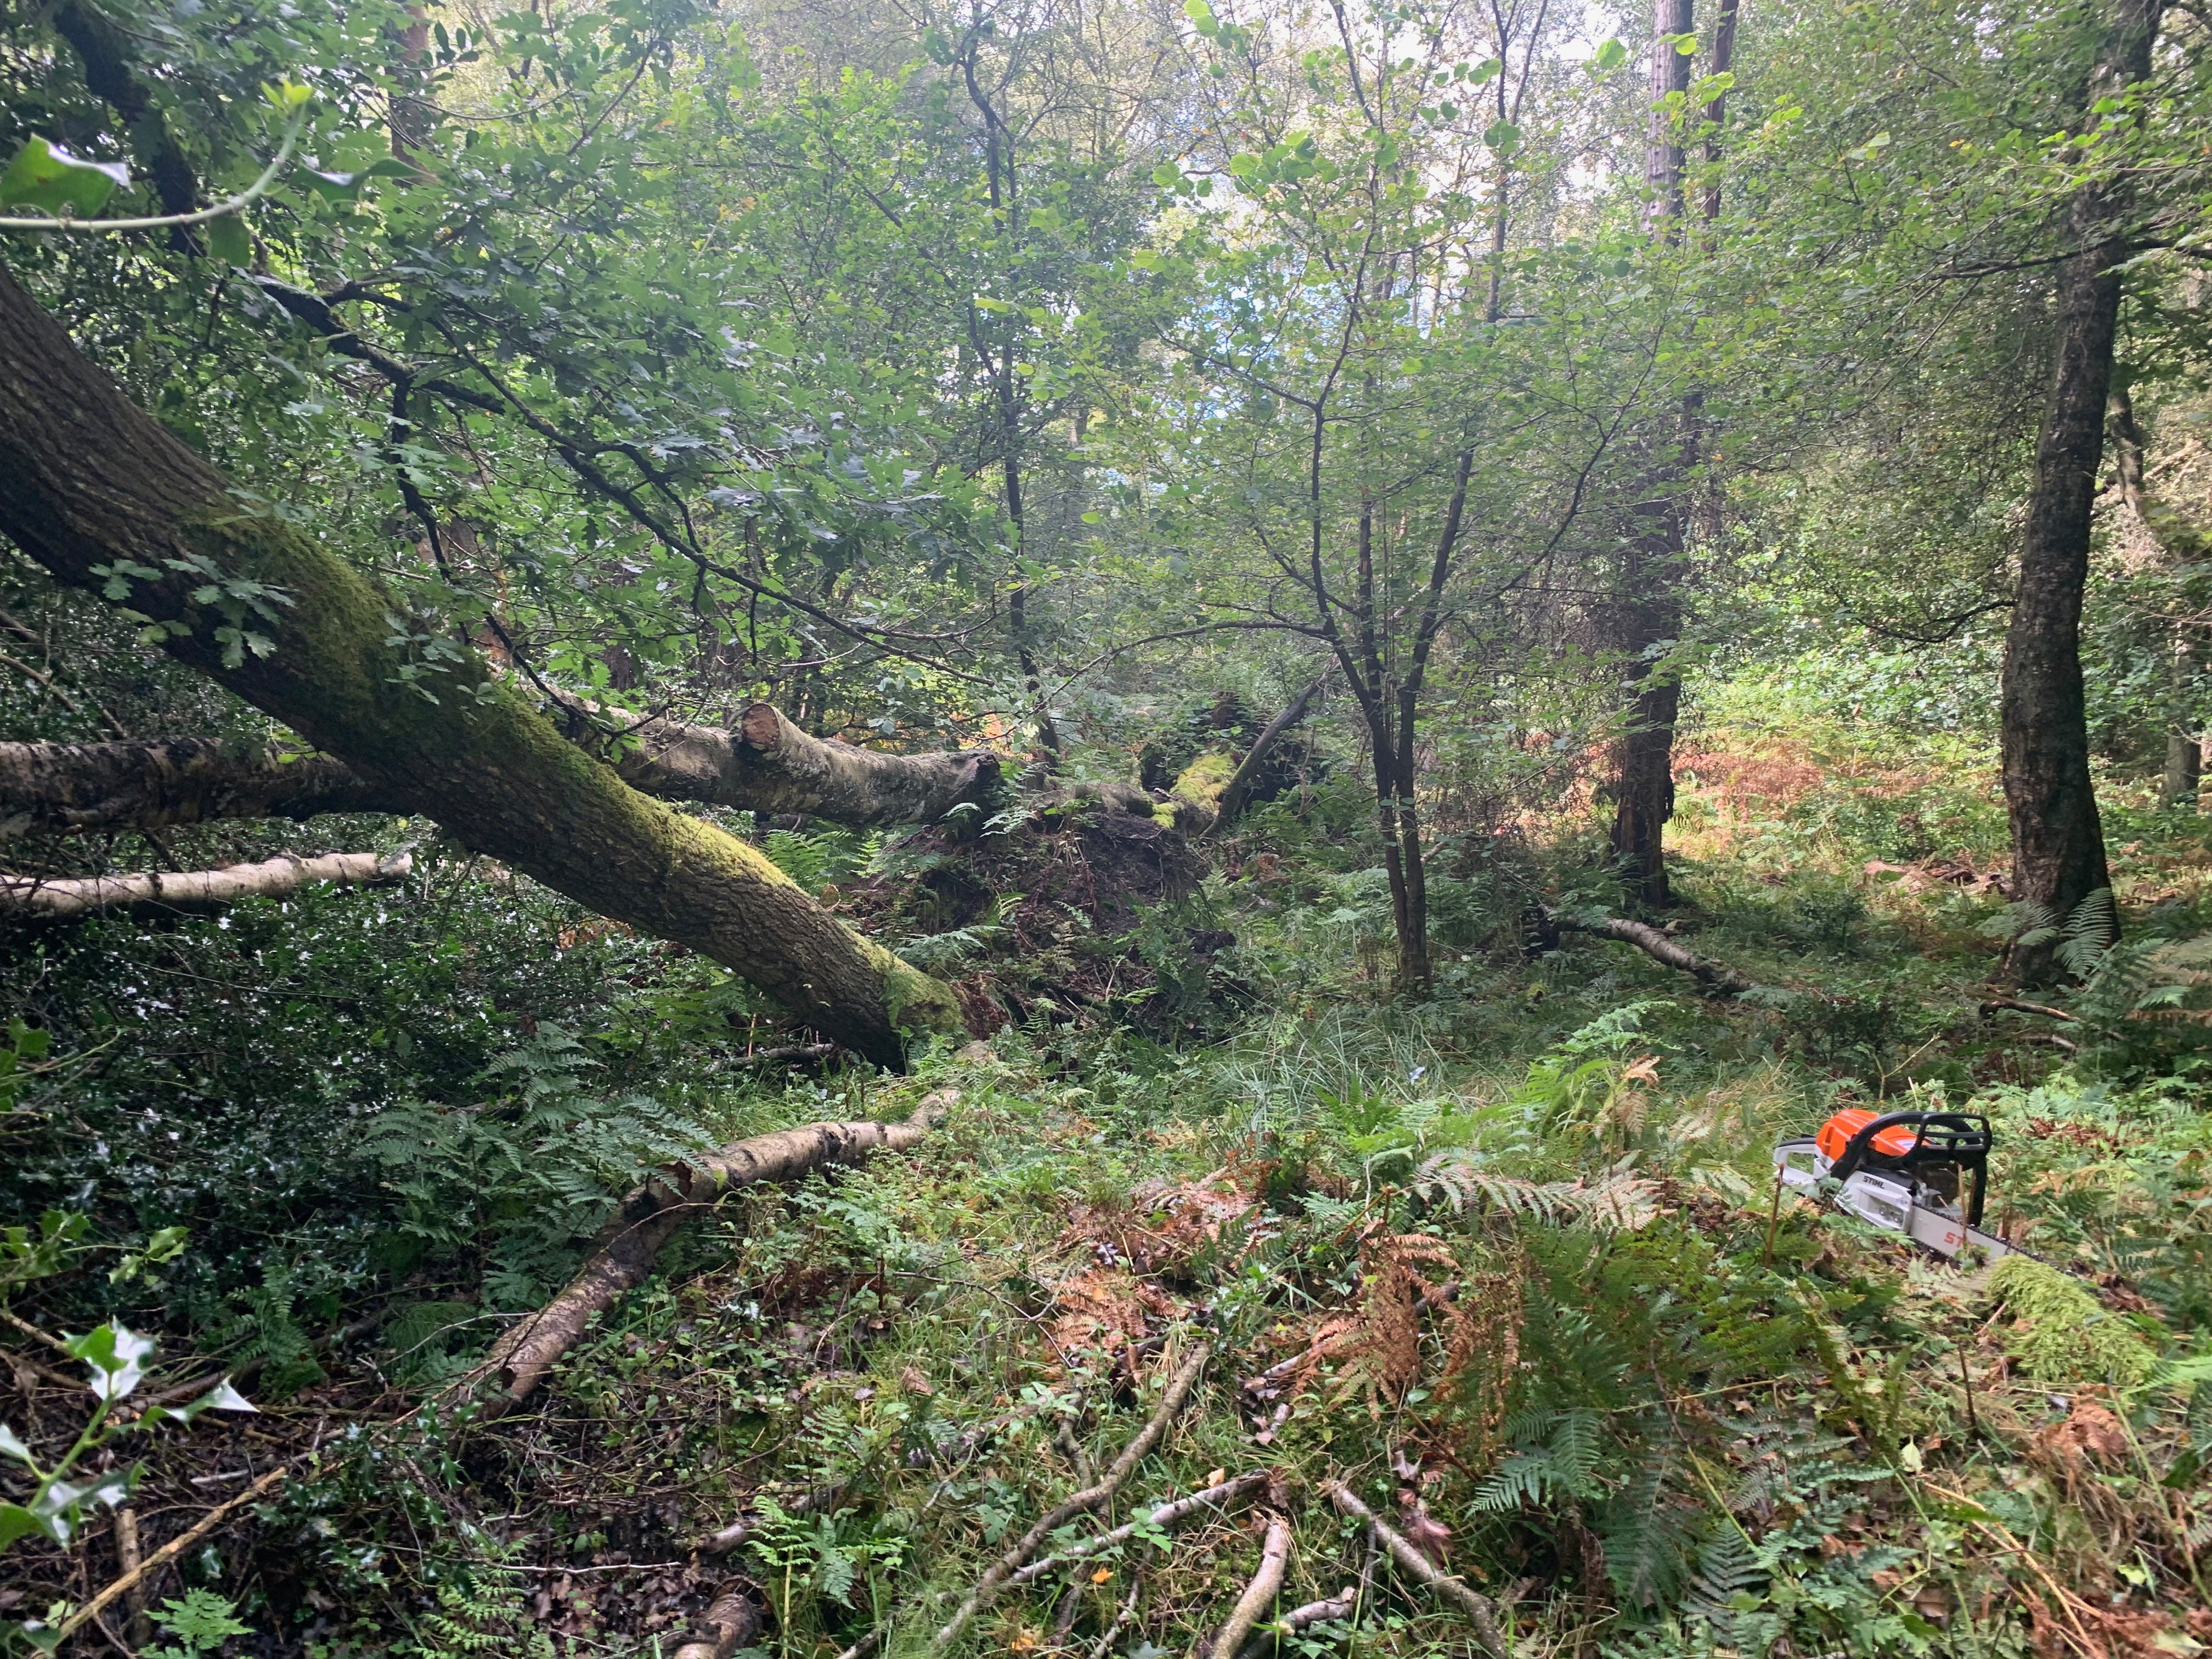
In the above photo, everything behind that chainsaw was covered in dense sea of bracken. Whilst that sounds lovely, this woodland has many deer, which bring with them, ticks. Ticks love bracken and areas of long grass and so before I do any work in such areas, sensible precautions are taken to reduce the likelihood of getting bitten. Ticks can give you awful diseases and whilst I accept that risk as part of this kind of work, it is a numbers game in which the wise stack the deck in their favour. So I always cut the brush.
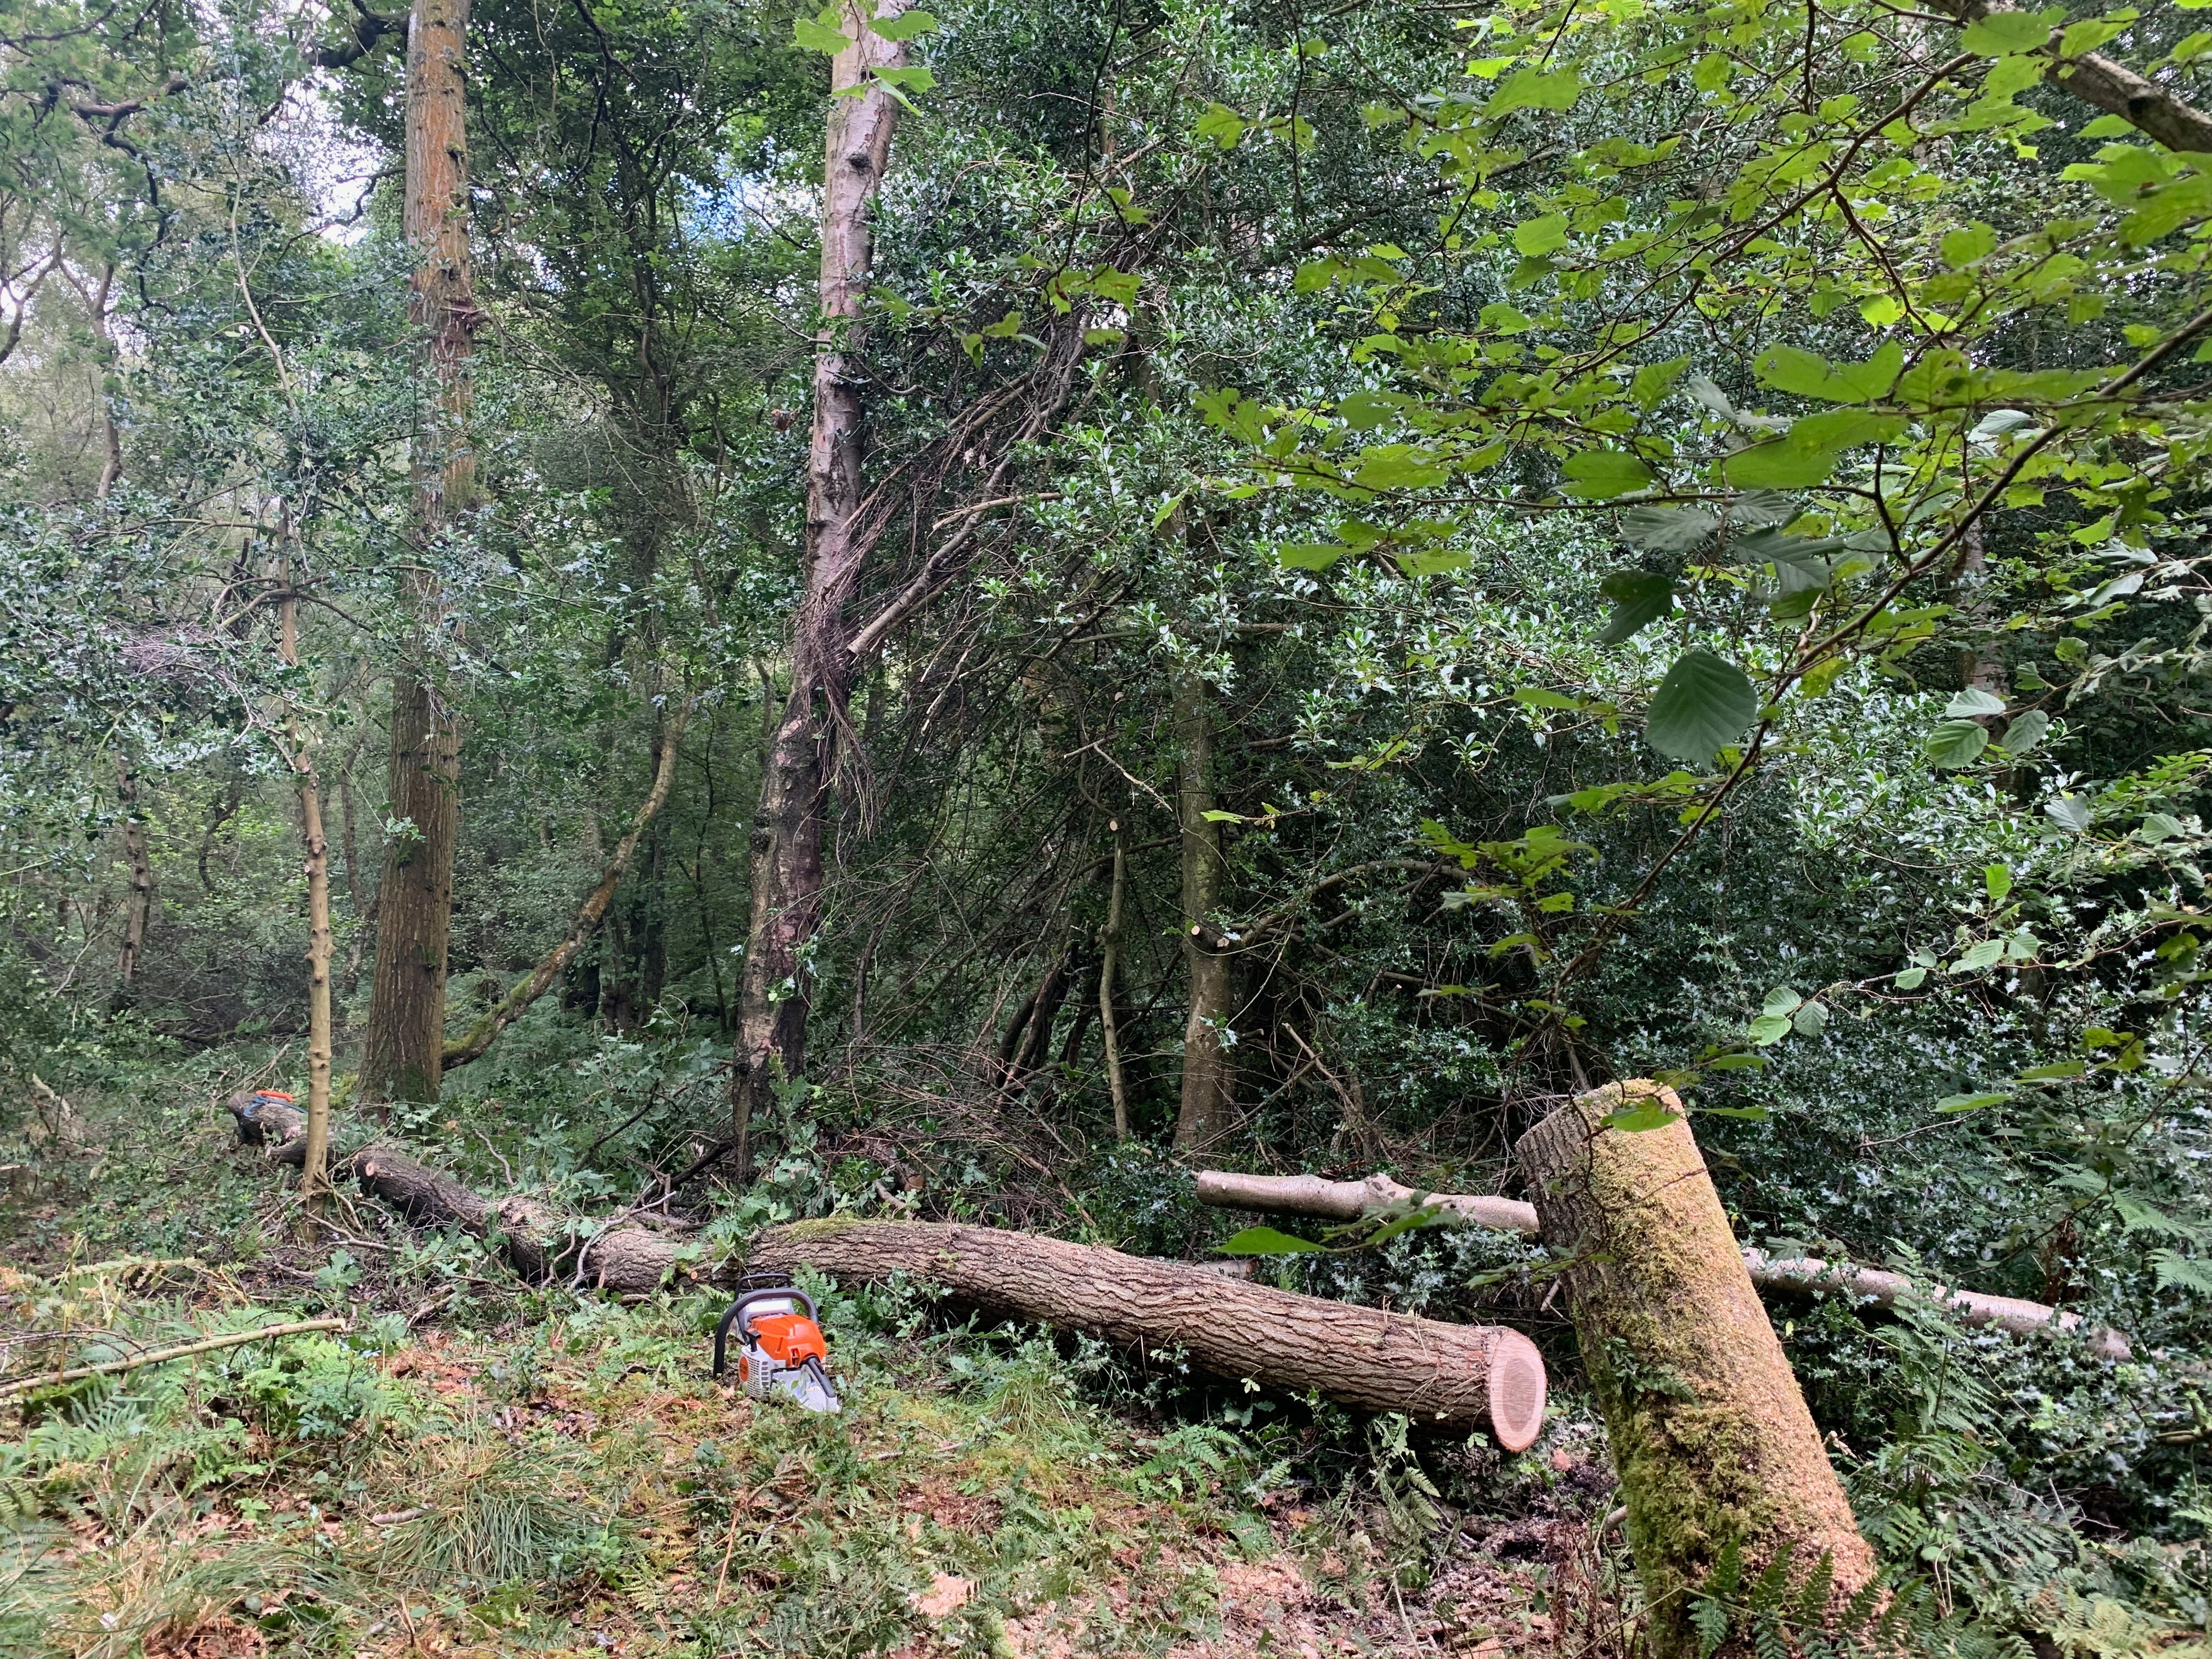
Once I was through cutting brush I took this photo and we discussed how we were going to tackle the remaining mess. The two fallen trees you can see certainly had to be winched but they were on top of each other. In the end we just decided to stop theorising and just crack on. Which is often the far better strategy.
I did record a little snippet of video at this point to try and show the scale of the trees and to give you all an idea of the working space. Excuse the mouth breathing. Woodland work quickly has you breathing heavily as the ground is always uneven, and you’re always hot in chainsaw trousers which results in what you hear.
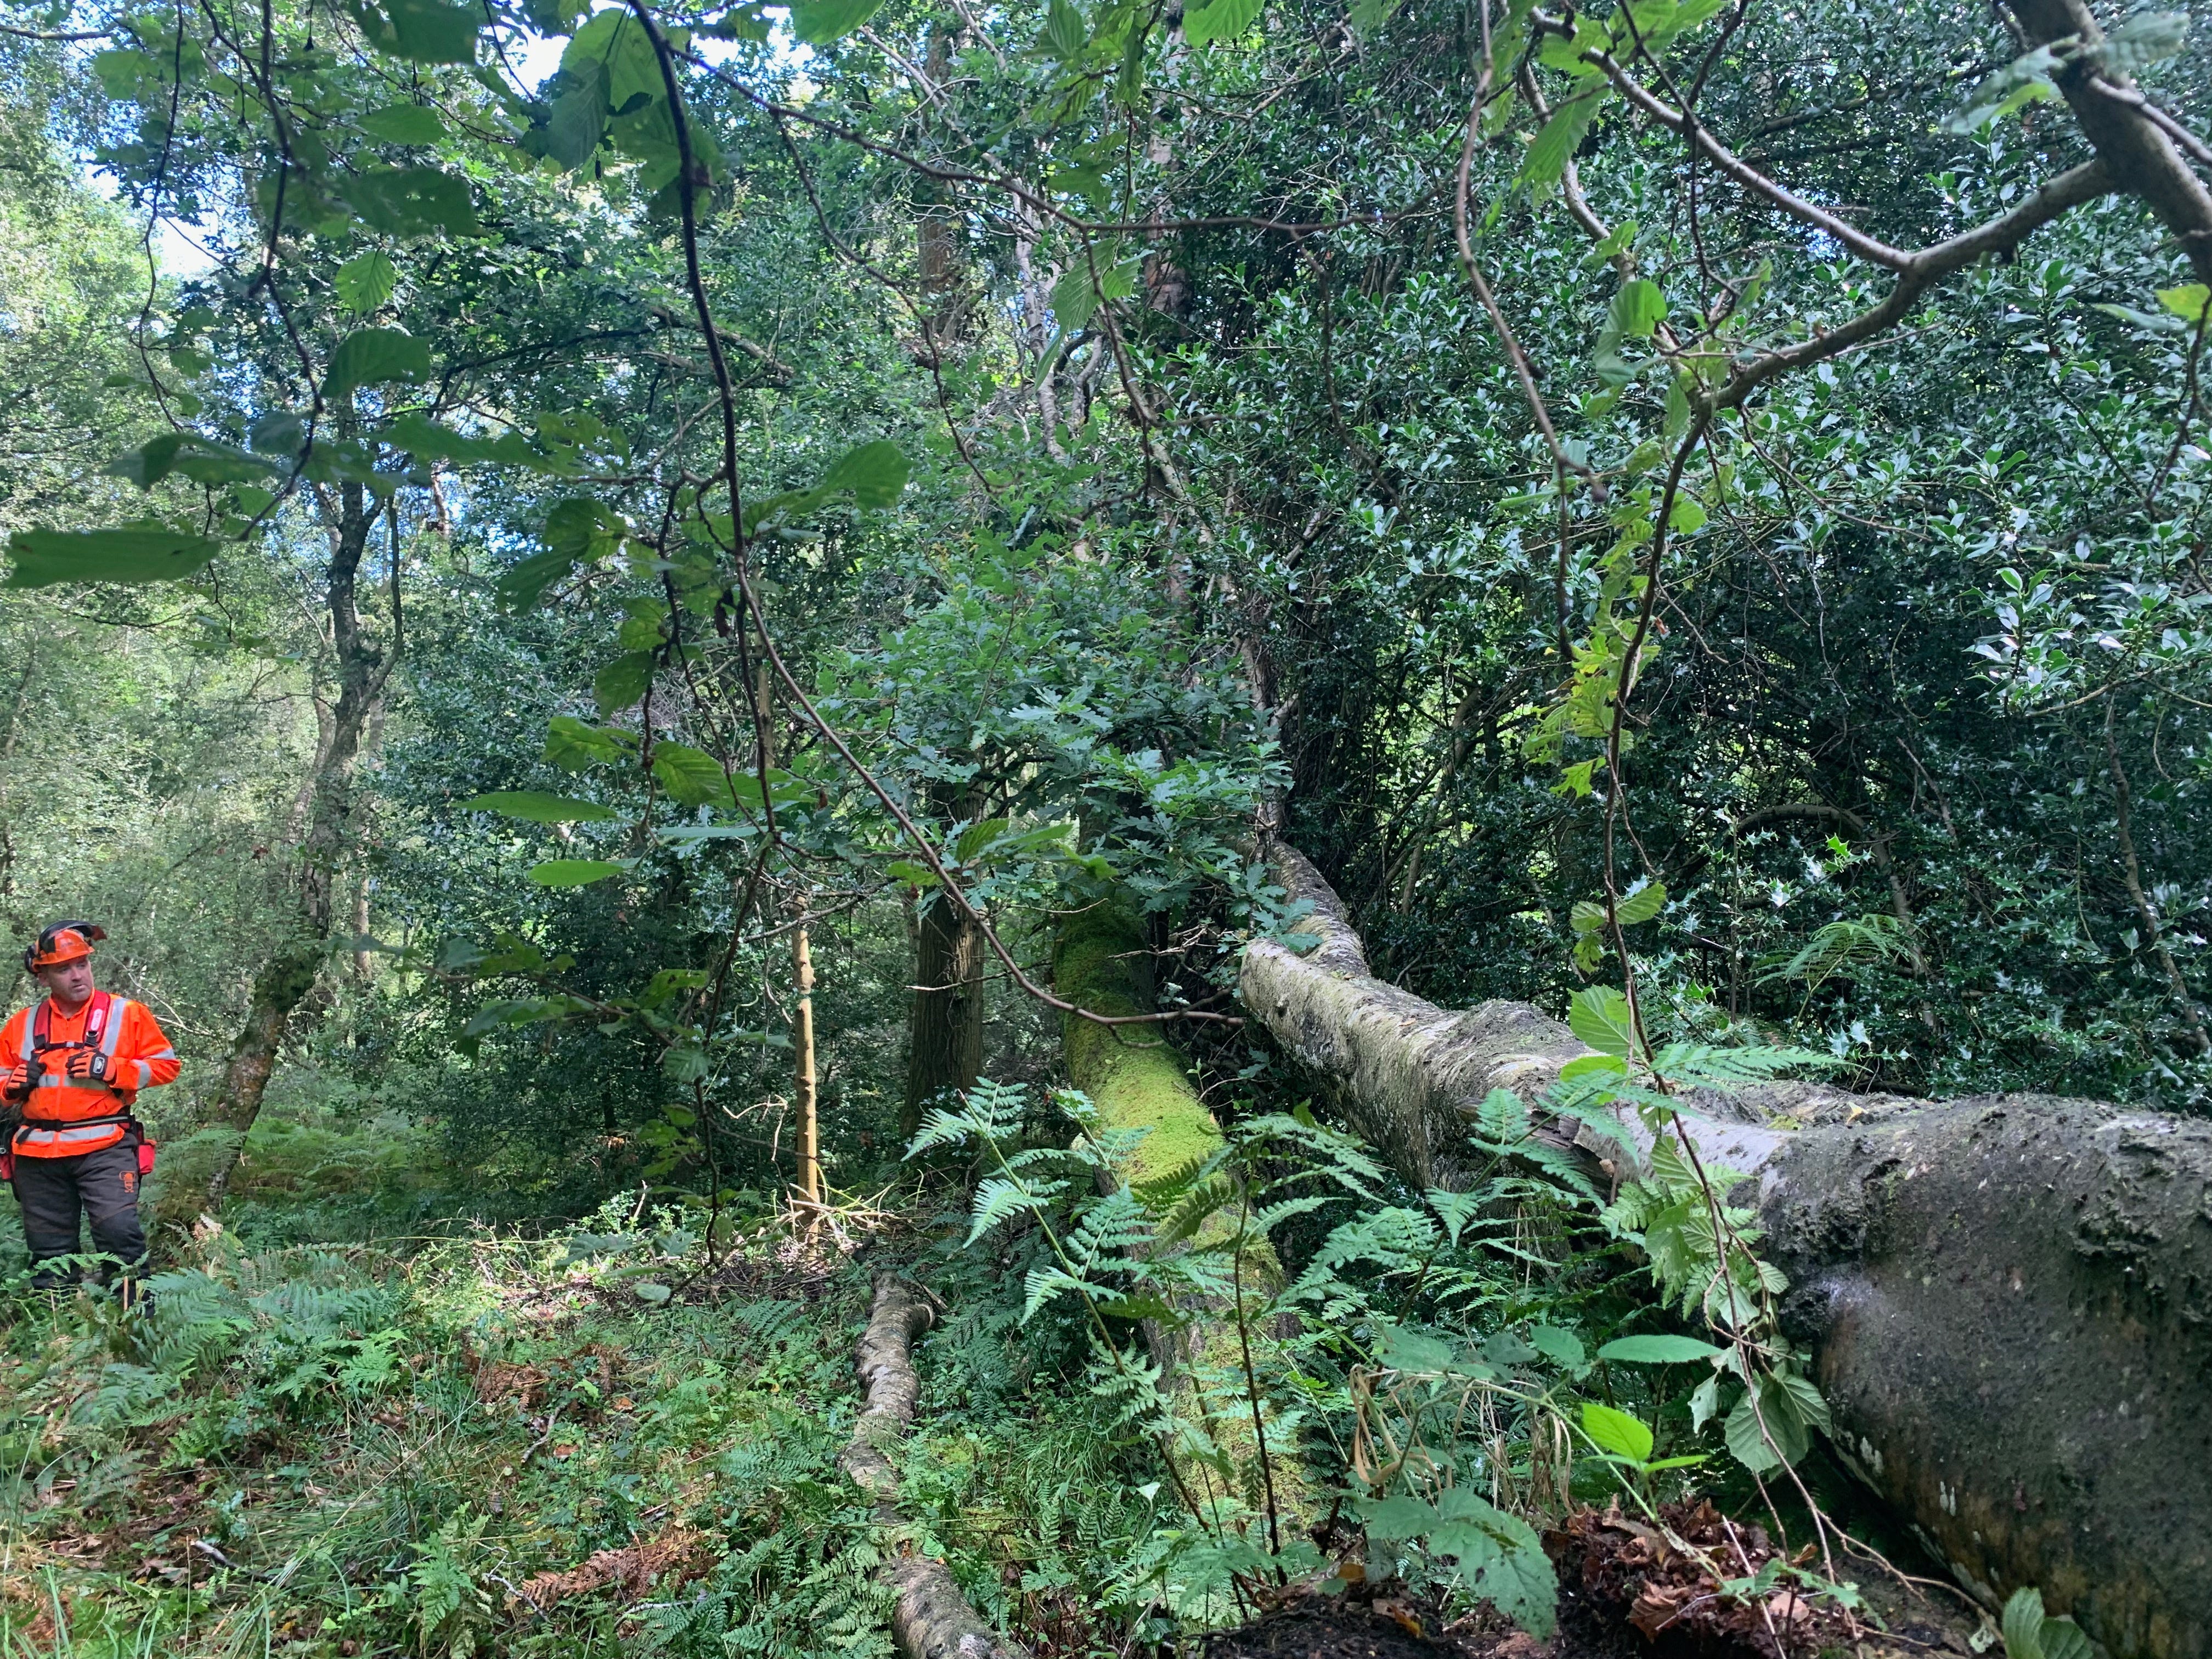
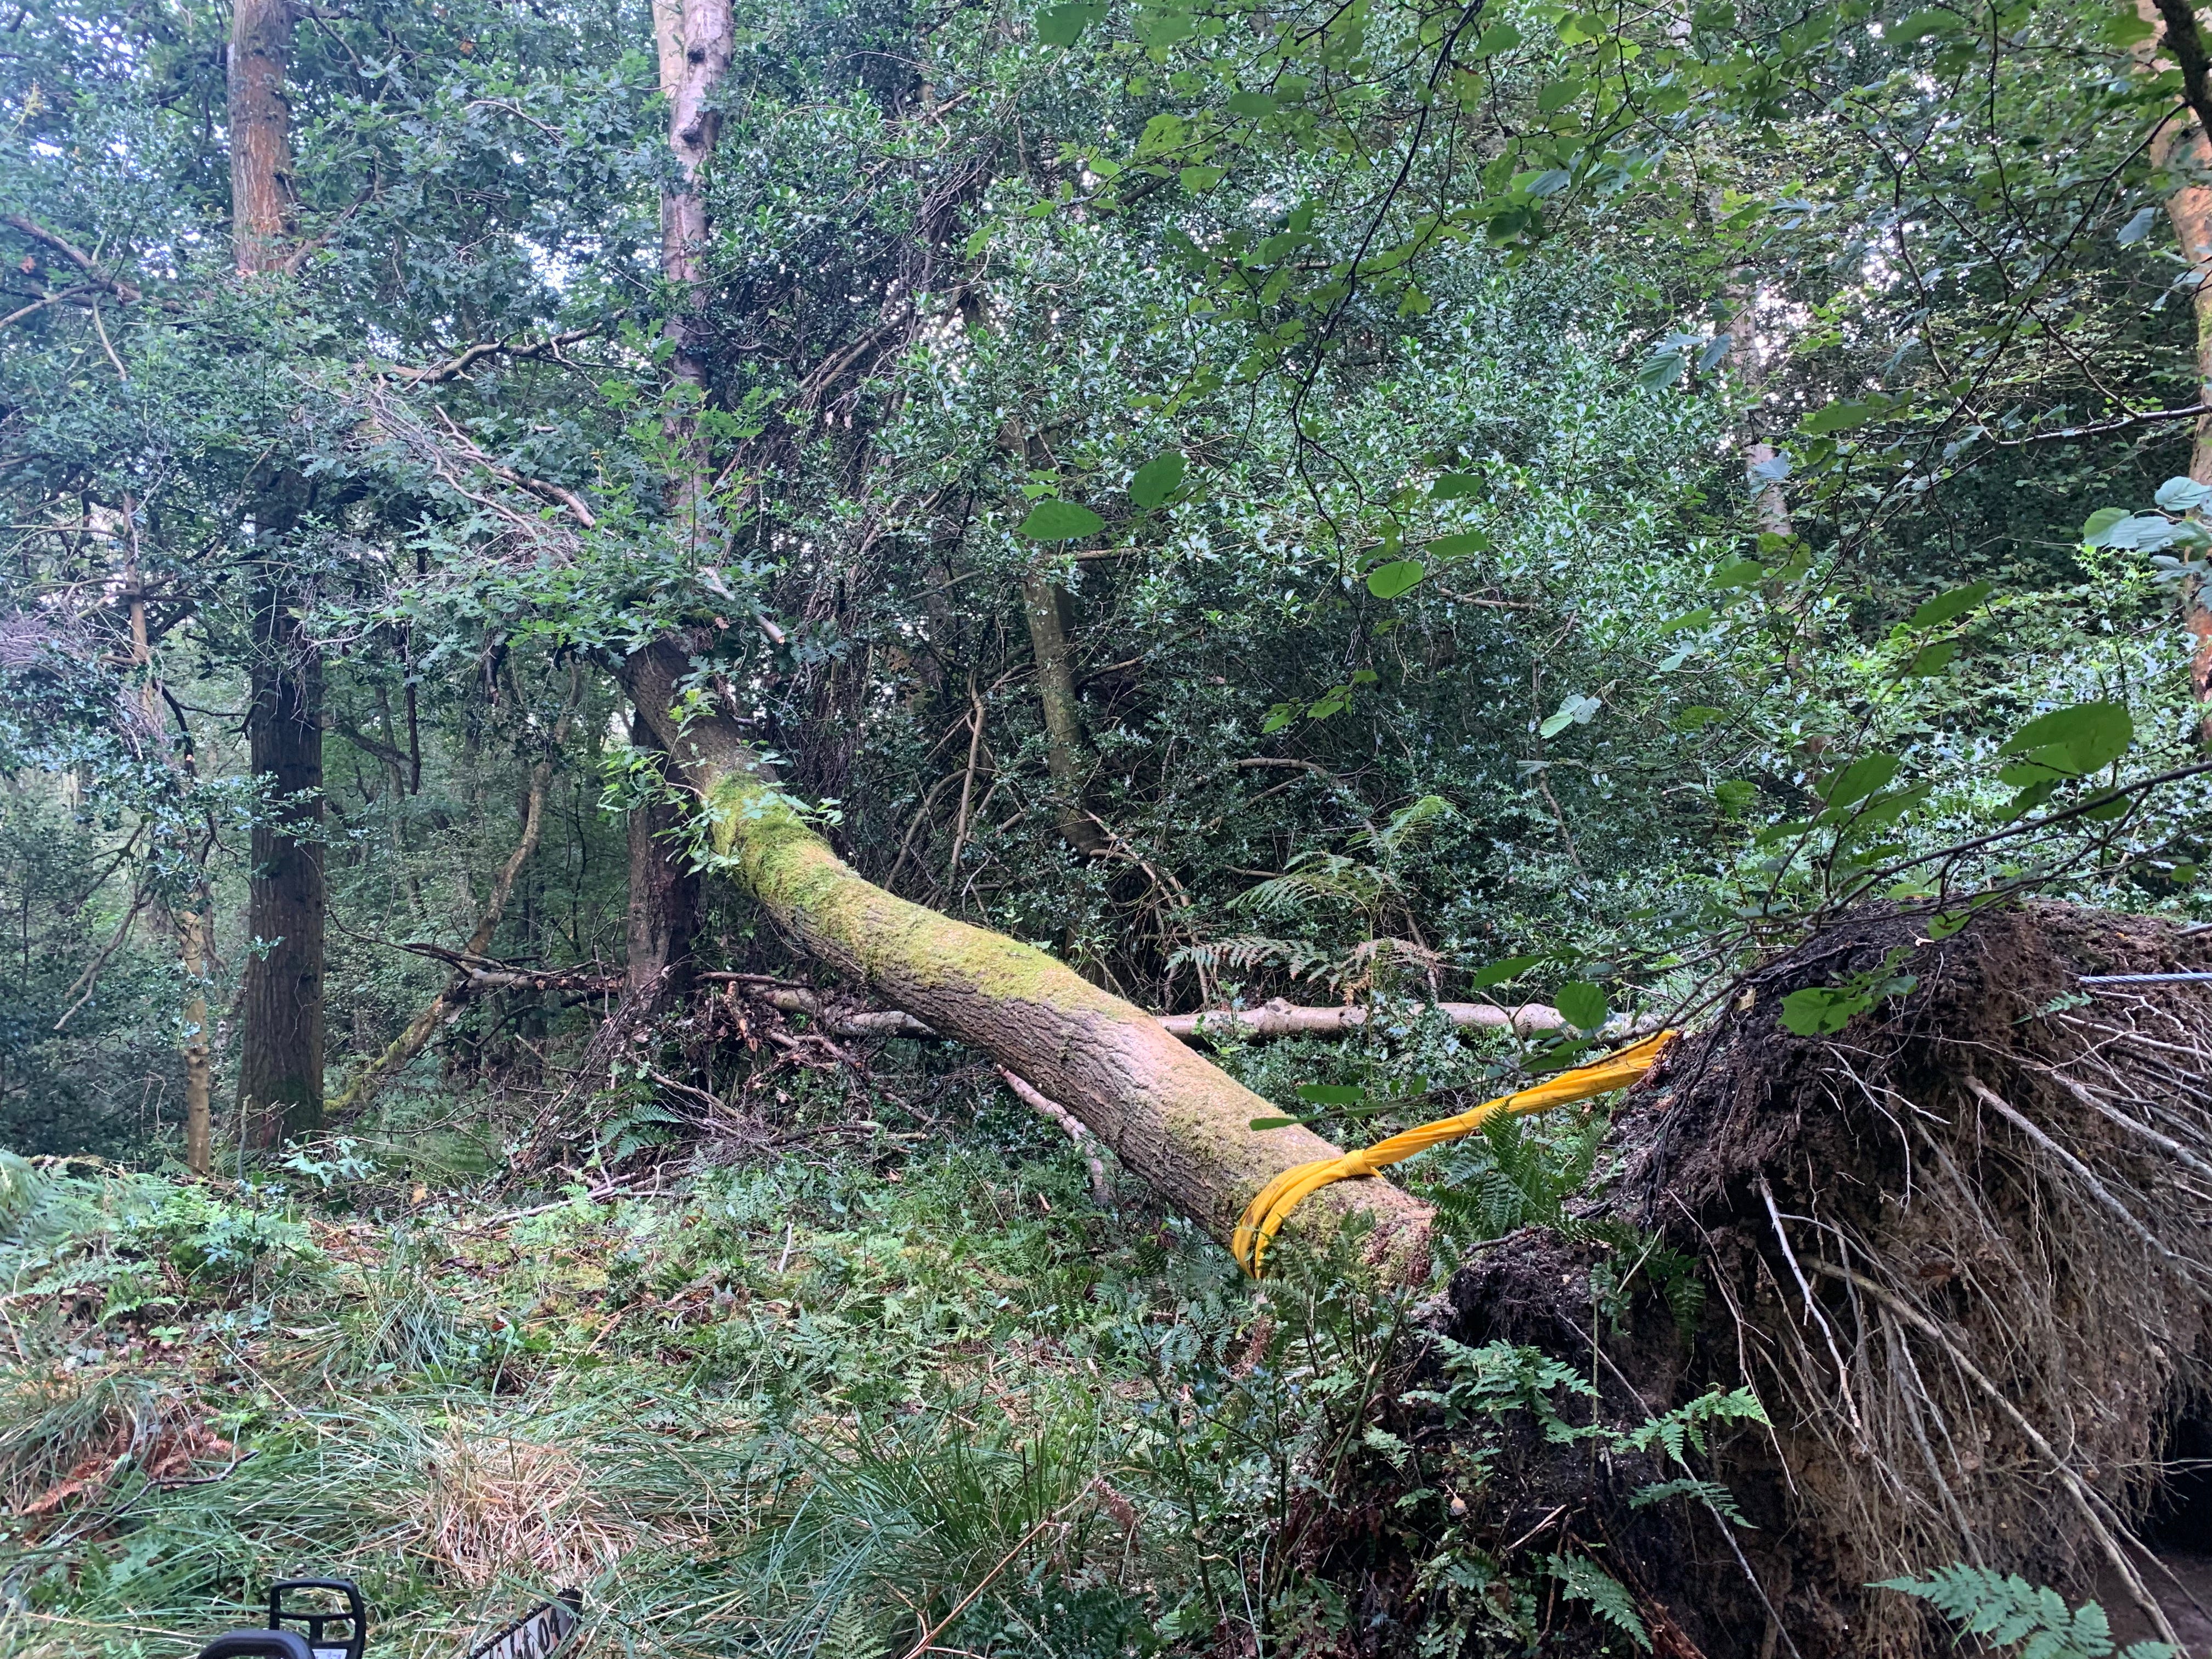
On the second birch, I was doing the winch. Here’s what it looked like before we set the winch up and started cutting.

What you’re looking at above is about fifteen to eighteen metres of fallen tree from the root plate to the crown. I didn’t bring the video gear with me when we did this job as I wanted to get it done (filming adds time to everything, even if it is point and go) so I didn’t get any footage of the birch tree coming down as I was too busy being the winch–man.
Once the tree was down and the root plate has been winched back into place, it looked like this.
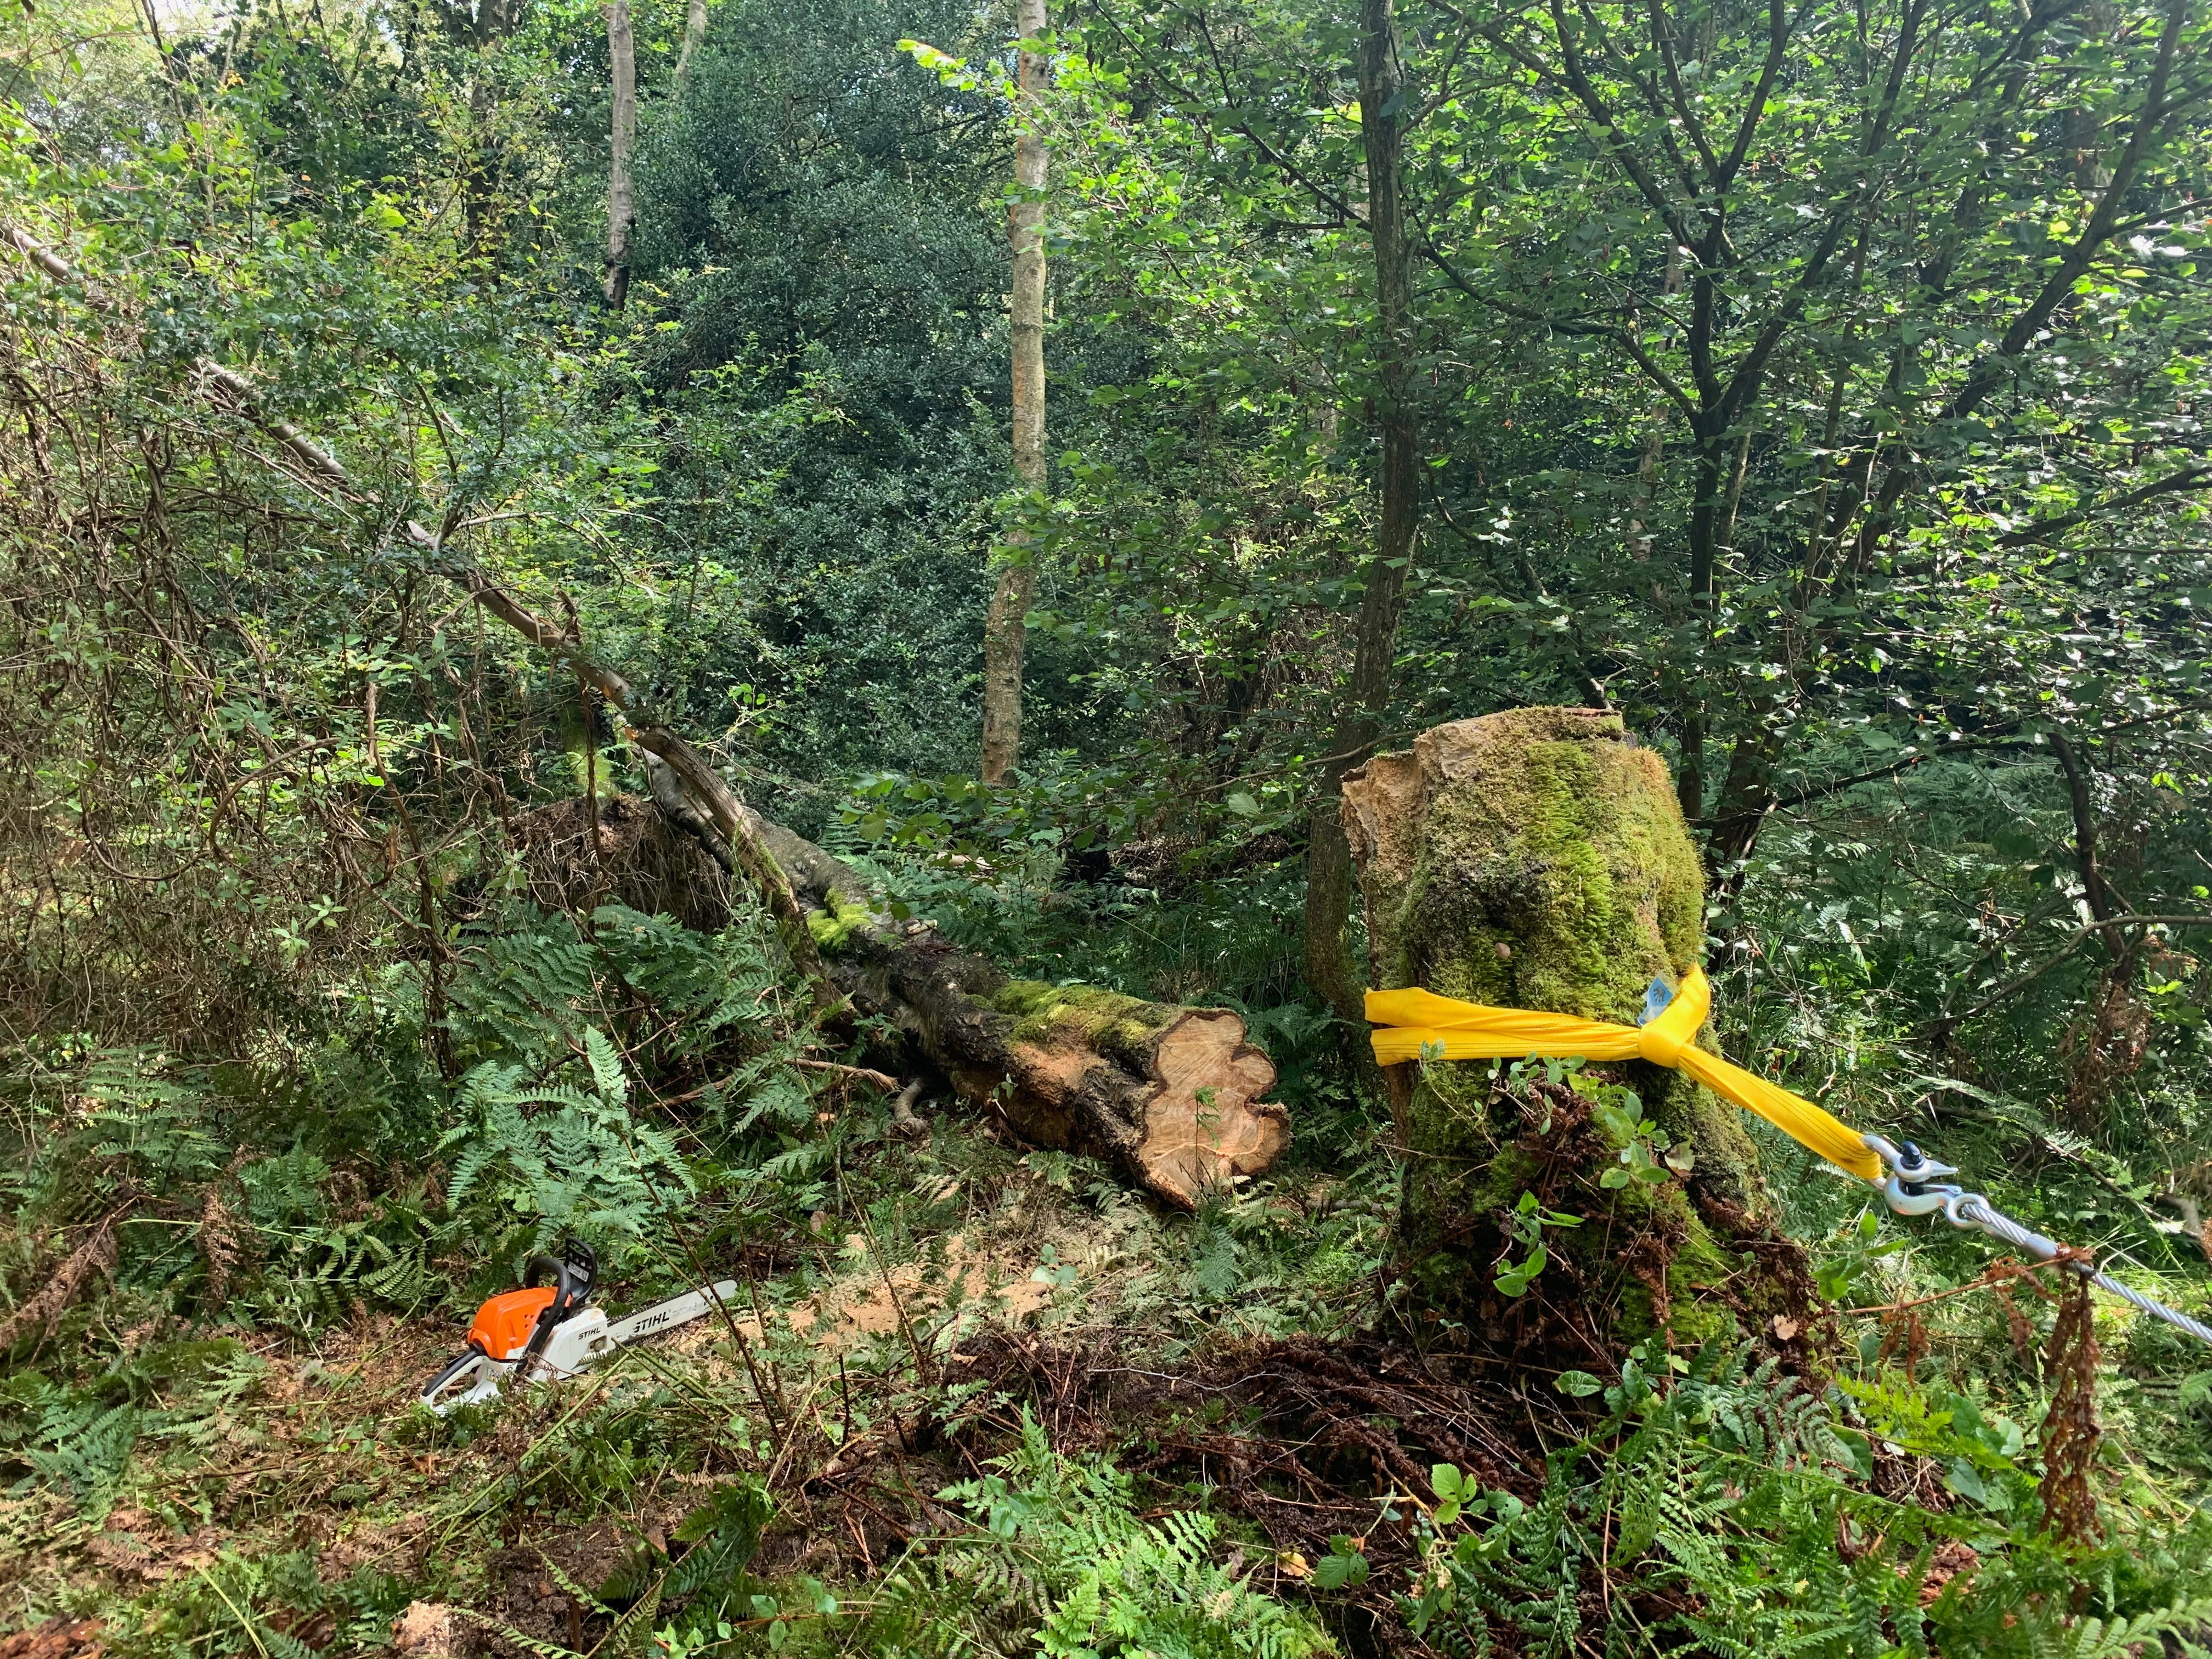
Before we could go any further we needed to winch the birch log out of there. It was on top of the oak which not only put it in the way of dealing with the oak, but we had to get it off to see what, if any, reaction the oak would have once it was relived of about six hundred kilograms of birch log. It’s not that thrilling, but I got some footage of that log being winched to give you an idea of the speed that a hand winch can operate at.
Finally, once the birch was out the way, we could get on with dealing with the oak. The tree was still alive and I took no joy removing it. Birch trees are everywhere in this woodland, you could even say they’ve taken over and are at this point acting invasively even if they are native pioneer species. I don’t fret too much about removing birches, but I do fret about oak trees. They can live for hundreds of years (unlike birch which last about 80 maximum and about 50 on average) and support hundreds of native species of life. When an oak tree is removed, I always make a little vow to that tree to ensure that it doesn’t go to waste. This tree was no exception and all things considered had a pretty good, but not perfect, stem.
I was to be the one cutting the oak and John was on the winch. What follows isn’t a how to, but when dealing with a windfallen tree, once you’ve established a safe working area (we had) and cleared the working space (check) you get the winch set up so that the stem can be put under just enough tension to make sure the winch system is stable. You don’t want the strop to suddenly go slack as it tears through weak roots for example.
The bit where I get technical
At the risk of going all “technical” I am going to go “all technical” as I like explaining this stuff because it allows me to cement my knowledge and hopefully share with you all some of the insights and challenges in this kind of work.
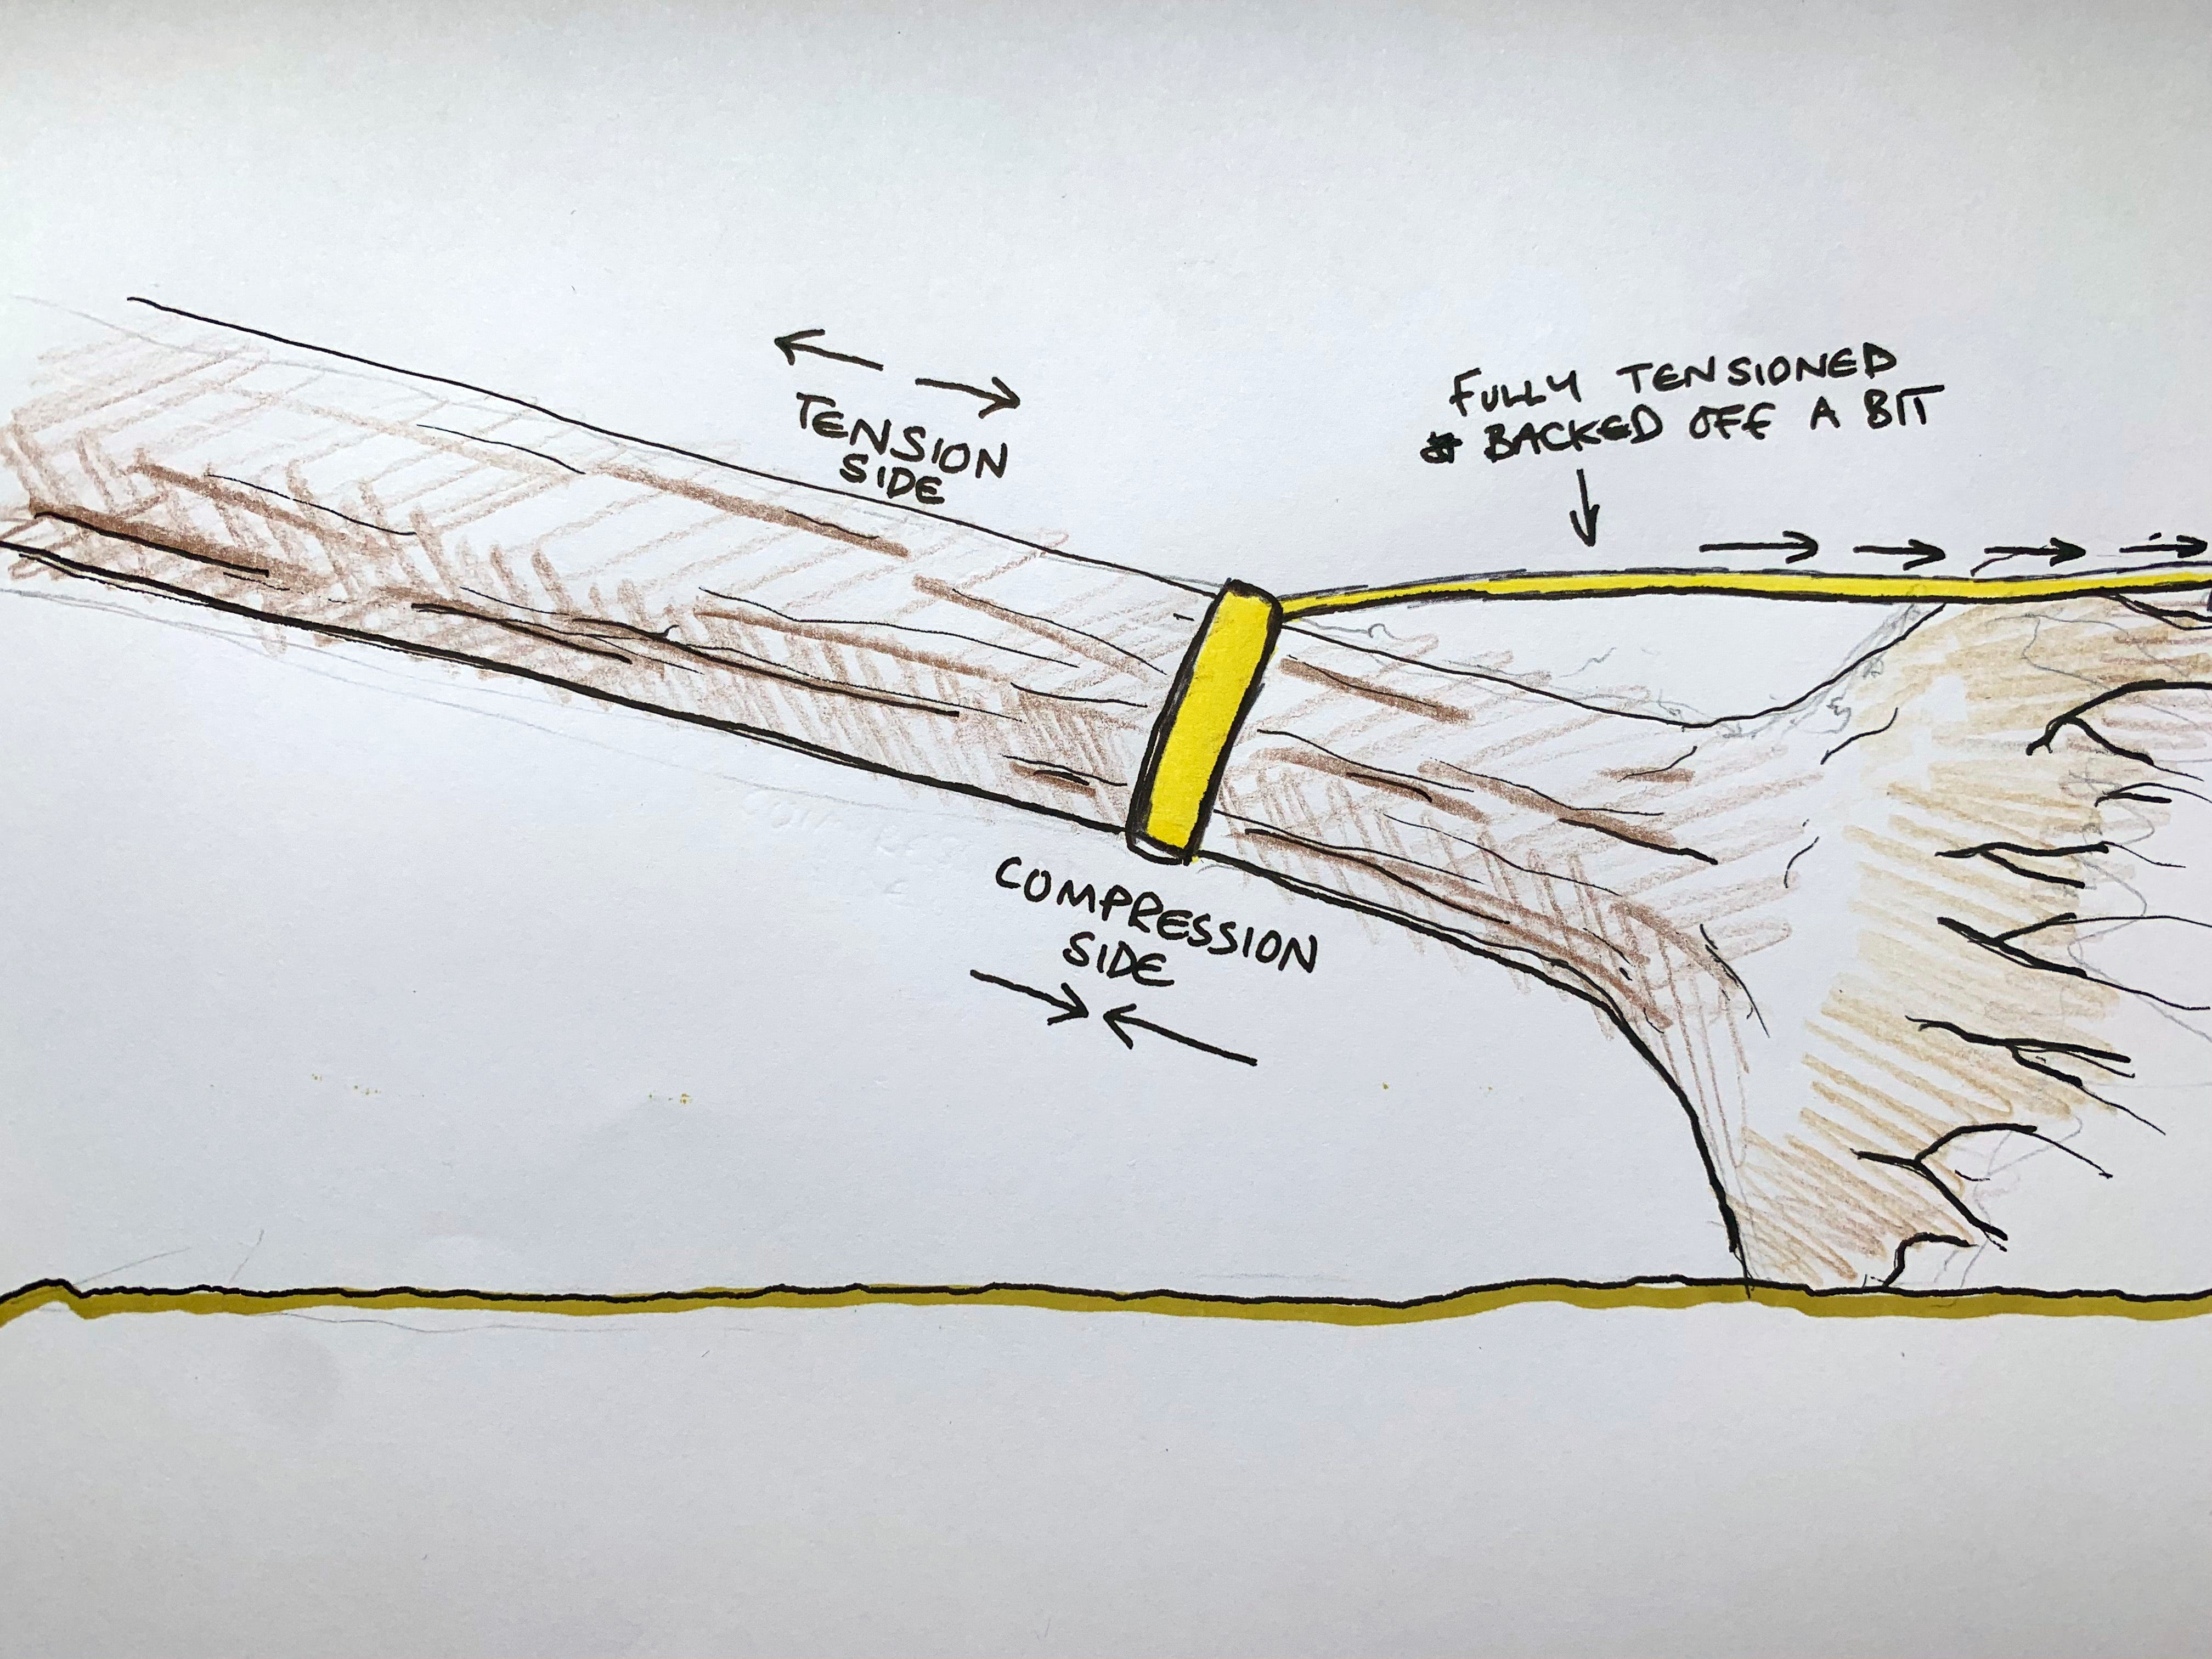
Here you can see the oak just before I made the first “J Cut”. The idea is that you tension the stem with the winch right up to the point that the winch reaches its maximum pull. This is so you’re controlling where the tension and compression forces are. But what is tension and compress? Speaking basically, tension is when the wood fibres are pulling apart and compression is when wood fibres are pressing together. To give an example you can do for yourself, hold your wrist and hand straight with each other and look at the skin where the hand and wrist meet. It should be relaxed. Now lift your hand up. The skin will wrinkle and push together. This is compression. Now tilt your hand down and the skin will stretch – this is tension. Wood does the same, only less obviously. Steve, one of my teachers at treeschool taught me that and it really stuck with me.
Generally speaking, compression wood will nearly always trap your saw unless you use the correct cutting technique. In this case that technique is called the “J Cut”.
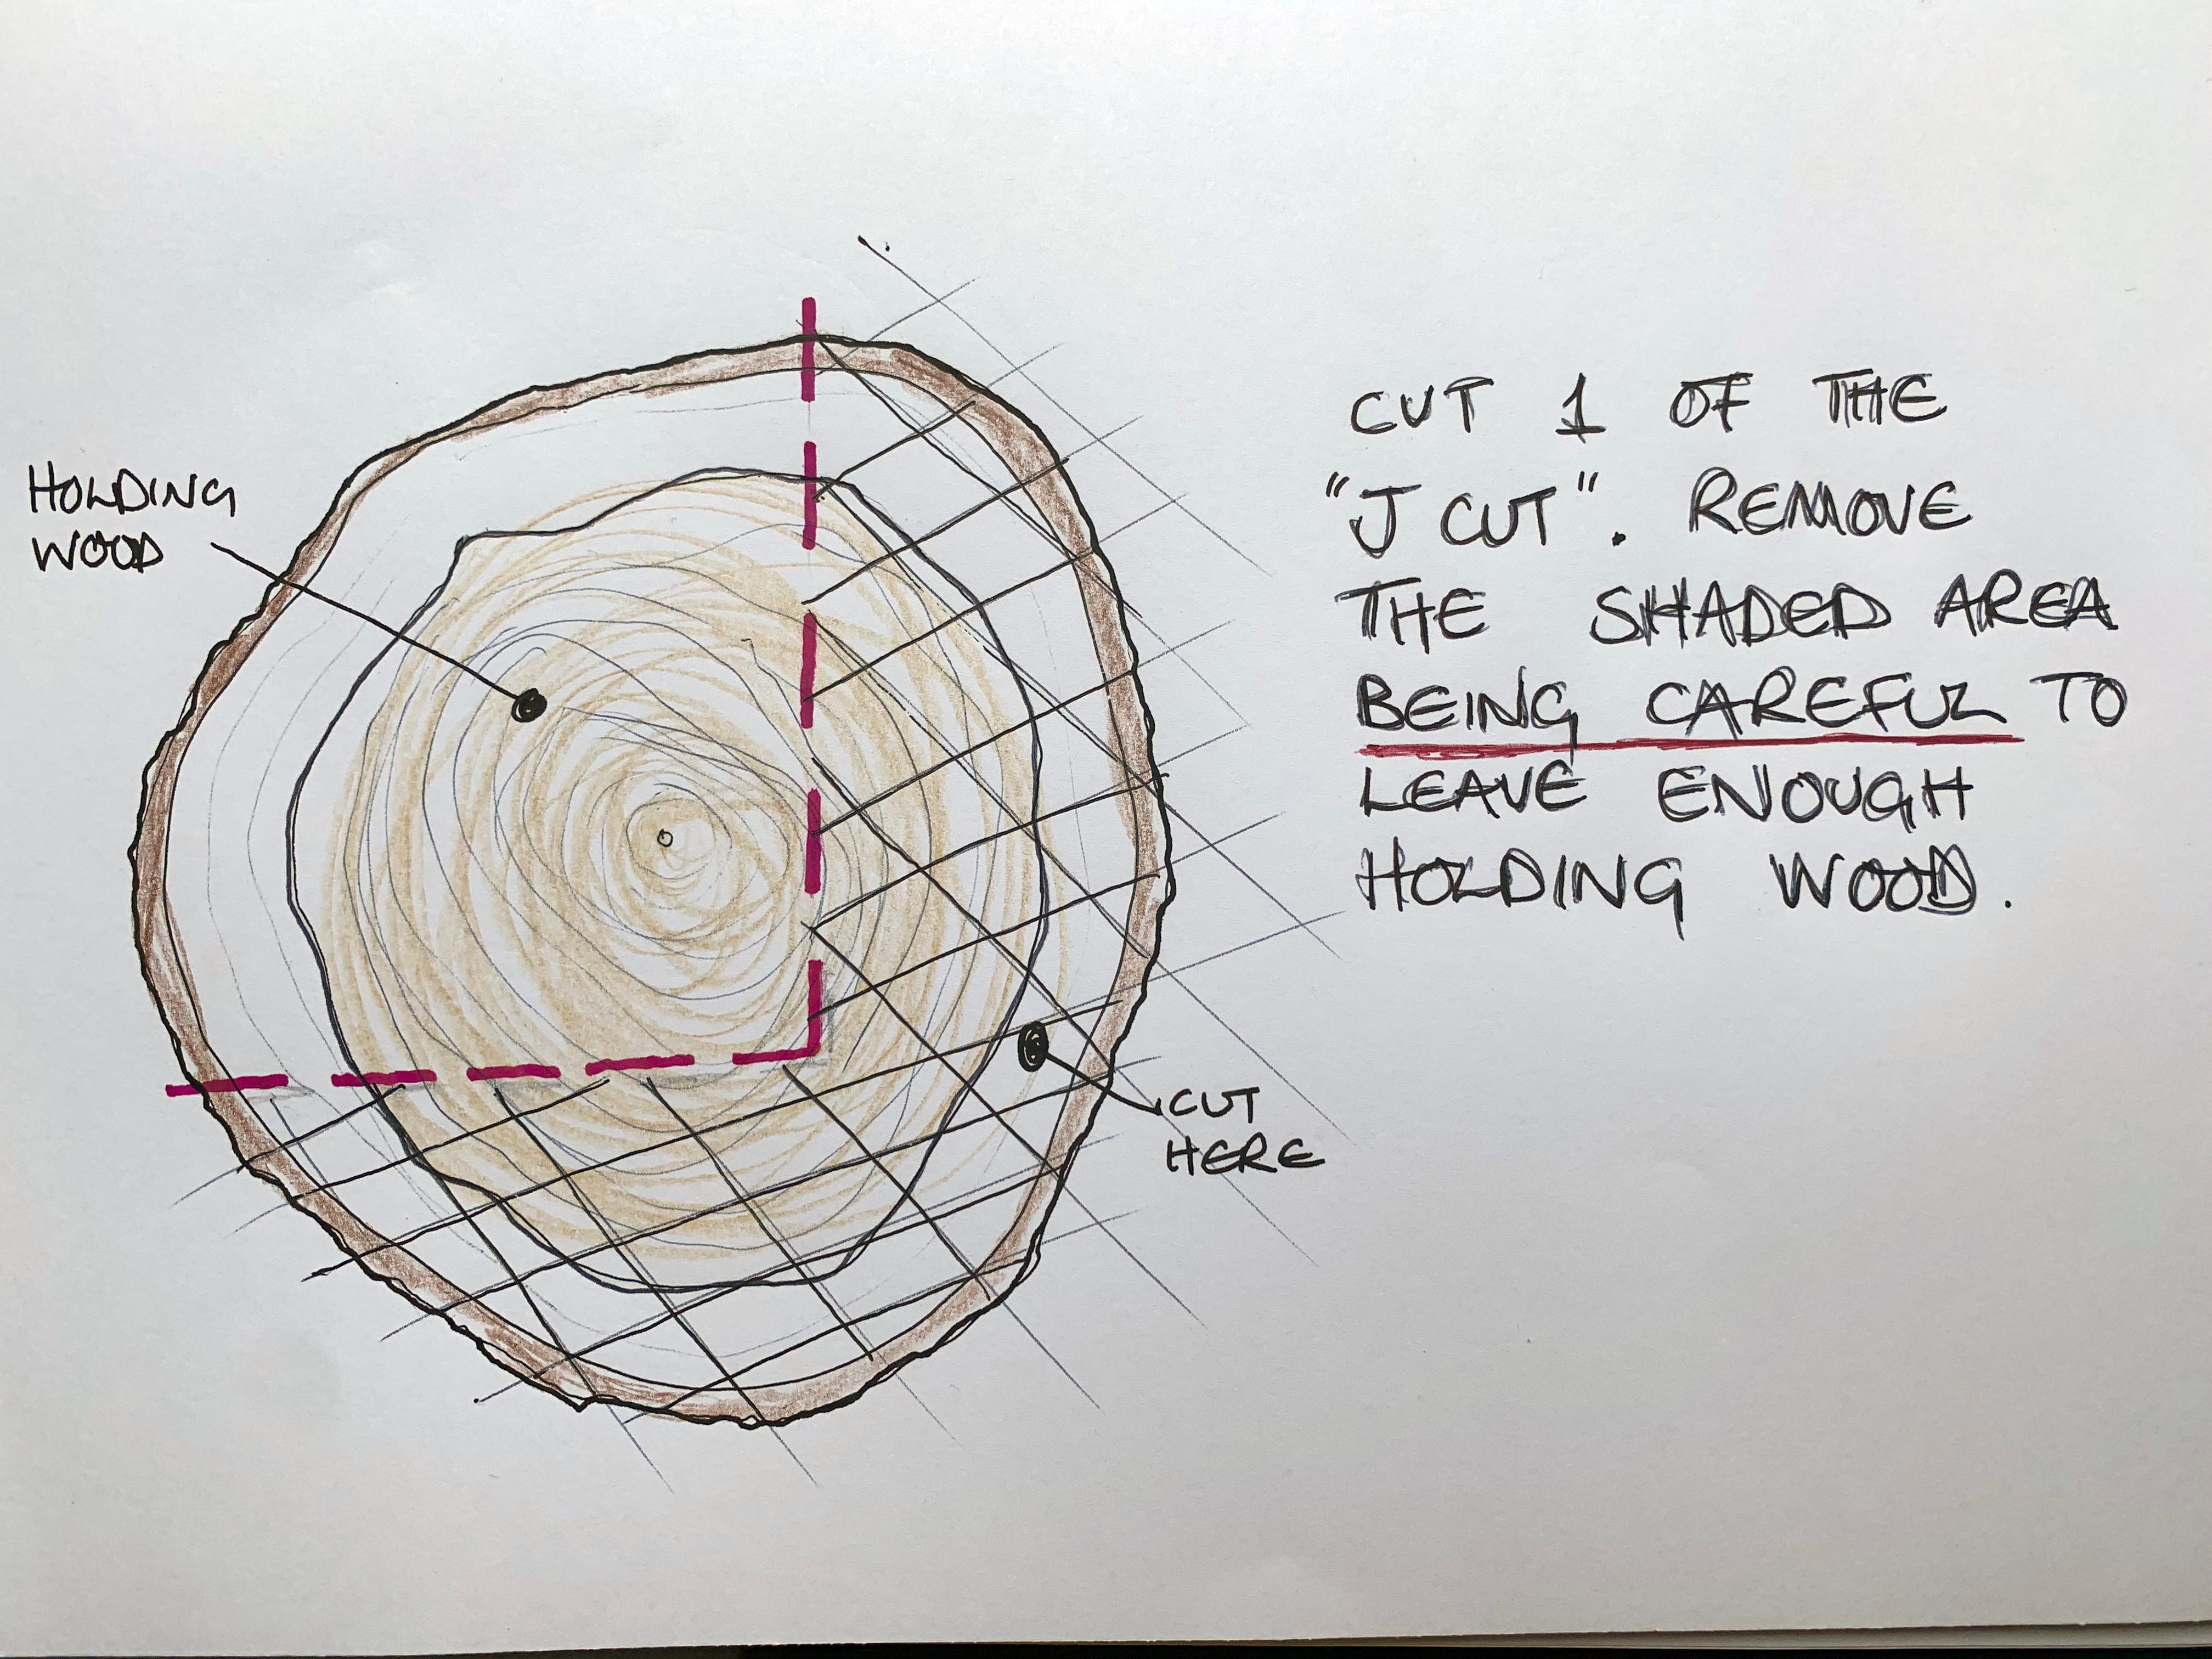
The “J cut” is taught when dealing with individual windblown trees on the NPTC course and it has two parts. The first is where it gets the name. You can see from the above example that you cut out a “J” shape. Starting from the top, you cut about 1/3 of the diameter down through the stem. Once you’re approaching the bottom you tilt your bar down and then sweep up through the other side ensuring to come up no more than 1/3 of the diameter. The result is what you see above - a J shape. The second part of the cut is less complex. About two inches up the stem you cut 2/3 of the diameter and cut downwards ensuring you’re parallel with the first cut.

When doing your J cut you want both cuts to be parallel to each other (see above) and perpendicular (right angles) to the stem. It would be logical to cut in line with gravity, but you don’t want to do that. Always 90º to the stem and parallel to each other. The second cut should be two inches up the stem towards the crown. This is important, if the cut is too close it’ll pop too early and may fail to sever completely and if it is too far away, it won’t pop at all. Two inches, or there about, seems to be sweet spot.
The benefit of this two part cut is that it allows you to cut all of the compression wood without the fibres closing because you’ve left just enough holding wood to keep the stem intact. Why leave the stem intact though? Isn’t the aim to get the tree on the ground? These are good questions, let’s address them with some situational awareness.
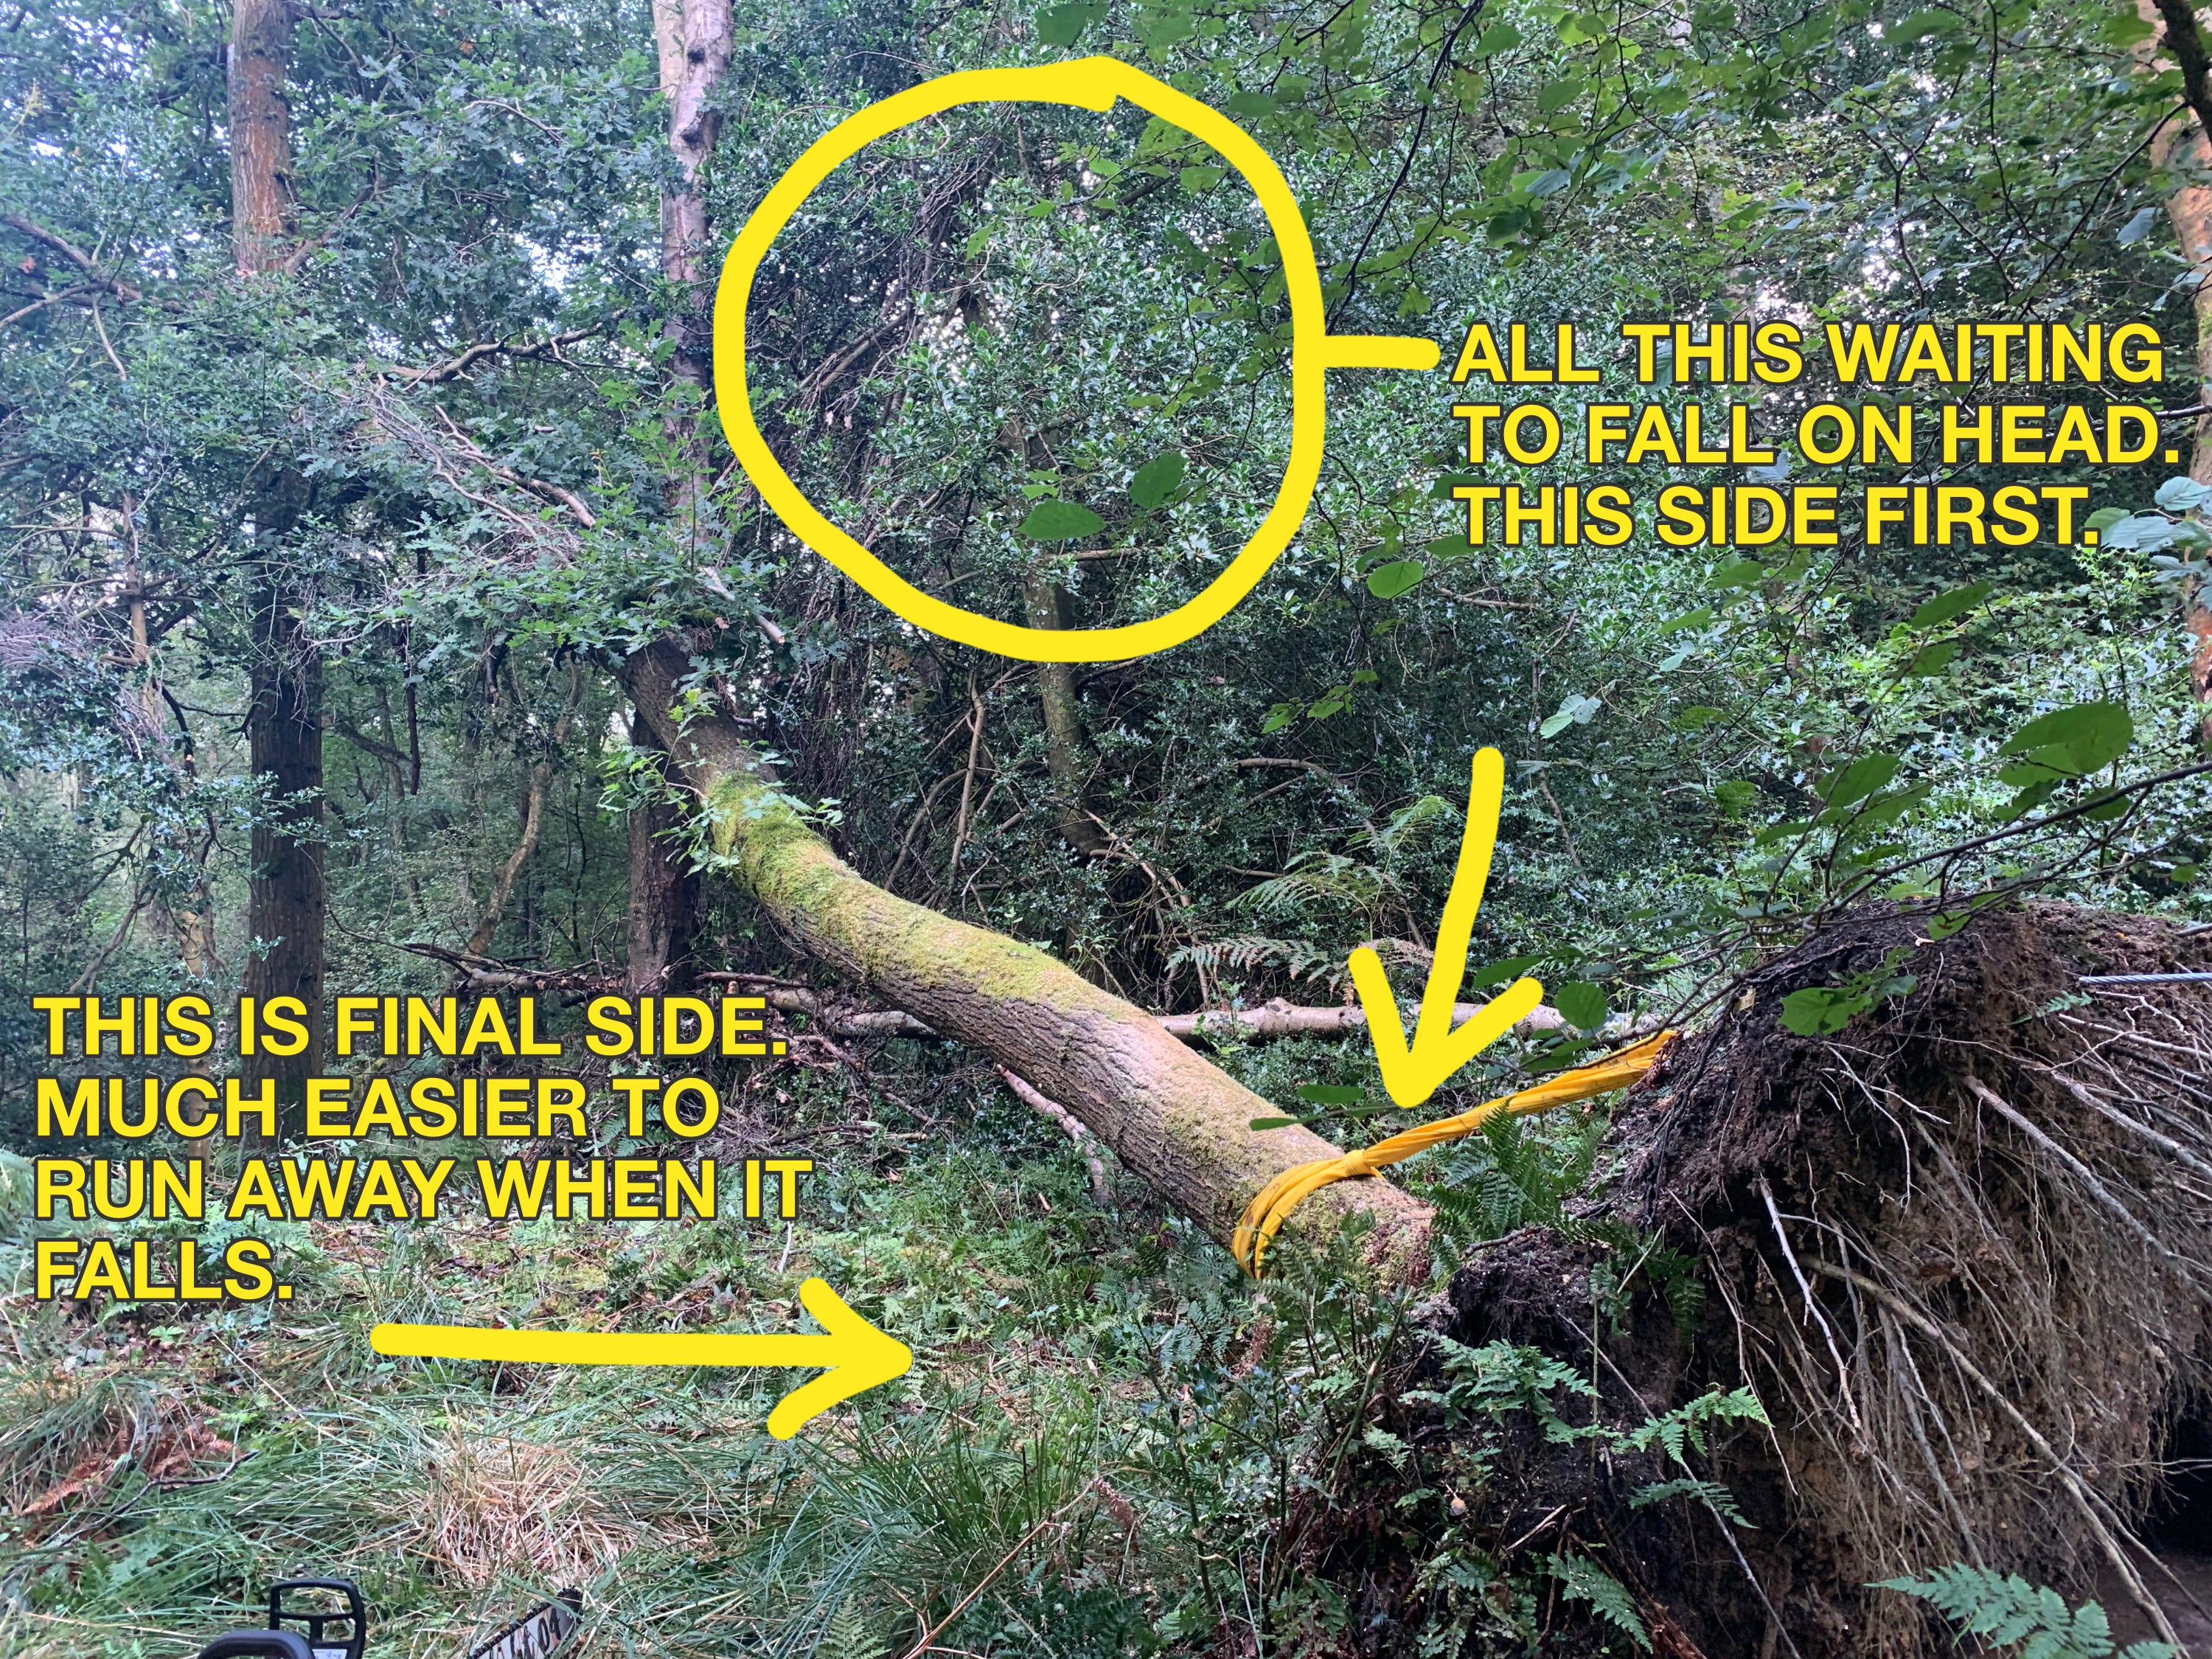
On this particular tree there were a few things for me to watch out for. Firstly, was all the crap in the canopy. There were three windfallen trees worth of smashed branches and wood up there and I wanted none of it on my head. This means that there was an order to where I would stand and a two part cut helps with that. I’ve outlined the order in the above photo and in case the logic is not obvious, I wanted to both not be under everything when it fell to the ground and also able to walk away in a calm way when it did. Secondly the oak was hung up on another tree. This means that there was the chance that it had some sideways (fancy pants term – lateral) tension or compression. Lateral tension means ”in theory” it could violently spring towards (bad) or away (good) from me once the stem was severed from the root plate. So this is why we use a two part cut – safety and control. Safety because a two part cut allows you to ensure you’re on the right side (compression side) if / when it was to explosively move. Control because you’ve already removed most of the material in the first cut so you can be very precise with your second cut.
Doing windblow requires two people because it isn’t just about the cut that the saw operator uses. The winch and the winch operator play just as important a part in safety and control. You’ll notice in all the photos and video so far that the winch system always goes over the root plate. This is both to prevent the root plate falling forward onto the operator (safety) and as already mentioned, it allows control of the tension and compression in the stem for the operator (control).
Back to the Job
Getting back to practical world, I knew what side I was standing on first, the system was ready to go and I was about to start cutting. I wish I had recorded this as it made a delightful and quite thunderous noise as it came down.
I recorded a little walk around of everything as soon as it was down.
After that it was about forty minutes of clearing up and putting all of the brash onto what was already a pretty messy heap. Once we were done it looked like this, I was very grateful to the log for presenting itself so delightfully for milling.
I’d love to say I got it all tidied up and lovely, but this part of the woodland can be very boggy and it had rained heavily for days before we arrived to work. It isn’t that much fun to work in a squelch-fest and so once we reached the point you can see above, we had pretty much just called it a day.
Here’s the before and after. You’re probably going to think it looks a bit nasty afterwards and I’d be inclined to agree with you. However, at least there’s nothing too large that can fall on someone.


I still need to go back to this area of the woodland finish the cleanup and mill up that oak. We’ve had a fair run of dry weather recently and I may take a poke at that tomorrow. Maybe not, there’s just so much to do and those stairs are not going to make themselves.
I’m always grateful to anyone who comes down to the woods to help out and I was very grateful for John’s help. I couldn’t have done this one without him and for that, I am very grateful for his time, speed and willingness to carry heavy things over boggy ground.
Thanks for reading,
Jamie.